Step 10: Publish and test the workflow
- Step 1: Open designer to create workflow
- Step 2: Add the review stages
- Step 3: Assign task to Team A to review the document
- Step 4: Team A approves and sends the document to the next state
- Step 5: Team A rejects document and sends email to initiator
- Step 6: Assign a task to Team B to review document
- Step 7: Team B rejects and sends document to Team A
- Step 8: Team B gives final approval and sends email to initiator
- Step 9: Configure start options
- Step 10: Publish and test the workflow
The workflow design is now complete. You can publish the workflow and test it by uploading a document to the Document library.
|
1 |
Publish the workflow |
- From the toolbar at the top of the Designer page, click Publish.
Note: The settings saved for the workflow through Workflow Settings in Step 9: Configure start options of this solution are reflected in the Publish dialog box. For this solution we have already configured the Name and the Start options for the workflow.
- For Assigned use, select Production. For more information about assigned use, see Assigned use when publishing workflows and forms.
- Click Publish.
|
2 |
Test the workflow |
- Open the SharePoint Document Library for which you created the workflow.
- Click Upload to add the document you want to get reviewed.
The workflow which is configured to start when a new item is added, is started.
|
3 |
View the workflow status |
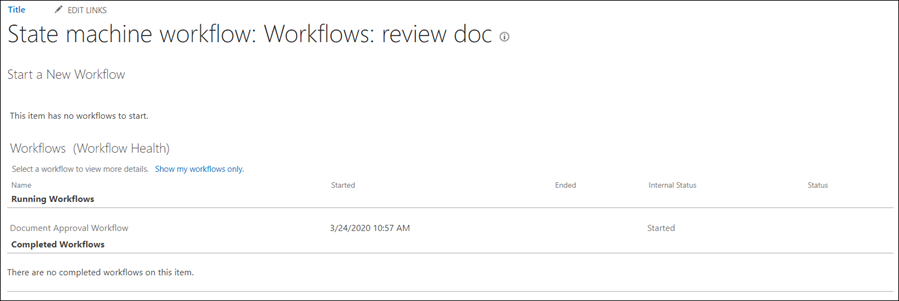
You can confirm the start of the workflow by checking the workflow details.
- Hover the cursor over the item you added to the list and click the vertical ellipsis icon (
 ). An options menu is displayed.
 - On the options menu, point to More and then click Workflow. The workflow page is displayed for the list item. The status of the Workflow is shown as Started as shown in the image below:
The following actions were used to build our workflow. If you want to learn more about the actions, click on a link to see the help topic for the action.