Step 4: Team A approves and sends the document to the next state
- Step 1: Open designer to create workflow
- Step 2: Add the review stages
- Step 3: Assign task to Team A to review the document
- Step 4: Team A approves and sends the document to the next state
- Step 5: Team A rejects document and sends email to initiator
- Step 6: Assign a task to Team B to review document
- Step 7: Team B rejects and sends document to Team A
- Step 8: Team B gives final approval and sends email to initiator
- Step 9: Configure start options
- Step 10: Publish and test the workflow
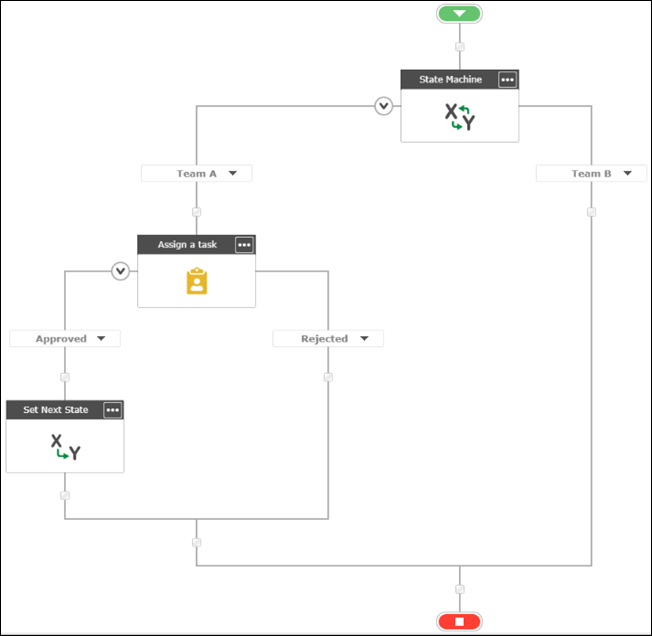
Next, let's configure the Approved branch of the Assign a task action that we add to the Team A state.
|
1 |
Add Set next state action |
- Click the Logic and Flow category in the action toolbox, select the Set next state action and drag it to the Approved branch of the Assign a task action in Team A.
-
Do one of the following to open the Action configuration window.
- Double-click the action.
- Click
 on the action and then click Configure.
|
2 |
Set the next state to Team B |
- In the Action configuration window, open the Set next state drop-down and select Team B from the list.
- Click Save.
The workflow will move to Team B when the Team A reviewer approves the task.
For more information about the Set next state action and how it's used, see Set next state.
|
Follow along This is what your workflow looks like at this point in the solution: |

|
Next step:
Step 5: Team A rejects document and sends email to initiator