Step 9: Configure start options
- Step 1: Open designer to create workflow
- Step 2: Add the review stages
- Step 3: Assign task to Team A to review the document
- Step 4: Team A approves and sends the document to the next state
- Step 5: Team A rejects document and sends email to initiator
- Step 6: Assign a task to Team B to review document
- Step 7: Team B rejects and sends document to Team A
- Step 8: Team B gives final approval and sends email to initiator
- Step 9: Configure start options
- Step 10: Publish and test the workflow
After you design the workflow you can name the workflow and set the workflow start options. We want this workflow to start whenever a new document is added to the Document library.
|
1 |
Configure workflow settings |
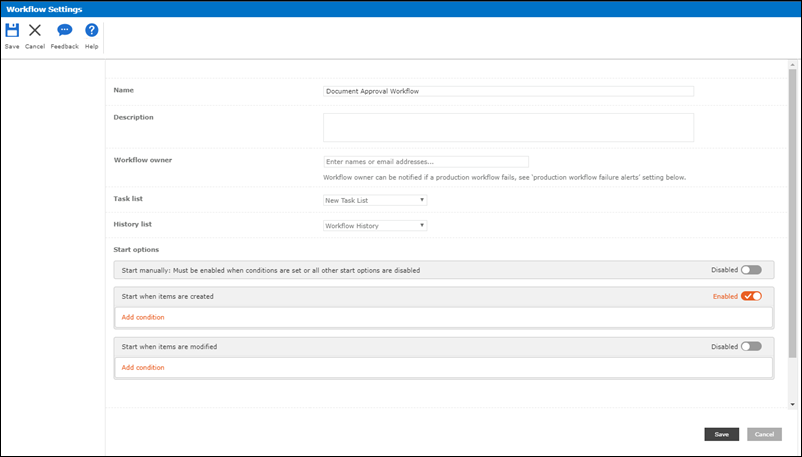
- From the toolbar, select Settings. The Workflow Settings window opens.
- In the Name field, type Document Approvals Workflow.
|
2 |
Set start options |
- In the Start options section, enable the Start when items are created toggle.
- Click Save.
|
Follow along The Workflow Settings for the workflow: |

|
Next step:
Step 10: Publish and test the workflow