Step 8: Publish and test the workflow
- Step 1: Create the list and columns in SharePoint
- Step 2: Design, configure, and publish the Leave Request form
- Step 3: Open the Workflow Gallery
- Step 4: Send acknowledgment email
- Step 5: Get the response for the leave request
- Step 6: Result notification email
- Step 7: Configure start options
- Step 8: Publish and test the workflow
The Leave Request workflow is now complete. You can now publish and test the workflow.
|
1 |
Publish the workflow |
- From the toolbar at the top of the Designer page, click Publish.
Note: The settings saved for the workflow through Workflow Settings in Step 7: Configure start options of this solution are reflected in the Publish dialog box. For this solution we have already configured the Name and the Start options for the workflow.
-
For Assigned use, select Production or Development. For more information about assigned use, see Assigned use when publishing workflows and forms.
- Click Publish.
|
2 |
Test the leave request workflow |
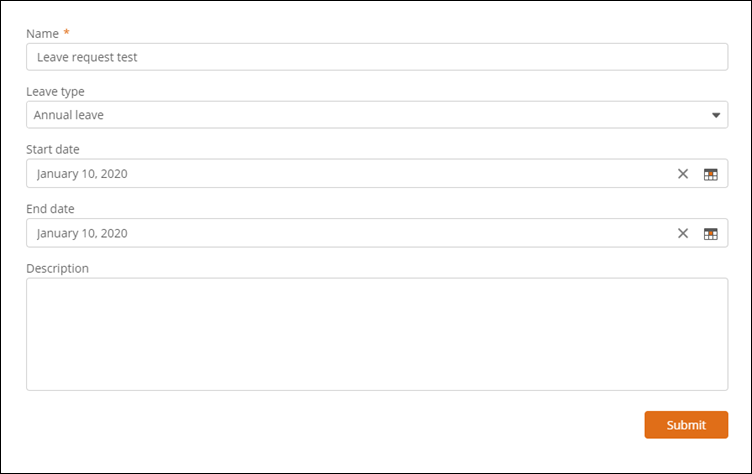
- Open the Leave Request SharePoint list and click +New to add a new item to the list. The Form you designed for the Leave Request list is displayed.
- Fill the form fields and click Submit. A new item is added to the list.
The Leave Request workflow which is configured to start when a new item is added to the list, is started.
|
3 |
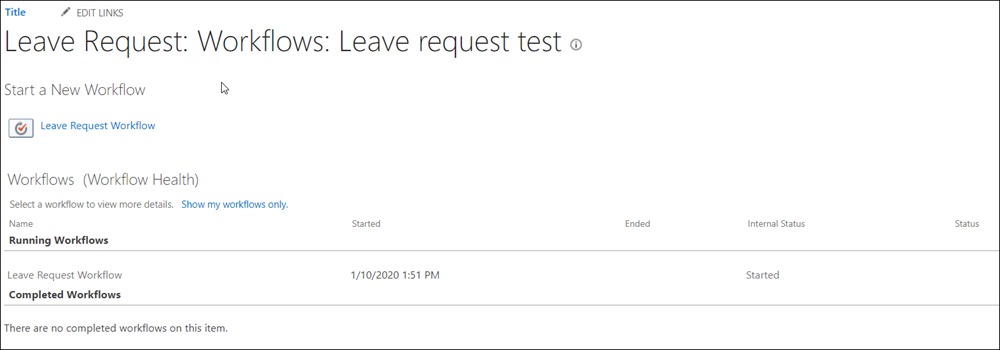
View the workflow status |
You can confirm the start of the workflow by checking the workflow details.
- Hover the cursor over the item you added to the list and click the vertical ellipsis icon (
 ). An options menu appears.
 - On the options menu, point to More and then click Workflow. The workflow page is displayed for the list item. The status of the Leave Request Workflow is shown as Started as shown in the image below:
You can test the leave request workflow by changing the configurations of the actions to send emails to an email address you have access to. To do this open your workflow and do the following:
- Open the Action configuration window of the Send an Email actions and add an email address you have access to in the To field.
- Open the Action configuration window of the Assign a Task action add an email address you have access to in the Participant field.
Note: The Participant email must be an email account within the Office 365 tenancy.
- Save and publish the workflow.
- Add an item to the Leave Request list to trigger the workflow to start. Example shown in the image below:
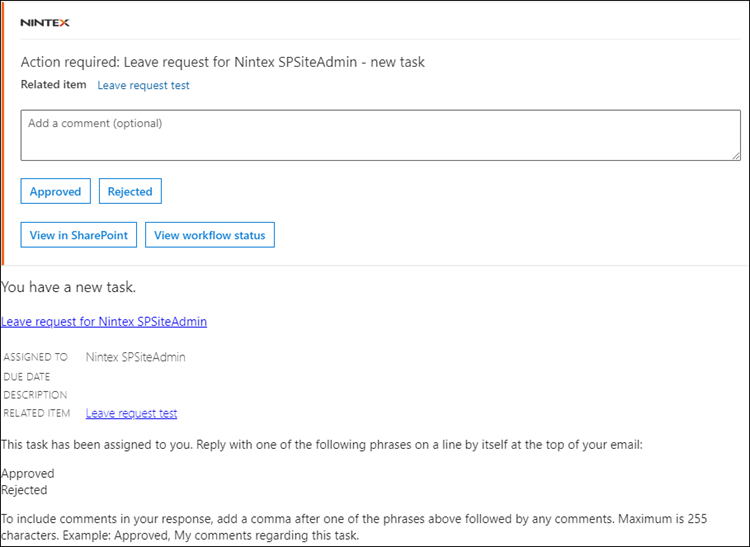
- Monitor email to confirm receipt of the Acknowledgment email and the Task email.
- Test each branch of the Assign a Task action:
To test the Approved branch, click Approved in the Task email.
- To test the Rejected branch, click Rejected in the Task email.
Note: To test the second branch, you must add another item to the list and start the workflow again or start the workflow manually. For more information about how to start the workflow manually for a list item see, Start a workflow manually.
- Monitor email to confirm the receipt for approval or rejection of the leave request. The result notification as per the configuration done in step 6 of this solution is received.
Acknowledgment email - As per the configuration done in step 4 of this solution

Task email - as per the configuration done in step 5 of this solution