Send Email
The Send Email action An instruction within a botflow. sends an email using a botflow Automated steps that you can design for each bot that will run. to one or more recipients.
-
Sending a large number of email messages, or including a large number of recipients, may cause your email message to be blocked. When possible, be sure to include a valid From email address, as well as a Subject to reduce the probability of your email messages being categorized as spam.
-
On May 30, 2022, basic access authentication for Gmail was deprecated and less secure apps are no longer supported. If you are using App Passwords to send or get email from a Gmail inbox, those passwords will continue to work. If you want to use full OAuth authentication for additional security and standardization, you can transition to it with Nintex Bot 17.10.0 or later.
-
On December 31, 2022, basic authentication for Microsoft Exchange Online was deprecated. If you want to use full OAuth authentication for additional security and standardization, you can transition to it with Nintex Bot 17.10.0 or later.
Using the Send Email action, you can:
- Send regularly scheduled emails to a list of recipients.
- Distribute attachments.
- Distribute a newsletter to members of a group.
- Send notifications to account holders.
- Set up automatic reminder messages.
Add a Send Email action to a botflow
- Create a Credential to use your email account authentication from within the botflow.
- Click Add
Item (
 ) on the
Botflow Pane.
) on the
Botflow Pane. - Select Credential.
- Type a Name for the credential.
- Type a unique Username.Note:
- The username cannot match the name of any other credential in the botflow.
- For email, the username is the email address.
- If needed, type the value of the Password and confirm it to ensure that the correct value has been submitted.Note:
On May 30, 2022, basic access authentication for Gmail was deprecated and less secure apps are no longer supported. If you are using App Passwords to send or get email from a Gmail inbox, those passwords will continue to work. If you want to use full OAuth authentication for additional security and standardization, you can transition to it with Nintex Bot 17.10.0 or later.
On December 31, 2022, basic authentication for Microsoft Exchange Online was deprecated. If you want to use full OAuth authentication for additional security and standardization, you can transition to it with Nintex Bot 17.10.0 or later.
- (Optional) Click + (plus sign) in the Additional Fields table header to add optional fields.
- Type a Name for the field.
- Type the Value to send to the application.
- Click OK.
- (Optional) Select the Never save protected values with botflow check box.
- (Optional) Type a Note to document special instructions or functionality.
- Click OK to save the credential.
- Add an email account to your botflow.
- Click Add Item () on the Botflow Pane.
- Click Email.
- Account
- Letter: Displays the default connection letter A specific letter used by Nintex RPA LE to communicate with an external application when a Nintex RPA LE action runs..
- Email: Displays the email account information created in Credentials. If more than one credential is available, select the required credential from the drop-down list.
- Send Mail As: Type an email display name for the email From field.
- Authentication: Select an authentication method:
None. Users can send, but not receive, emails.
OAuth2. Select if you are using full OAuth authentication for Gmail. This does not require a password for login after a token has been received from the provider. In order to receive the token, allow Google to access your Nintex RPA LE account.
App Pasword. This requires a SMTP password for login.
Basic. This requires a SMTP password for login.
- Confirm Password: Type the email authentication password.Note:
On May 30, 2022, basic access authentication for Gmail was deprecated and less secure apps are no longer supported. If you are using App Passwords to send or get email from a Gmail inbox, those passwords will continue to work. If you want to use full OAuth authentication for additional security and standardization, you can transition to it with Nintex Bot 17.10.0 or later.
On December 31, 2022, basic authentication for Microsoft Exchange Online was deprecated. If you want to use full OAuth authentication for additional security and standardization, you can transition to it with Nintex Bot 17.10.0 or later.
- Purpose: Select to:
- Send & Receive: Both the Send Email (SMTP) settings and the Receive Email (IMAP) settings must be configured.
- Send only: Only the Send Email (SMTP) settings must be configured.
- Receive only: Only Receive Email (IMAP) settings must be configured.
- Test Connection: Click to validate the email account information. If the test is successful, a test email is sent to the email address provided in the Email field.
- Send Email (SMTP)
- Server: Type the SMTP server name or IP address.
- Port: Type the required port number.
- SSL: Select Yes to send email using SSL.
- Receive Email (IMAP)
- Server: Type the IMAP Server name or IP address.
- Port: Type the required port number.
- SSL: Select Yes to receive email using SSL.
- On the Actions list, click Email and then click Send Email from the Email list.
To create a credential:
Note: In compliance with companies that have a policy against saved passwords, when selected, neither the password nor any of the Additional Field values are saved in the botflow. This option is for use in an attended bot situation where the user must first enter the password and/or Additional Field values before botflow runs, either by using the Credential Prompt action or by manually setting those values.
To create an email account:
If you are using full OAuth authentication for Gmail, you must enable IMAP access. In the Gmail account Settings, go to Settings > Forwarding and POP/IMAP > IMAP access > Enable IMAP. Nintex Bot uses the following Gmail OAuth authentication server settings:
SMTP server settings
Server: smtp.gmail.com
Port: 587
Authentication: TLS/STARTTLS
IMAP server settings
Server: imap.gmail.com
Port: 993
Authentication: SslOnConnect
The Send Email Action Builder window displays.
- Set the Send Email settings.
To: Type one or more email addresses in the To field.
Subject: Type a subject in the Subject field.
Attachment: Type the attachment location. If you have multiple attachments, type a comma and a space between file locations or use the Zip action.
Message: Type a message in the Message field.
More: Click More to display additional fields.
- If needed, adjust the Rule settings to modify how Nintex Bot finds the application target.
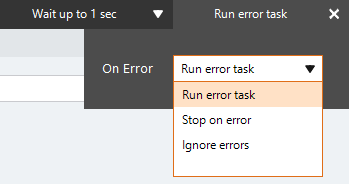
- If needed, adjust the Run Error Task settings to fine tune how the action runs.
- View the action Details settings.
- If needed, adjust the Run Switch setting to create the action without running it.
- (Optional) Type an action note.
- Click OK to add the Send Email action to the botflow.
If you will be using your account to routinely send email, consider using Account Preferences to store your Email Preferences.
- Click Account from the Nintex RPA LE Menu Bar.
- Click Preferences in the Account Panel.
- Click Email.
- Authentication: Defaults to Yes and requires SMTP Password for login.
- Email: Type the email address. This address displays in the email From field.
- Send Mail As: Type an email display name for the email From field.
- Password: Enter the email authentication password.Note:
On May 30, 2022, basic access authentication for Gmail was deprecated and less secure apps are no longer supported. If you are using App Passwords to send or get email from a Gmail inbox, those passwords will continue to work. If you want to use full OAuth authentication for additional security and standardization, you can transition to it with Nintex Bot 17.10.0 or later.
On December 31, 2022, basic authentication for Microsoft Exchange Online was deprecated. If you want to use full OAuth authentication for additional security and standardization, you can transition to it with Nintex Bot 17.10.0 or later.
- Purpose: Defaults to Send and Receive. Select to Send only or Receive only, if required.
- Server: Type the SMTP Server name or IP address.
- Port: Defaults to 25. Type a different port number, if required.
- SSL: Defaults to No. Select Yes to send email using SSL.
- Server: Type the IMAP server name or IP address.
- Port: Defaults to 993. Type a different port number if required.
- SSL: Defaults to Yes. Select No if receiving email using SSL is not required.
- Click OK to save the changes.
The Preferences window displays.
The Email configurable fields display.
Account
Send Email (SMTP)
Receive Email (IMAP)
If you are using full OAuth authentication for Gmail, you must enable IMAP access. In the Gmail account Settings, go to Settings > Forwarding and POP/IMAP > IMAP access > Enable IMAP. Nintex Bot uses the following Gmail OAuth authentication server settings:
SMTP server settings
smtp.gmail.com
Port: 587
Authentication: TLS/STARTTLS
IMAP server settings
Server: imap.gmail.com
Port: 993
Authentication: SslOnConnect
| Field or button | Description |
|---|---|
| Send Email Options/Settings | General
Note: Multiple field entries must be separated by a semi-colon, comma, or pipe character.
|
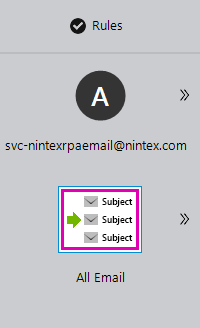
| Rules |
Note: Selecting Current Email requires that the email action be inside of the Loop Email action.
|
| Details |
When directed by Nintex Support, click Details from the Preview Panel of the Action Builder. If needed, Nintex Support will supply additional information. |
| Run error task |
|
| Note |
(Optional) Type a Note to document any special instructions or functionality.
|
| Run Switch |
The Run Switch toggle controls how Nintex Bot runs an action when adding or editing an action in a botflow.
|
| OK/Cancel | Click OK to save the action or click Cancel to discard the action or any changes. |