Post-installation fixes
This topic describes fixes to be done post installation:
- Install Nintex Bot Chrome Extension
- Set Microsoft Internet Explorer 11 browser compatibility
- Automate Nintex RPA Central authentication
- Update a Nintex RPA Central license key
- Migrate SQL Server database
- Can't reach localhost
- Back up and restore
Install Nintex Bot Chrome Extension
After you install Nintex RPA Central and Nintex Bot, you must install the Nintex Bot Chrome Extension if you want to target and automate interacting with elements in Google Chrome or Microsoft Edge (Chromium based) web pages. The Nintex Bot Chrome Extension can be installed on Google Chrome and Microsoft Edge.
Requirements for using the Target Selector with Google Chrome
The requirements for using the Nintex Bot Target Selector Allows you to choose the target element the botflow interacts with, such as a button, text field, or check box. with Google Chrome are:
- Nintex Bot version 16.5.5 or higher.
- Nintex Bot Chromium Extension version 1.0.0.5 or higher.
- Google Chrome Version 75 or higher.
- Google Chrome Zoom set to 100%.
- Windows Display Scale and layout set to 100% (Settings->System->Display).
- Windows Display Make text bigger set to 100% (Settings->Ease of Access->Display).
To install the Nintex Bot Chrome Extension for Google Chrome:
- Start Google Chrome.
-
Using Google Chrome, go to https://www.nintex.com/chrome.
-
Click Add to Chrome to install the Nintex Bot Chrome Extension.
- Close Google Chrome and Nintex Bot.
-
Restart Google Chrome and Nintex Bot.
If a pop-up displays, click to add the extension.
Nintex Bot can now target and automate the interaction of elements within Google Chrome web pages.
Note: If you experience issues using the Nintex RPA Chrome Extension, go to Nintex RPA Chrome Extension is disabled in your browser to troubleshoot them.
Requirements for using the Target Selector with Microsoft Edge
The requirements for using the Nintex Bot Target Selector Allows you to choose the target element the botflow interacts with, such as a button, text field, or check box. with Microsoft Edge are:
- Nintex Bot version 16.5.5 or higher.
- Nintex Bot Chromium Extension version 1.0.0.7 or higher.
- Microsoft Edge Version 83 or higher.
- Google Chrome Zoom set to 100%.
- Windows Display Scale and layout set to 100% (Settings->System->Display).
- Windows Display Make text bigger set to 100% (Settings->Ease of Access->Display).
To install the Nintex Bot Chrome Extension forMicrosoft Edge:
- Start Microsoft Edge.
- Click
 on the top-right corner of the Microsoft Edge browser, and click Extensions.
 - Click Chrome Web Store. You are redirected to the Chrome Web Store.
- Click Allow extensions from other stores, and click Allow when prompted.
- Using Microsoft Edge, go to https://www.nintex.com/chrome.
- Click Add to Chrome to install the Nintex Bot Chrome Extension for Google Chrome.
- When the Add "Nintex Bot Chrome Extension" to Microsoft Edge message appears, click Add extension. The Nintex Bot Chrome Extension icon displays in the Microsoft Edge toolbar.
- Close Microsoft Edge and Nintex Bot.
- Restart Microsoft Edge and Nintex Bot.
Nintex Bot can now target and automate elements within Microsoft Edge web pages.
Set Microsoft Internet Explorer 11 browser compatibility
Note: Microsoft Internet Explorer 11 is not supported in Nintex RPA Central. It is supported in Nintex Bot, but only when used with one open tab.
When using Nintex Bot with Microsoft Internet Explorer 11, you may see the Nintex Bot layout displaying incorrectly. You must adjust the browser compatibility view settings to correct the display.
- Open Microsoft Internet Explorer.
- Click the Settings gear and select Compatibility View settings from the menu.
- Clear the Display intranet sites in Compatibility View check box.
- If needed, remove the nintex.com website reference from the Websites you've added to Compatibility View list.
- Close the Compatibility View Settings window.
The Nintex Bot browser will refresh and correctly display.
The Compatibility View Settings window displays.
Automate Nintex RPA Central authentication
When starting Nintex RPA Central, you may get a window asking for your sign in credentials. You can adjust the local intranet security settings to automate sign in when starting Nintex RPA Central.
- Open the Windows settings from the Windows menu.
- Search for and select Internet Options in Windows Settings.
- Select the Security Tab, click the Local Intranet icon, and then click the Custom level button.
- Scroll down to User Authentication -> Logon and select Automatic Logon only in the Intranet zone.
- Click OK to close all open windows.
The Internet Properties window displays.
The Local Intranet - Security Zone window displays.
Click OK or Apply for any windows that display.
You will now be automatically authenticated when starting Nintex RPA Central.
Update a Nintex RPA Central license key
You can edit the license key if you want to update the license details.
-
On the top navigation bar in Nintex RPA Central, click Settings.
- Click License and subscription in the side navigation menu.
- In the License information section, to the right of the License key, click and select Edit.
- Edit the License key and click Update.
The license key is updated.
In some instances, the Nintex RPA Central web page does not display after changing a license.
You can check the Nintex RPA Central service to be sure it is running.
To check the Nintex RPA Central service is running:
- Click on the Windows menu and search for 'services.'
- Open the Microsoft Windows Services app.
- Verify the service Nintex RPA Central is running.
- If the service is not running, right-click on Nintex RPA Central and start the service.
After the service starts the Nintex RPA Central web page will display.
Migrate SQL Server database
-
You must be using Nintex RPA Central 2.6.0 or above to migrate your SQL Server database. Additionally, after you migrate your SQL Server database, you cannot downgrade Nintex RPA Central to any version lower than 2.6.0.
-
You can use any licensed Microsoft SQL Server edition that is version 2012 or above (Standard, Enterprise, Developer, or Web). Nintex RPA LE does not support the use of Microsoft Azure SQL Database.
Follow these instructions if you are a database administrator who wants to migrate your existing RPACentralWeb and RPACentralKeys databases from Microsoft SQL Express (local on the Nintex RPA Central computer) to Microsoft SQL Server. Storing your data on Microsoft SQL Server allows you to control the connection strings and database locations and manage data in the same way that you manage other data in your line of business systems using standard SQL technology. It removes the 10 GB database Microsoft SQL Express size limit. It can also improve the performance of your server.
-
Back up your files that contain botflows and schedules and the botflows in your Nintex RPA Central database. For more information, go to Back up and restore.
-
Ensure that you have installed the latest version of Microsoft SQL Server Management Studio (SSMS).
-
Ensure that Microsoft SQL Server Management Studio allows SQL connections:
-
In the Object Explorer, right-click on the Security folder.
-
Select Properties.
-
Select SQL Server and Windows Authentication mode.
-
Click OK.
-
-
Restart Microsoft SQL Server Management Studio to ensure that the server authentication change is activated.
-
Stop the Nintex RPA Central service, if it is running.
-
Copy the existing RPACentralWeb and RPACentralKeys databases on Microsoft SQL Express to a temporary location. Nintex RPA LE populates the RPACentralWeb database with botflows and users, while the RPACentralKeys database is relatively small and contains encryption keys and log files.
Note: You cannot change the name of the RPACentralWeb and RPACentralKeys databases.
-
Navigate to C:\Windows\System32\config\systemprofile.
-
Copy the RPACentralWeb.mdf, RPACentralWeb_log.ldf, RPACentralKeys.mdf, and RPACentralKeys_log.ldf files.
-
Paste the RPACentralWeb.mdf, RPACentralWeb_log.ldf, RPACentralKeys.mdf, and RPACentralKeys_log.ldf files to a temporary location.
-
-
In Microsoft SQL Server Management Studio, attach the RPACentralWeb.mdf, RPACentralWeb_log.ldf, RPACentralKeys.mdf, and RPACentralKeys_log.ldf files to a new SQL instance:
-
In the Object Explorer, right-click on the Databases folder.
-
Select Attach.
-
Click Add under Databases to attach.
-
Navigate to and select the copied RPACentralWeb.mdf, RPACentralWeb_log.ldf, RPACentralKeys.mdf, and RPACentralKeys_log.ldf files and click OK.
-
Click OK again.
-
-
Create a new SQL user (that is not a Windows user) (for example, RPACentralService) to add to the SQL connection. This new SQL user will be specified in the connection strings used to connect to your Microsoft SQL Server. You must create this new SQL user because the Nintex RPA Central service uses a local system account.
-
In the Object Explorer, right-click on the Security > Logins folder.
-
Select New Login.
-
-
Assign permissions to the new SQL user:
-
In the Object Explorer, right-click on the Databases > RPACentralKeys database.
-
Select Permissions.
-
Select the Grant check box next to the Create Tables, Create / Access Schemas, Select, References, Insert, Update, Alter, and Delete permissions.
-
Click OK.
-
In the Object Explorer, right-click on the Databases > RPACentralWeb database.
-
Select Permissions.
-
Select the Grant check box next to the Create Tables, Create / Access Schemas, Select, References, Insert, Update, Alter, and Delete permissions.
-
Click OK.
-
-
On the Nintex RPA Central server, download, unzip, and run the Nintex RPA Central SQL Configuration Tool from the latest release notes.
Note: This tool allows you to configure and test the connection strings for your RPACentralWeb and RPACentralKeys databases on your Microsoft SQL Server, cache the credentials, and restart the server. It does not delete any data in your Nintex RPA Central databases.
-
As an Administrator, open Command Prompt.
-
Change the directory to the Nintex RPA Central SQL Configuration Tool location:
cd C:\SqlConfigurationTool -
Run this command in Command Prompt:
psexec.exe -i -s "C:\SqlConfigurationTool\SqlConfigurationTool.exe"Important: Do not skip this step! If you do not run this command line, you may receive a services error.
- Copy the connection strings for your RPACentralWeb database and RPACentralKeys database and paste them into the Nintex RPA Central SQL Configuration Tool. Tip:
The correct connection string format for the RPACentralWeb database is: Server=ServerName;Database=RPACentralWeb;User ID=userid;Password=password
The correct connection string format for the RPACentralKeys database is: Server=ServerName;Database=RPACentralKeys;User ID=userid;Password=password
-
Click Test Connection to test the connection to the databases with the strings.
-
Click Save Configuration.
Nintex RPA Central restarts.
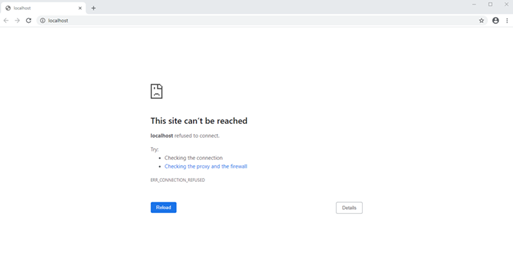
Can't reach localhost
In certain instances, an installation of Nintex RPA Central will return an error message: This site can't be reached, localhost refused to connect.
To fix this issue and connect to the localhost, ensure:
- The latest version of Nintex RPA Central is installed by going to the Product Releases page (registration required).
- The Nintex RPA Central service is running.
- You are using a certificate with a private key.
To verify your installation of Nintex RPA Central is using a certificate with a private key:
- Open Windows settings from the Windows menu and search for Manage computer certificates.
- Expand the Personal folder and click Certificates.
- Double-click the certificate from the list that matches the certificate you used in your installation of Nintex RPA Central.
-
Click the Details tab and scroll down to Thumbprint to verify the thumbprint of the certificate matches the thumbprint of the certificate you used in your installation of Nintex RPA Central.
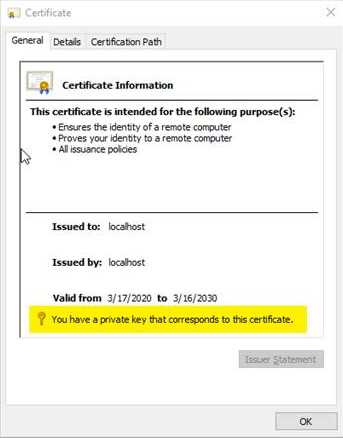
- Click the General tab and verify that the certificate provides you with a private key corresponding to the certificate.
The Certificates - Local Computer window displays.
The Certificate window displays.
If you can't find a certificate in the list that provides you with both a private key and the thumbprint value of the certificate you are using in Nintex RPA Central, you will need to either create or obtain a certificate with a private key as described in the CA information for your Network Administrator section of HTTPS certificate configuration.
Back up and restore
Follow these instructions to back up MDFs (Microsoft SQL Server Master Database Files and Microsoft SQL Server Primary Data Files) and LDFs (Microsoft SQL Server transaction log files).
- Stop the Nintex RPA Central service to make sure that the existing database files are not locked.
- In File Explorer, navigate to C:\Windows.old\Windows\System32\config\systemprofile.
- Copy and paste the following files to another folder to restore later:
-
RPACentralKeys.mdf
-
RPACentralKeys_log.ldf
-
RPACentralWeb.mdf
-
RPACentralWeb_log.ldf
Note: Use the same license key if you are restoring the database on a different virtual machine. Nintex RPA Central downloads a certificate that is attached to the license key. The certificates in RPACentralKeys are then used to encrypt and decrypt the botflows stored in the RPACentralWeb LocalDB database.
For detailed information, see the Microsoft instructions about backing up SQL Server databases.
Follow the steps below if you're restoring Nintex RPA Central on the same machine where you completed the backup and where the license is already activated.
- Stop the Nintex RPA Central service to make sure that the existing database files are not locked.
- In File Explorer, navigate to C:\Windows.old\Windows\System32\config\systemprofile.
- Copy and back up the following files to another folder in case you need to restore the files:
-
RPACentralKeys.mdf
-
RPACentralKeys_log.ldf
-
RPACentralWeb.mdf
-
RPACentralWeb_log.ldf
-
Replace the database files with the required backup files.
If the files remain locked, set the Nintex RPA Central service to not automatically start when logging into Windows:
- Set the Nintex RPA Central service with Startup Type == Manual.
- Restart the machine and replace the files again with the backed up files.
- Set the Nintex RPA Central service with Startup Type == Automatic (Delayed Start).
- Start the Nintex RPA Central service.
- Check if the botflows and schedules have been restored successfully in Nintex RPA Central.
Important: Ensure that the license key is deactivated from the original Nintex RPA Central machine. If the machine is no longer accessible, contact Nintex Support to remove the license key.
- Install Nintex RPA Central on the new machine.
- Activate the original license key.
- Stop the Nintex RPA Central service to make sure that the existing database files are not locked.
- In File Explorer, navigate to C:\Windows.old\Windows\System32\config\systemprofile.
- Copy and back up the following files to another folder in case you need to restore the files:
- RPACentralKeys.mdf
- RPACentralKeys_log.ldf
- RPACentralWeb.mdf
- RPACentralWeb_log.ldf
-
Replace the database files with the required backup files.
If the files remain locked, set the Nintex RPA Central service to not automatically start when logging into Windows:
- Set the Nintex RPA Central service with Startup Type == Manual.
- Restart the machine and replace the files again with the backed up files.
- Set the Nintex RPA Central service with Startup Type == Automatic (Delayed Start).
- Start the Nintex RPA Central service.
- Check if the botflows and schedules have been restored successfully in Nintex RPA Central.
Final step: