You can create a form in the email that your DocuSign recipients receive when you request their signature. You add Secure Fields to one or several recipients.
Example
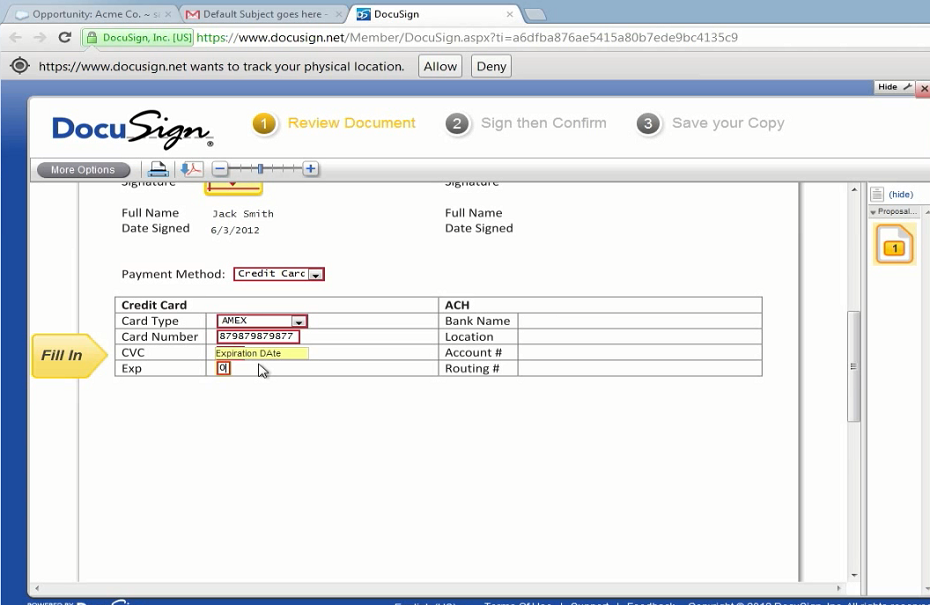
Below is an example of a DocuSign envelope that uses secure fields for billing information. Credit Card and ACH fields are conditionally displayed based on the Payment Method field.
Add Secure Fields
Note: You must integrate DocuSign with the app and add a DocuSign delivery to create Secure Fields. For more information, see DocuSign integration and .DocuSign.
To begin adding secure fields to a DocGen Package, you must first navigate to the recipient you wish to add form fields to.
Navigate to DocGen Packages, DocuSign Delivery Option, Recipient.
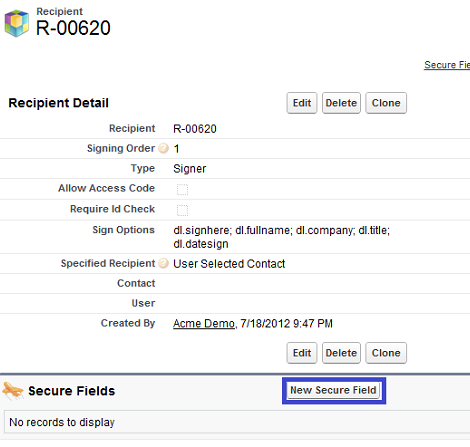
Once you are within the Recipient Detail Page, you must scroll down to the Secure Fields related list and select the New Secure Field button.
You will be taken to the New Secure Field Type menu. You must select which type of secure field you would like to add.
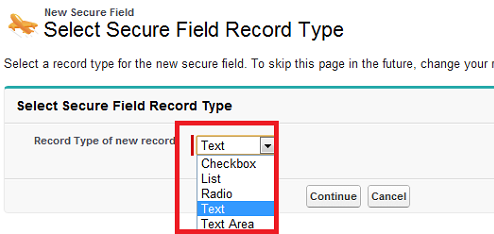
Your options are:
-
Checkbox - This will create a checkbox.
-
List - This will display a pre-determined list of values to the recipient from which they can select one option.
-
Radio - This can display two or more selectable buttons from which they can select only one.
-
Text - This will display a standard text field. You can add validation to these, which will restrict which values are accepted by the field.
-
Text Area - This will display an area that is pre-set, which can be filled in by the recipient.
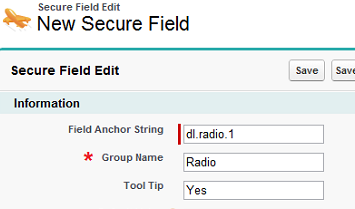
Once you select your Secure Field Type, you will be taken to the Secure Field Edit Page. Fill in all fields relevant to your use case.
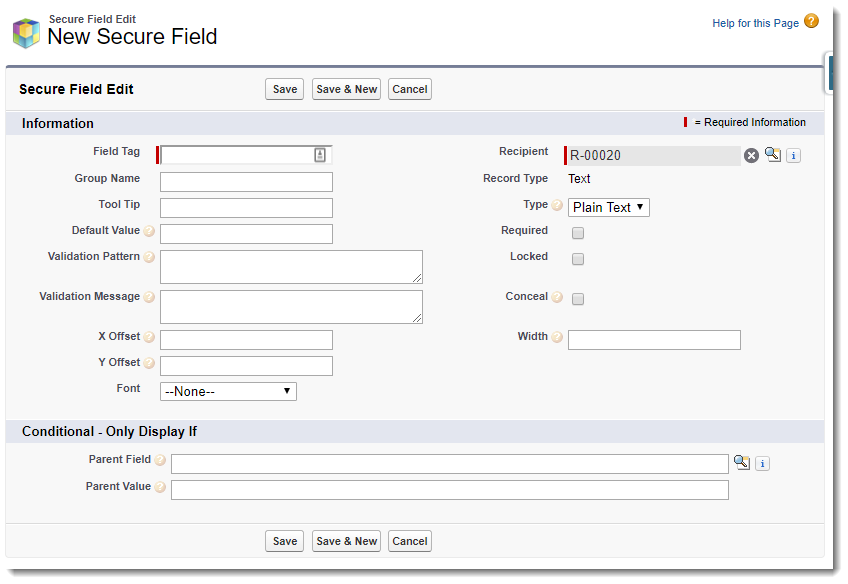
|
Section |
Field |
Description |
|---|---|---|
| Information | Field Tag |
This string will become a field tag that will go in your DocGen Package Documents and will be replaced with a form field by DocuSign. Enter in a unique string of text here. It must not match anything else in your document since it is being stamped with a field by Salesforce. |
| Group Name |
This field is only required for radio secure fields, but is also necessary if you intend to use DocuSign Connect in order to update Salesforce. Give each secure field an identifiable group name. |
|
|
|
Tool Tip |
This can be considered help text. Enter in a description of the value you want inserted into the secure field, so the email recipient has a better idea of what information to input in the secure field. |
|
|
Default Value |
If you want the recipient fields to be defaulted with information, you can insert static text or a Field Tag here. Field tags will dynamically pull information from the related records you run from. |
|
|
X Offset |
If you do not like the positioning of a secure field, you can adjust its horizontal alignment by inserting a negative (moves left) or positive (moves right) number here. |
|
|
Y Offset |
If you do not like the positioning of a secure field, you can adjust its vertical alignment by inserting a negative (moves down) or positive (moves up) number here. |
|
|
List Items |
This field is only applicable to List secure fields. Enter in which list values you want to appear in this text area. You must separate each list value by a semi-colon. |
|
|
Recipient |
This field determines which recipient the secure field is assigned to. You can look up all recipients related to the DocGen Package here. |
|
|
Record Type |
This will auto-fill with the value selected from the Type menu. |
|
|
Required |
Checking this box will make a value for this form field required. If a field is not required, it can be left blank by the recipient. |
|
|
Locked |
Selecting this checkbox will make the default value for this field uneditable. |
|
Conditional - Only Display If |
Parent Field |
If you wish to have this field be conditionally displayed, you must select another field anchor string in this field. You can look up all of your secure fields by selecting the magnifying glass icon. |
|
|
Parent Value |
Here, you must enter in the value from the Parent Field that will activate the secure field being created. |
Once you have entered in values for all relevant fields, select Save or Save & New if you wish to keep adding secure fields.
Working with radio fields
If you are creating radio buttons for a group (Example: Yes or No), you must assign all of the radio fields the same Group Name value. This will ensure that only one of the radios is selectable.
For example, if you create radios for a Yes option and a No option, they must have the same group name because you want to make sure Yes OR No is selectable instead of Yes AND No being selected. Giving both the same group name will ensure that only one of the options is selectable.
