
How to configure the DocuSign connect feature. You can have DocuSign make updates to Salesforce after the completion of an envelope using DocuSign Connect. These updates include attaching the signed contract back to a Salesforce record, updating fields in Salesforce and creating records inside of Salesforce.

In the example provided to you on this page, we will set up DocuSign to update the Account Billing Information, Attach the signed DocuSign contract to the Opportunity record and update the Opportunity Stage field to Closed.
Note: You must integrate DocuSign with the app and add a DocuSign delivery, and create Secure Fields to configure DocuSign Connect. For more information, see DocuSign integration , .DocuSign and .(Optional) DocuSign secure fields.
Configure DocuSign Connect for standard objects
Configure your DocuSign connect settings to ensure your Salesforce org is connected to DocuSign.
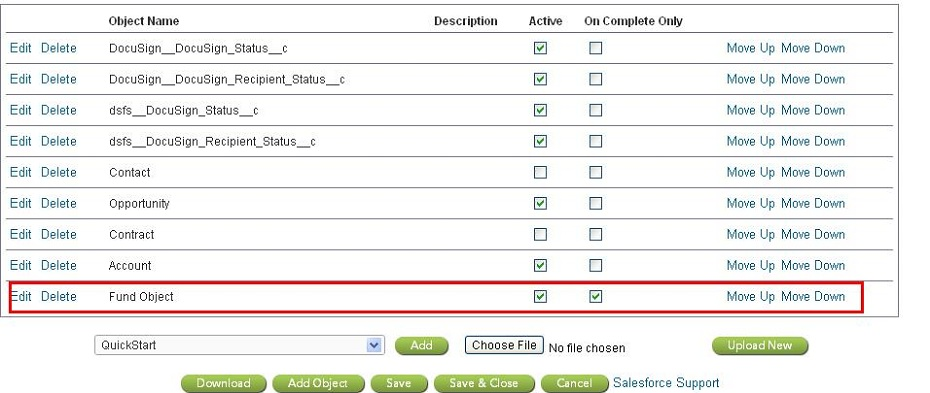
- On the Connect for Salesforce configuration page, scroll down to the Connect Objects section.
- Click New Object, then select Salesforce Object.
- You are now adding an object to update within your Connect settings. You must configure the Object page properly to successfully update a Standard Salesforce object.
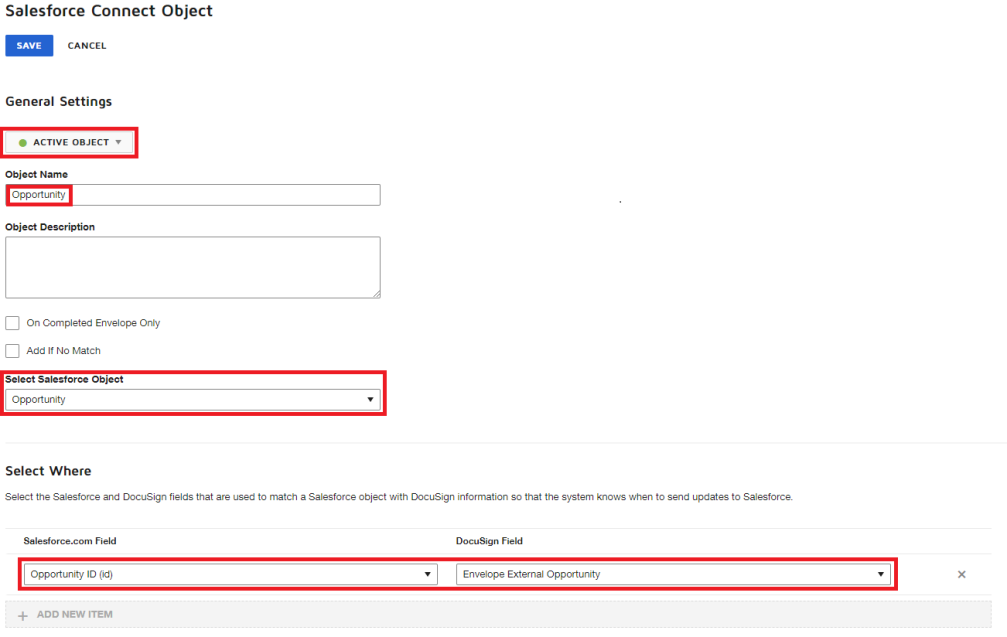
- Under General Settings, select Active Object.
Below is a brief description of each section of the Object Edit Page:
-
Object Label - Enter a label for the object you intend to update. This is primarily for management purposes. This label will be visible to the DocuSign Admin within the Connect Page.
-
Select Salesforce.com Object:
-
Object - This dropdown provides you with a list of all your Salesforce objects. You must select the object you wish to update here.
-
Add if no match - Check this box if you wish to insert a new Salesforce record if the record Id referenced in the Select Where: section cannot be found.
-
Select Where:
-
Salesforce.com Field - You must select what will be used to identify a specific record to update. It is best practice to select the object's (Id) field
-
DocuSign Field - You must fill the Salesforce.com Field with a value from DocuSign. The DocGen Package automatically sends standard object Ids to DocuSign, so you can select Envelope External Object in the dropdown, where Object is the Salesforce object you select in the Select Salesforce.com Object: list.
-
Update Fields
-
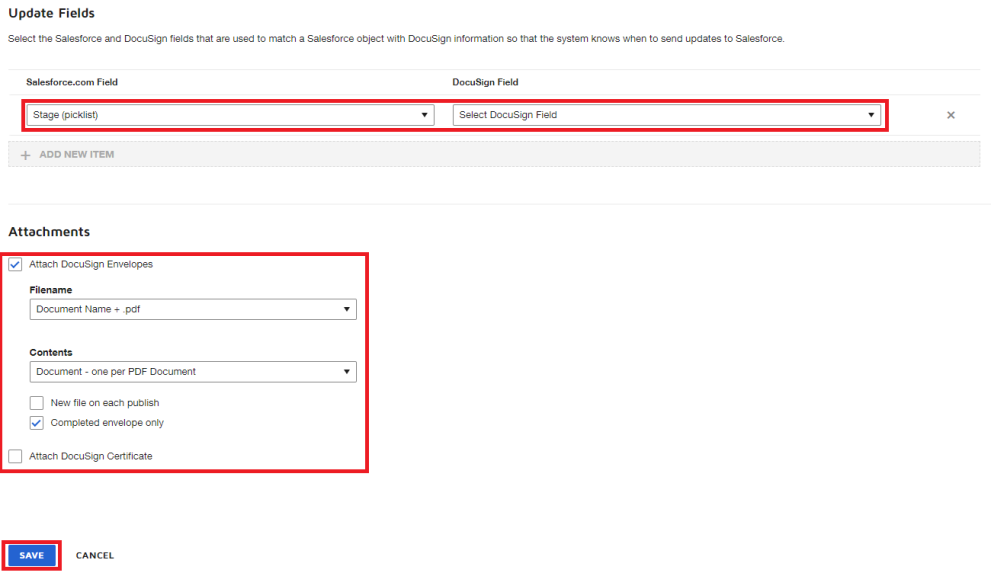
Salesforce.com Field - Here, you will be provided with a list of all fields available in the object selected in the Select Salesforce.com Object: field. Select the field/s you want to update here.
Note: You can update one or several fields per object.
-
DocuSign Field - If you want to update the Salesforce fields with dynamic values such as Sign Fields (Example: Date Signed) or Recipient Secure Fields, you can specify them here.
-
Value - If you do not wish to update the Salesforce fields with dynamic values, then you can update them with static values by entering the values here.
-
Attachments
-
Attach DocuSign Documents - Selecting this box will attach the signed contract to the Notes and Attachments object on the record specified.
-
Completed Envelope Only - Selecting this box will attach the completed DocuSign contract Only. If this box is not selected, DocuSign will attach the contract to the specified record every time DocuSign Connect is run, which can occur several times within one signing.
In the example above, we have set up DocuSign Connect to update the Opportunity Stage field to Closed and automatically attach the signed contract to the Opportunity record.
Update Salesforce with Recipient Secure Fields
In addition to updating Salesforce with static values, DocuSign can update salesForce.com with values entered into Secure Fields by the envelope recipients.

You must choose which Salesforce.com Field to update and then select Recipient Secure Field in the DocuSign Field column. Finally, you must select which specific secure field is being assigned to each Salesforce field by entering the Secure Field's group names, in the column of fields to the right of Recipient Secure Fields.

You can easily access the Secure Field Group Names by navigating to a list view of all Secure Fields tied to a Recipient.
Configure DocuSign Connect for custom objects
Get the object Id a) Select the record ID field of your main object from the field tagger. The main object must contain the fields you wish to update.
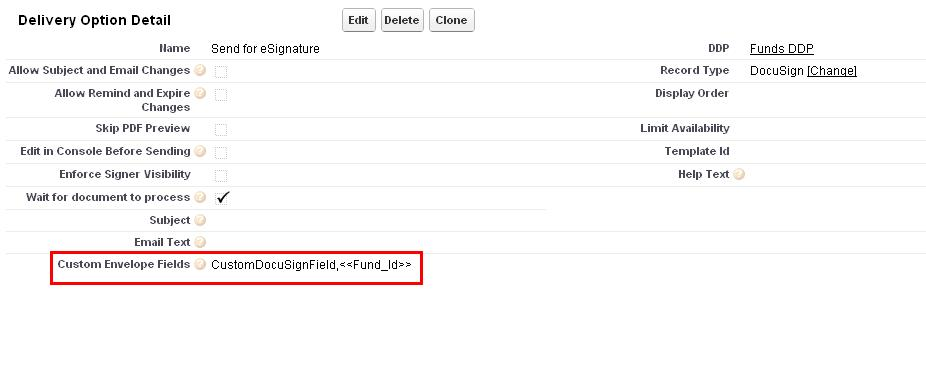
Add record Id to custom envelope field.
Navigate to: DocGen Packages tab -> DocGen Package Record -> -> Delivery option (DocuSign) -> custom envelope field] and name of new DocuSign field.
Assign a custom field to your DocGen Package Delivery (DocuSign).
Use the following syntax.
CustomField,<<Object_Id>>
Where:
-
CustomField is an arbitrary name you assign it
-
<<Object_Id>> is the record id you retreive from the field tagger.
Add “DocuSign field” to
Envelope custom Fields:
Navigate to: [objects page -> DocuSign Admin -> DocuSign console ->preferences -> envelope custom field -> Add]
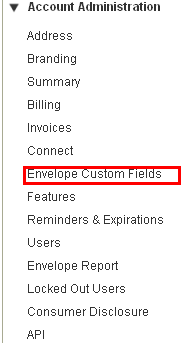
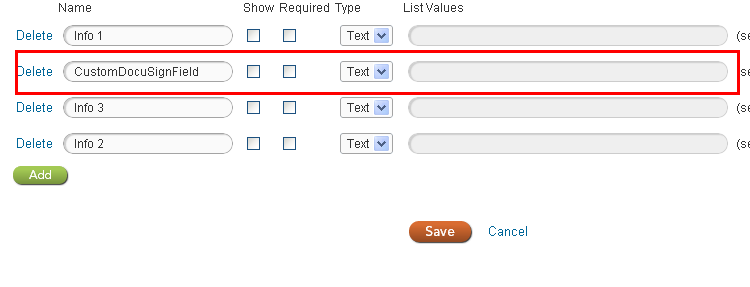
Assign your arbitrary custom field name to your new DocuSign envelope field.
Add object to Connect settings.
Navigate to: [DocuSign Admin --> DocuSign Console --> Preferences --> Connect --> Add Object]
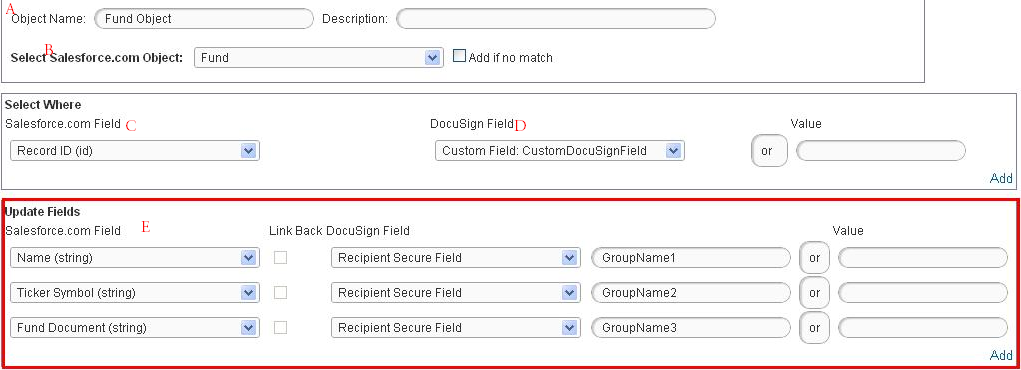
-
Object Name - Name object.
-
Select Salesforce.com Object - Select Salesforce object custom object.
-
Salesforce.com Field - In Select Where enter Record ID for Salesforce field and custom DocuSign field for DocuSign Field.
-
DocuSign Field - Select the custom field in the DocuSign field picklist.
-
Update Fields - Adding the field and group names.
Add fields and group names for pass back Salesforce fields.
Note: You may also attach the DocuSign document to your DocGen Package.