
How to tag templates for DocuSign deliveries.
After you have added the DocuSign delivery option to your DocGen Package and assigned Secure Fields to your recipients, you must tag your DocGen Package templates with DocuSign tags. For more information, see DocuSign integration , DocuSign, (Optional) DocuSign secure fields.
Tag DocuSign templates
When you are ready to begin tagging your template with DocuSign tags, navigate to DocGen Packages and select the appropriate DocGen Package. Once you are in the DocGen Package Detail Page, select the Field Tagger button and your DocGen Package Document.
With your Field Tagger open, select Recipients as your Main Object. This selection will provide you with a list of the recipients available in your DocGen Package. For more information about adding recipients, see DocuSign.
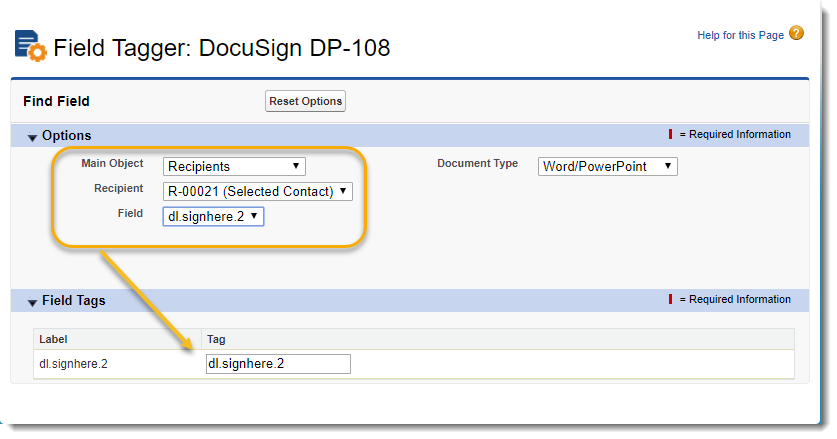
Select the appropriate Recipient. A list of Fields assigned to the Recipient will appear. Select the appropriate Field and you will be provided with a Field Tag to use in your template. Drag and drop this field tag into your template. Continue to add DocuSign tags as necessary.
Be sure to navigate through all of your other recipients along with their respective Fields and Field Tags until your templates are fully tagged.

Note: After you tag your templates, change the font color of the tags to match the background of your document. This makes the tag invisible in the PDF output document, but allows the signing service to tag the documents.
Be sure to upload or replace your templates inside of Salesforce when you are done making changes.