Custom workflow steps
You can expand the list of standard Steps in the workflow designer tool by creating custom workflow. Custom workflow steps make it easy for workflow designers to drag, drop and configure a step into a workflow to call a SmartObject method associated with the step.
To create a custom workflow step, you will associate it with a service method of a service object (note that the Service object Method should be bound to a deployed SmartObject). You also associate the step with an icon to represent the technology or function of the step. once you deploy the custom steps, they will appear in the K2 Workflow Designer in a specific toolbox location.
For an end-to-end example that demonstrates how to create a custom workflow step, see Example: Creating a custom workflow step for Google Drive.
How custom workflow steps work
To understand how custom steps work, you need to understand how SmartObjects work. For an overview of SmartObjects, see and for an overview of Service Types see the topic in the User Guide.
To create a custom step, you will associate the custom step with an existing SmartObject Service Method, Service Object, and Service Type. When you use the custom step in Workflow Designer, the configuration panel shows the Service Instances (connections) of the Service Type associated with the step. You can then select which Service Instance to use, and the workflow will execute the SmartObject in the Service Instance that matches the Service Object Method specified by the custom step's definition. 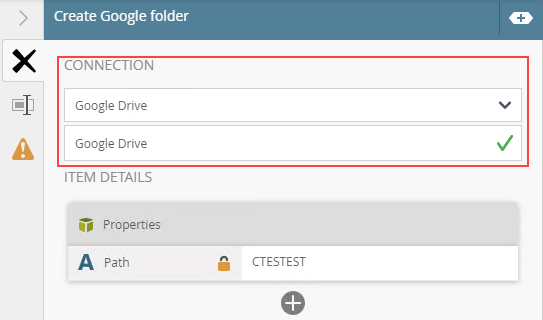
At runtime, the custom step definition compares the Service Instance information (the connection selected when configuring the custom step) to the Service Type, Service Object, and Service Object Method that you chose when creating the custom step. It then executes the SmartObject that matches the definition of the custom step, using the following logic:
- If there is only one Service Object in the selected connection/Service Instance, use that Service Object even if the name does not match.
- If there is more than one Service Object in the selected connection/Service Instance, use the Service Object where the name matches.
- If there is more than one item in the collection, but no name matches, you will see a validation error: "A single, matching SmartObject was not found."
- If there are no SmartObjects in the selected connection/Service Instance, you will see an error like "a SmartObject was not found".
See Creating custom workflow step for more information about validation that happens when you drag a custom step onto the canvas.
Considerations
Keep in mind the following considerations when creating and using custom steps:
- Carefully plan the structure (name and toolbox path) of your custom steps; this will prevent potentially broken workflows in the future. You cannot change the name or the location of a custom step once you create it. For more information, see Managing custom workflow steps.
- You must create/register the custom step in each environment where a workflow will use it. Package and Deployment does not package or deploy custom steps, and workflows containing custom steps will not function without the same structure in both environments. In other words, if you have a Development K2 environment and a Production K2 environment, you must register the custom step in each environment.
- You must be a member of the Security Administrators role, or both the Package and Deployment and Server Admin roles to create or maintain custom workflow steps.
- If you are deploying a workflow with a custom step to another environment, ensure that the custom step is already registered in the target environment before you deploy the workflow.
- If your service object names differ between service instances, your steps may fail at runtime. Validation messages appear in the configuration panel if the K2 Workflow Designer detects that there may be a problem at runtime.
- If you do not use the Generate SmartObjects option when creating the Service Instance, there is a chance that the Service Object Method Names you use in the step configuration will not match, and the steps will fail at runtime.
- If you delete all the custom steps in a toolbox node, the system removes the node.
- Deactivate custom steps if you no longer want designers to use them, but they are still used in deployed workflows. For more information, see Managing custom workflow steps.
- The system disables the configuration panel if there is no SmartObject/Service Object Method match found.
- Service Types (along with their Service Objects and the SmartObjects they're based on) that do not have the same structure may not behave the way you expect. Validation messages appear in the configuration panel if the K2 Workflow Designer detects that there may be a problem at runtime.
- If you need to update the Service Type, Service Object, or Method at a later point, you must update the step's definition. You can also update the description and the icon, but you cannot update the custom step's name or location in the toolbox. See the topic Managing custom workflow steps for more information.
- If you delete a custom step used in a deployed workflow, and then create a step with the same toolbox path and name, that new step’s icon will show in your deployed workflow instead of the fallback icon. The step in the deployed workflow is still linked to the old step’s type/object/method. If you want to link the new step to the new type/object/method, delete the step and re-add it from the toolbox, then redeploy the workflow.
See these topics to learn how to set up custom workflow steps: