Creating custom Workflow steps
To create or update custom steps, and to see a list of custom steps in your environment, use the custom step management form available at:
https://[servername]/Runtime/Runtime/Form/com__K2__System__Management__Workflows__CustomStep__Forms__Main
(Replace the [servername] placeholder with the name of your K2 environment)
Example of the Custom Step Management Form
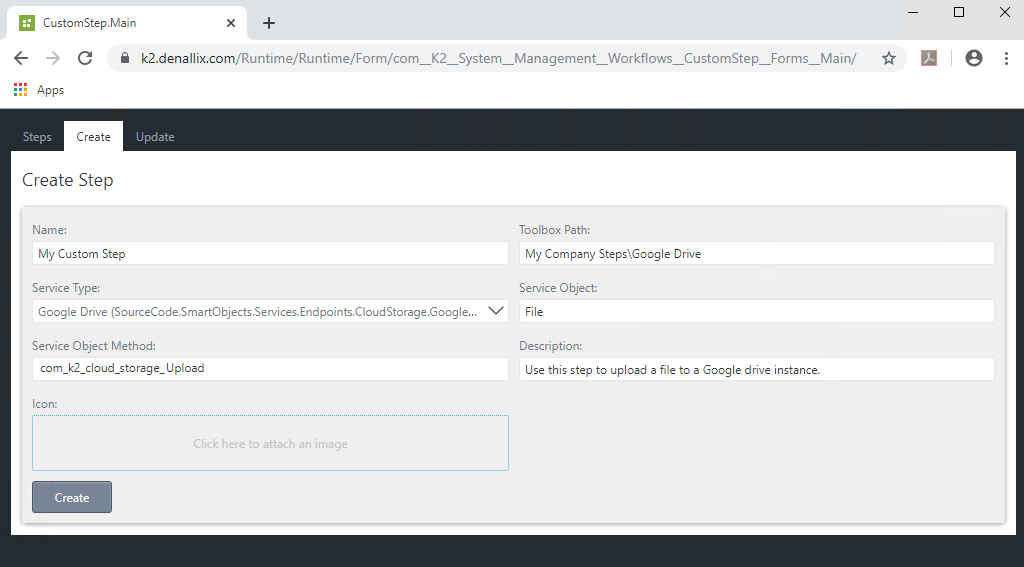
- Select the Create tab to begin, and specify the following properties to create a step:
Field Description Name The name of the custom step as it should appear in the K2 Workflow Designer. Toolbox Path The location for the custom step in the workflow designer toolbox. You can specify two levels, such as My Company Steps\Google Drive, or simply Google Drive if you don't want nested steps in the toolbox. Service Type The system name of the Service Type to use, where the Service Type contains one or more service instances, each containing one or more Service Objects used by one or more SmartObjects. When using the management form, all Service Types in the K2 environment are displayed. Service Object The system name of the service object (the Service object must be used by one or more SmartObjects). Service Object Method The system name of the Service Object Method to use (the method must be linked to a SmartObject method that the workflows will use at runtime). Description A short description of the custom step, appears as a tooltip in the designer. This field is limited to 100 characters. Icon A Scalable Vector Graphic (SVG) that visually represents the service type, object, and method to be shown in the toolbox, on the canvas, on the configuration panel, and in the View Flow report. For more information about creating SVG files and how they are modified when creating or updating a custom step's icon, see About Creating SVG Icons.
The special characters you can use are: `~!@#$%^&*()-=\_+[]':",./<>?|- Using the backslash character \ in the Toolbox Path indicates a sub folder. So `~!@#$%^&*()-=\_+[]':",./<>?| will create two folders, the parent folder `~!@#$%^&*()-= and the sub folder _+[]':",./<>?|
- Using more than one backslash \ in the Toolbox Path results in an error: You can only specify a toolbox path with two levels, such as 'Main Folder\Steps'
- Emoticons and curly braces { } are not supported in any string input values
- Click the Create button to continue.
- Refresh (Ctrl+F5) your browser to reload the K2 Workflow Designer to see your new custom step in the toolbox in the path you specified. In the case of this example, the path is My Company Steps\Google Drive and the step name is Create Folder.
About creating SVG icons
For the best results, create SVG icons for each step with dimensions of 32 pixels x 32 pixels. Do not include any animations in the SVG file. You also cannot reference external styles in the svg,. so if you are using styles, export the image with inline styles. You will receive a warning if your icon contains any embedded <styles> or <link rel> tags. The system will create the custom step using the specified icon, but removes the tags mentioned above.
The system removes the following items from the SVG file:
- All <script> tags
- Inline scripts in any XML element attribute, CDATA, comment, or element content
- The <title> tag
- width and height attributes from the SVG root node. Note that viewbox/viewport are kept as-is
Also, note that K2 replaces all color values with K2-defined CSS variables and uses these CSS variables to render the SVG in the workflow designer. If your icon has colors that do not display correctly when added to the canvas, check that it does not contain an embedded style sheet. It should rather contain inline styles.
For information on exporting your SVG file with inline styles, see your SVG editing software's Help. For example, the help topic for Adobe Illustrator: https://helpx.adobe.com/illustrator/using/svg.html
Considerations
Your Service Type, Service Object, and Service Object Method fields are not validated when you create your steps. If these do not match SmartObjects on your system, you cannot configure the step in the K2 Workflow Designer. If they do match, you see one or more instances of the service type in the Connection dropdown in the designer.
You will not be able to configure your custom step in a workflow if:
- The specified Service Type, Service Object, and/or Service Method do not exist.
- The specified Service Type does not have at least one Service Instance (connection).
- The selected connection (Service Instance) does not have SmartObjects that point to the specified Service Object.
- The specified Service Method is not linked to a SmartObject method of a SmartObject, pointing to the specified Service Object, that belongs to the selected connection (Service Instance).