Edit a process
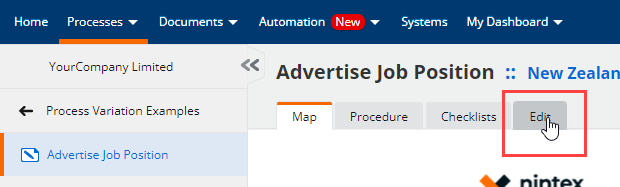
Once you create a process, use the Edit tab to add or edit process details.
The Edit tab is where you define what your process does, build the step-by-step procedure, assign roles, and publish changes. Whether you are starting from scratch or using AI-assisted tools, this guide will help you create comprehensive, accurate process documentation.
Who can edit a process
Processes can be edited by Promasters A Nintex Process Manager system administrator who administers a Nintex Promapp site and has rights to view and edit all areas of a Nintex Promapp site., Business Analysts A user who can create and edit all processes if not restricted by permissions, view all reports and edit Roles and Responsibilities., and the Process Owner A user responsible for ensuring the process is operating effectively, and continuously improving. Not necessarily a subject matter expert, but empowered with organisational authority to approve changes as needed. or Expert A user who performs day-to-day process management on behalf of the Process Owner. This role requires detailed understanding of the process.. Additional editors can be assigned through the process group. If you use the Process and Document Approval add-on, anyone assigned as a group Process Approver A user responsible for reviewing and approving changes made by process editors. Additional approvers can be specified at the process level. or Process Publisher A user responsible for publishing after a process has been approved. If no publishers are named for a group, then once the final approval is obtained, the process will automatically publish. also has editing rights.
On this page:
Edit Process details
In the Edit tab, update key process fields to ensure the process information remains accurate and aligned with business needs.
Complete one of the following actions:
- Use the Search box at the top-right of the main navigation bar.
- On the Home Page:
- Use the Search box.
- Click Recently viewed or My favourites.
- Click Processes > All Processes.
- Click Processes > Recently viewed.
Edit process details
|
Section |
Description | |||||||||||||||||||||||||||||||||||||||
| Summary |
Add a brief description of the process purpose and scope.
|
|||||||||||||||||||||||||||||||||||||||
| Triggers and Inputs |
Identify what starts the process and what resources are required.
|
|||||||||||||||||||||||||||||||||||||||
| Outputs and Targets |
Define the expected results or deliverables.
|
|||||||||||||||||||||||||||||||||||||||
|
RACI (Responsible, Accountable, Consulted, Informed) |
Assign key roles to clarify ownership and involvement. Manage stakeholders from this section. Stakeholders can be users who are not directly involved in the process, but are involved in processes affected by changes to your process. Add a stakeholder when you want to notify them of any changes to your process. The stakeholders of each process are displayed using the RACI:
|
|||||||||||||||||||||||||||||||||||||||
| Timeframes and Costs |
Document expected durations or costs, if relevant.
|
|||||||||||||||||||||||||||||||||||||||
| Dependencies |
View related processes and understand how this process connects to others in your organization. |
 .
.
Use assisted editing tools
Use these tools to capture, convert, or generate process maps faster and more accurately.
Which Tool Should I Use?
| Tool | Best For | When to Use |
| Process Capture | Documenting existing processes | You want to record how work is currently done by capturing real user actions |
| AI Model to Map Converter | Converting BPMN diagrams | You have existing process models (BPMN) that need to become procedures |
| AI Process Generator | Creating new processes | You are starting fresh and have a clear description of what the process should do |
Process Capture
Use Process Capture to harness AI swiftly document processes directly from real user activities, reducing manual effort and ensuring objective documentation.
AI Model to Map Converter
Note: AI Model to Map Converter is currently not available in the AEN region .
When you create a new process (procedure), you now have the option to generate your first draft using Generative AI from your existing Process Models (BPMN). Process Manager will use your BPMN diagram to create a procedure map.
To use this functionality, once you’ve created a new process and before adding any activities:
1. Navigate to the Edit tab > Procedures sub-tab.
2. Select the Start with process model option.
3. Select the Process Model you'd like to convert.
Important: You need to have the Process Models feature enabled and access to at least one Process Model.
4. Click Open.
5. In the next screen, choose which part of your model to convert:
-
To convert the full model, select All the elements.
-
To convert part of the model, hold Shift and either drag to select or click elements individually.
6. Review your selection and click Convert.
7. Review the draft and choose one of the following:
-
Regenerate: Resubmits the same selection. Results may differ each time due to Generative AI.
-
Change selection: Go back and pick a different model or elements.
-
Save: Accept the draft and continue editing it in the Process Editor.
-
Discard: Cancel and return to the beginning.
If you have more questions regarding this feature, see AI Model to Map Converter FAQ
AI Process Generator
Note: AI Process Generator is currently in beta testing and is available on all tiers, but is not available in the AEN region. It will only be available to the Professional, Expert, and Enterprise tiers on full release.
You can create a first draft outline of your process using Generative AI. Process Manager will create a draft procedure based on the information you provide in the process summary and additional instructions.
Use the following steps to generate a draft procedure:
-
Create a new process, adding in depth content to the process summary and process details.
-
Navigate to the Edit tab and select Procedures.
-
Select the Start with AI option.
-
Review your process summary information and specify any additional instructions to be considered.
-
Click Generate, then wait for the draft procedure to be returned.
-
Review your draft procedure and choose one of the following options:
-
Regenerate draft: Resubmits the same prompt. Due to its nature, Generative AI can produce different results even when the prompt submission is the same.
-
Modify prompt: Go back and modify your prompt by adding additional instructions. To change your process summary information, you have to navigate to the Summary sub-tab.
-
Continue to editor: Accept the generated draft as your process’s first procedure draft and continue editing it within the Process Editor.
If you have more questions regarding this feature, see AI_Process Generator FAQ
Automation
Use Automation in Nintex Process Manager to integrate workflows with your processes. A workflow is an automated sequence of steps required to move a task from one stage to the next until completion of a process.
When a process map is published, it becomes much easier to identify the potential for process improvements. This is where automation comes into play. By using automated workflow technology, you can automate tasks within the processes you’ve created, allowing tasks to be diverted from user to user automatically according to the established workflow.
This feature connects Nintex Process Manager more closely with Nintex workflow A no-code/low-code solution that is used to automate parts of a given process or the entire process end-to-end. solutions (such as Nintex Workflow, Nintex for Office 365, or Nintex for SharePoint). Integrating Nintex Process Manager and Nintex workflows creates efficiencies, reduces errors and accelerates your business processes easily and smoothly.
-
For on-premise or Nintex for Office 365 users, it encourages collaboration between workflow designers and process experts, tracking workflows that are added to processes, highlighting where they impact the procedures and reporting on processes with associated workflows across the organisation.
-
For Nintex Workflow users it goes one step further to allow automation specialists An Automation Specialist is an IT / Technology Implementer/ Partner stakeholder who manages the relationship between the Process Expert and the Workflow Designer. Automation Specialists can associate workflows with processes, in addition to having Process Editor rights to the group they have been assigned to. within Nintex Process Manager to automatically provide detailed frameworks to workflow designers, then map the resulting automation solutions back into the process when they’re ready. This adds greater collaboration and accelerates the process for building effective solutions by exchanging clear information directly between the two platforms. For more information, see Automation.
Edit the procedure: Activities, tasks, and notes
In the Procedure tab, define or modify the workflow steps of your process.
- Add activities – Create major steps that group related tasks.
- Add tasks – Define detailed actions within each activity and assign roles.
- Add notes – Provide supporting information or clarifications.
- Add to-do items – Track tasks that must be completed before approval.
- Link documents – Attach files or connect related processes.
Add process links (processes, conditionals, and decisions)
Your process can be linked to other processes in several ways, showing relationships or connecting them into a longer sequence or 'mega' process.
In each case, you can connect an existing process, or create a new one to link, adding a ‘shell’ process you can come back to and fill out later.
-
Link to a Process: Process links connect processes that occur in sequence. This is useful if you have a step in your process that is too complex to capture in an activity. You can expand a linked process in the Map view to see the additional steps.
-
Add Conditional Process: Conditional processes are a sequence of extra steps that only apply in certain circumstances. It’s an ‘if needed’ step, not part of the usual process, but more complex than can be covered in a note.
-
Add Decision: You can add a decision diamond into your process for major decision points. Decision links can lead to an alternate process, or to an activity when the resulting alternate flow can be contained in a single step.
- Use decisions only for major decision points in your process.
- You cannot add a decision as the first step in the process. Any decision should be preceded by an activity providing context and meaning to the decision.
- Click on the Add Process Link drop-down list and select Add Decision
- Type a description for the decision (e.g., 'Application approved').
- Click on the Assign a role field and select the required role responsible for making the decision.
-
Configure both decision paths:
-
For the 'Yes' path:
-
Select Yes from the drop-down list
-
Select Activity or Process
-
If you select Process, click Add Process, select the process, and click Select
-
-
For the 'No' path:
-
Select No from the drop-down list
-
Select Activity or Process
-
If you select Process, click Add Process, select the process, and click Select
-
-
-
Click Save
Note: When an alternate flow from a decision results in a single step, you can add an activity link instead of the entire process. Additional information can be added as an output to indicate the next steps following this branch of the process.
Issue
When editing a process with a decision step, one of the decision branches (Yes or No) displays Continue instead of linking to an activity or process.
Cause
The Continue indicator appears when a decision branch has not been configured. Both the Yes and No paths must be set up for a decision to be complete.
Solution
-
Navigate to the process and click Edit
-
Click on the decision step to edit it.
-
Locate the branch showing Continue (either Yes or No).
-
Select either Activity or Process from the drop-down for that branch.
-
If you selected Process, click Add Process, select the appropriate process, and click Select.
-
Click Save to complete the configuration.
-
Repeat for the other branch if it also shows Continue.
Both decision paths must be configured before the decision step is complete.
Save, submit, and publish changes
- Save – Preserve changes while continuing to edit.
- Submit for approval – Send updates for review if an approval workflow is enabled.
- Publish – Make approved processes visible to all users. Only Promasters A Nintex Process Manager system administrator who administers a Nintex Promapp site and has rights to view and edit all areas of a Nintex Promapp site. or authorized publishers can publish.