Group Tags
In the Process Library section of the Process Discovery Console, you'll find processes displayed in Linear and Unified graphs. In the Unified graph view, you can attach tags to manage and organize nodes, which represent action types like clicks and keyboard strokes.
Managing groups is easier and more flexible with the new grouping process:
Individual Group Control: Improve control over your groups by opening or closing each one individually. This feature offers a more fine-tuned way of managing how groups display.
Efficient Group Creation: By grouping multiple nodes together, you can optimize your productivity and streamline your workflow.
These improvements in group tagging make it easier to work with nodes in maps, making your map simpler and helping you create sub-processes. The next section will guide you through working with grouped nodes in the process map using the Unified graph.
-
Select Process Library from the left navigation menu of the Nintex Process Discovery Console.
-
Select a process from the list.
-
Click on the Unified graph toggle to open the process as a Unified graph.
-
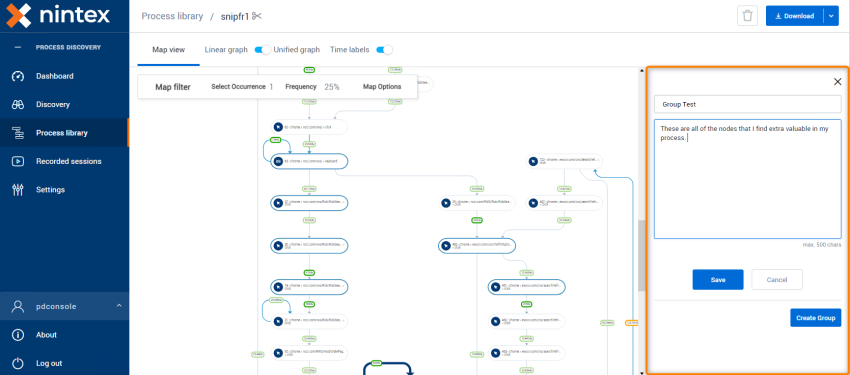
Hold down the CTRL key on your keyboard and click each node that you want to include in the group. When you click the second node, an actions pane opens on the right side of the screen.
-
Click the pen icon, and enter a name for the group. Make sure the group name is descriptive and provides a clear explanation of what the group represents.
-
Add a description for the group, if needed, to provide more context.
-
Click Save to save the group name and description.
-
Click Create Group to create the group. You can repeat these steps to create multiple groups as needed.
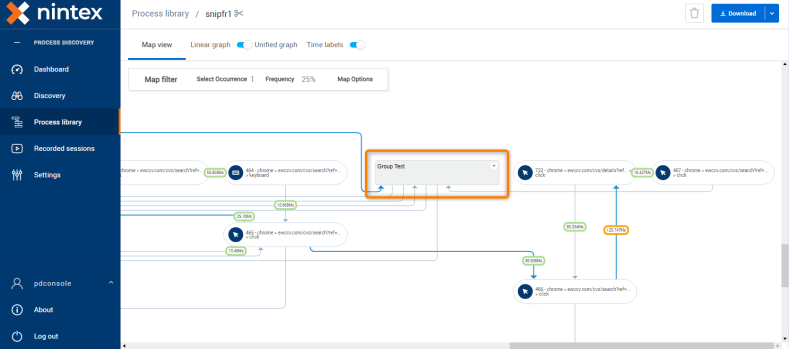
When there is a group of nodes, all selected nodes cluster together to form a single group node.
In the output files:
-
BPMN : The nodes are shown as a single group node.
-
CSV: There is a group column showing the group node.
-
-
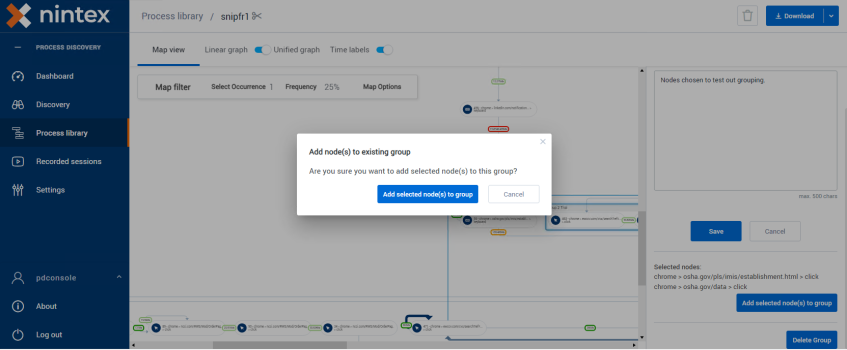
Select the group that you want to add nodes to.
-
Hold down the CTRL key and select additional nodes that you want to include in the group.
-
Click Add selected node(s) to group from under the list of the selected nodes.
-
Click Add selected node(s) to group in the confirmation dialog pop up.
-
Click Save.
-
Select the group name.
-
Select Delete Group.
-
Click Delete Group in the confirmation dialog pop up.
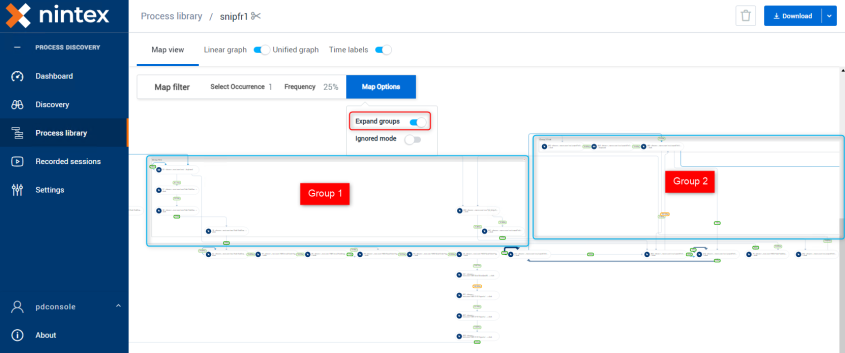
By default, groups of nodes are collapsed in the map view.
To expand all groups:
-
Click Map Options from the Map Filter.
-
Select Expand Groups.
To collapse all groups:
-
Click Map Options from the Map Filter.
-
Deselect the Expand Groups toggle.
To expand groups individually:
-
Locate the group you want to expand.
-
Click the small downward expand arrow in the right corner of that group.
