Getting Started with Process Discovery with the Console
The Process Discovery Console is a browser-based application that provides an overview of discovered processes with the ability to drill down into all the underlying details. The Console can be
accessed from any machine connected to the Process Discovery Server.
Using the Process Discovery Console, administrators can manage the teams and user access, define applications for discovery, manage the recorded data, and manage the Discovery Robots and their licenses.
Let's go over some of the basic and most essential configurations to get you started with Process Discovery.
To help you log in and use the Console, follow these steps:
Open Chrome or Edge web browsers from any machine with access to the Console server by entering its hostname or FQDN (Fully Qualified Domain Name), followed by /console.
So, for example, the URL might appear as follows:
-
localhost/console -
(FQDN)/console -
consoleserver.mycompany.com/console
To log in, use the below credentials unless other credentials were provided to you:
-
Username: pdconsole
-
Temporary password: Pd123456!
Password must contain:
-
One uppercase character
-
One numerical digit
-
A minimum of nine characters

Teams are organizational segments or units that share a single Discovery Server.
All Process Discovery settings and data are managed individually by a Team.
Console users may have permission to access the data of one or more Teams. You can think of a Team as a department in your organization, e.g., Finance, Sales, etc. One reason why you would want to have several Teams, is to divide the data collected from each department/division/group (AKA Team) in your organization. This way, when viewing or selecting a process, you can know which Team it was collected from.
To add teams, see Managing Teams.
Upon Process Discovery installation, the Robots connect to the Console automatically and become available for you to manually assign them to licenses and teams - all through the Nintex Console.
Assigning Robots is completed in two stages:
-
Assign a Robot (a user) to a Team.
-
Assign a License to the Robot (a user).
For details, see Managing Discovery Robots.
What else can you do here?
Go to Settings on the left navigation menu of the Nintex Console and select Applications.
For details, see Managing Applications.
Go to the Discovery page, select the desired Team, and click the Discovery button.
See Discovery for information and instructions.
Once you decide which processes you want to further analyze, add the processes to your library:
-
Select the desired process and click +Add to Process Library.
-
Fill in the process details and click Apply.
EXAMPLE: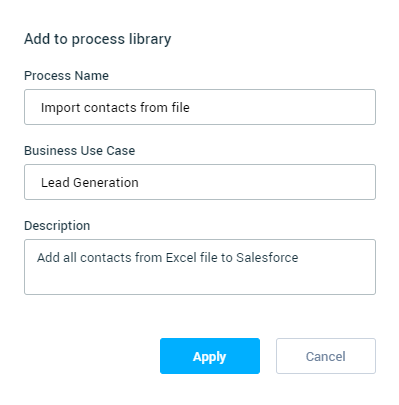
The Process Library contains processes selected by you for further analysis. This is the space where you can work on high-potential processes and consider ROI. For each process in the Process Library you can:
-
Analyze the different occurrences of a process and built the process map.
-
View different stats and process information such as process history, duration, used applications, variants, and type of actions.
-
Generate a set of files such as event log, automation, and documentation.
For more information, see Process Library.