Create a workflow with K2 Designer
The K2 Workflow Designer is a visual design tool that enables you to create simple to advanced workflows. By dragging and dropping steps to add user tasks and server events, and configuring those steps using static and dynamic values, you build your business logic into the workflow. The logic you design into the steps and flow of the various paths can contain rules, SmartObject data, forms, variables, inline functions, and other values based on the context of the workflow.
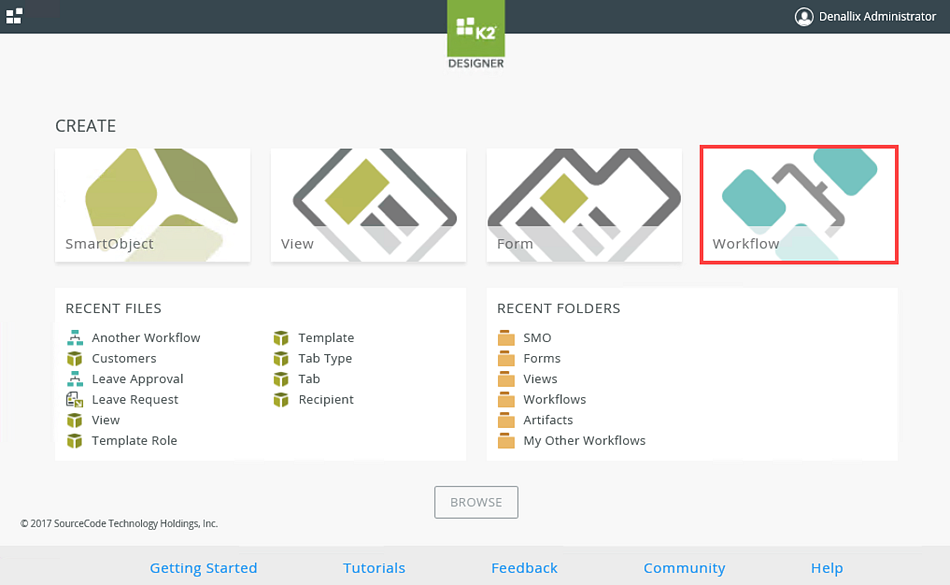
- From a supported browser, open the K2 Designer. The root URL is typically https://{webserver}/designer/. Click the Workflow link.
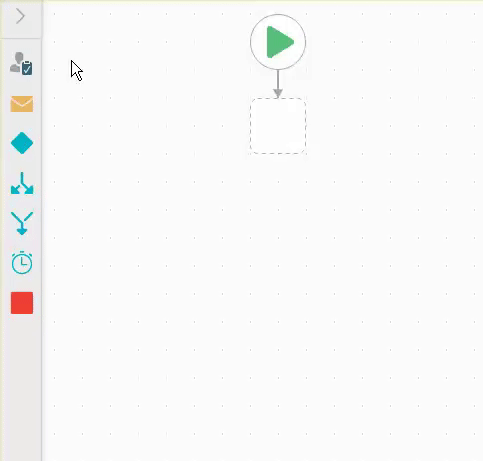
- The K2 Workflow Designer displays as follows:
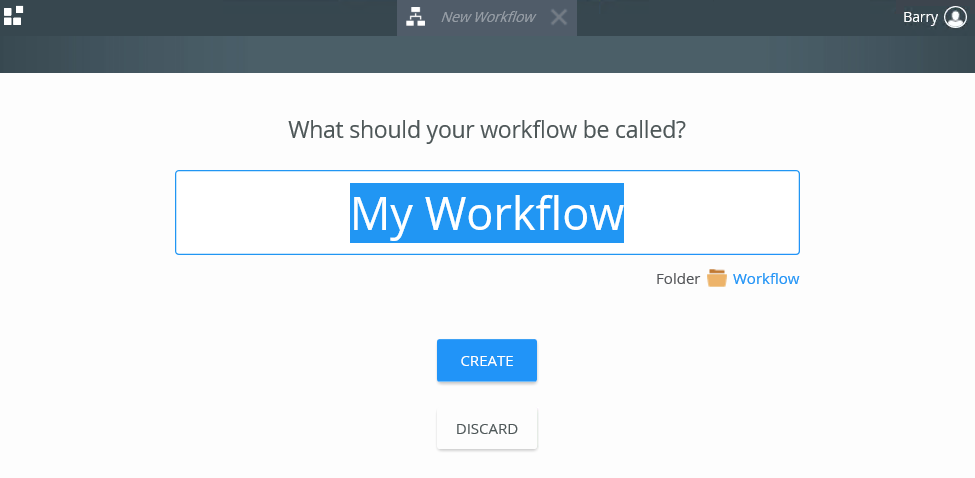
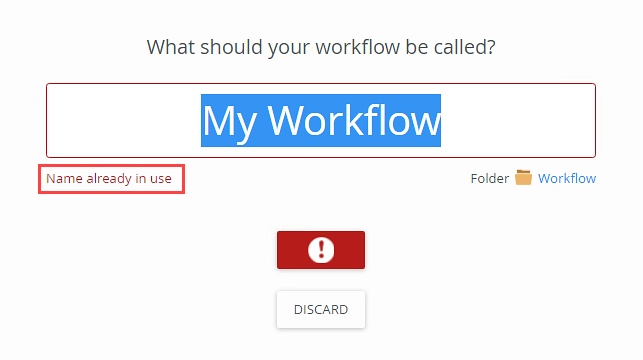
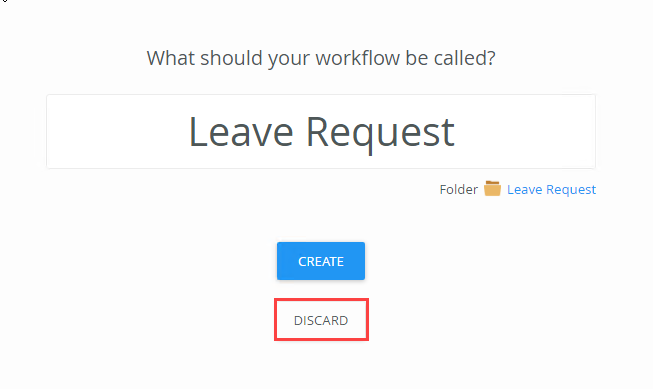
- Enter a unique workflow name.
- Click the Folder link to specify where to create the new workflow, and then click Create.
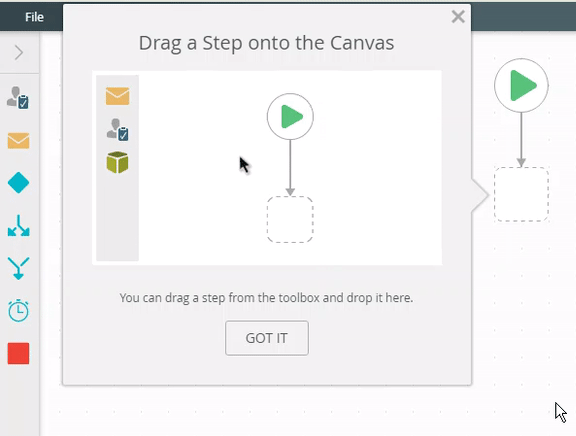
- The K2 Workflow Designer page displays. When you create a workflow for the first time, you see an animated tip. This tip shows you how to drag step onto the canvas. Click the X to close the tip. If you want to remove the tip, click the Got It button. For more information on how to turn the tip back on, see the Ribbon topic.
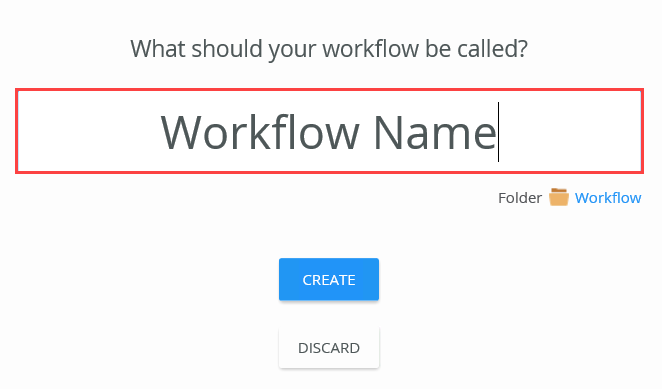
- If the workflow name already exists in the selected folder, a warning messages displays Name already in use when clicking the Create button. The Create button stays inactive until a unique name is typed.
- From here you can start building your workflow using steps from the Toolbox.
- Click the Discard button to cancel creating the workflow. The workflow is not created and you are returned to the K2 Designer page.
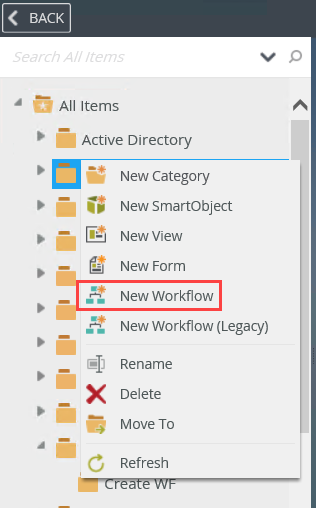
- To create a workflow directly from a category, right click the category and select New Workflow from the menu.
The following table explains the available options:
| Option | Explanation | How to Use |
|---|---|---|
| Workflow Name |
Use this field to add the workflow name. Workflow names must be unique. If the name conflicts with an existing workflow, you'll be shown a warning. There may be restrictions in the characters you can use and the length of the name that you can specify. For more, see KB002544- Item Naming: Known Restrictions and Limitations
|
Type a unique name into the field.
|
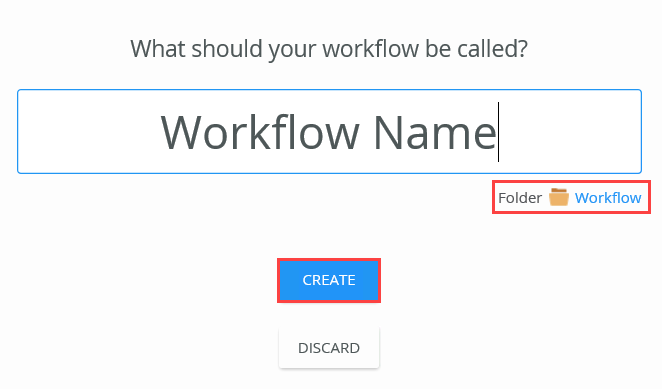
| Folder | Use this link to select the category for the workflow. If no category is selected the workflow is created in the default Workflow folder. It is recommended that you create a category to keep all objects related to the workflow together, and perhaps group them by business function or department. | Click the Workflow folder link to browse to the required location. |
| Create | Use this button to create your new workflow. This button is inactive (grayed out) if the workflow name is not unique. | Click the Create button to create the new workflow. |
| Discard | Use this button to discard any changes made on this page and return to the K2 Designer page. | Click the Discard button to discard any changes. |
For more information about the different browse states and errors, see the Browse States topic.
For more information on how to use the breadcrumb bar, see the How to use the Breadcrumb topic.
For detailed information on the Toolbox see the Toolbox Overview topic. Select the Context Browser tab to interact with SmartObjects, Workflow related fields, Functions, and to create Fields .
When creating a new workflow keep in mind the following considerations:
- Each workflow name has to be unique
- Only Users assigned with the applicable user rights are able to create a workflow. See Permissions below for more information. Sometimes multiple people must work on the same workflow. The K2 Workflow Designer enables multiple people to make changes to the same workflow at the same time.
When you deploy workflows from K2 for SharePoint or K2 Designer, only the person deploying the workflow is granted Admin rights. Any additional Start / Admin / View rights need to be manually configured in K2 Management. All deployment actions use the K2 Server Service account. However, all calls to the server are validated using the users credentials.
After deploying a workflow, use the manage permissions... link on the Deploy Success toast message to navigate to K2 Management. From here you need to manually configure the workflow rights.

To access the K2 Workflow Designer you need K2 Designer rights in the K2 Management site. This also allows you to create and edit workflows in the designer.
To deploy a workflow you need Export rights on the Workflow Server. For more information and how to grant rights, see the Server rights topic.
You need process rights to start workflows, and view workflow reports.
Process rights are permissions assigned to individuals. As the administrator you can control workflow access with these rights.
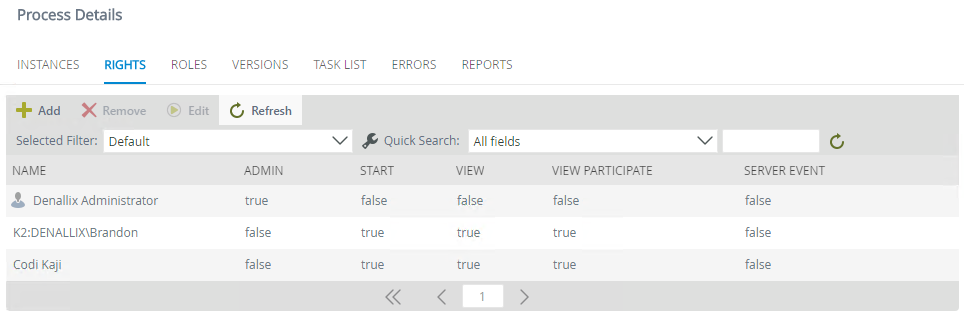
Process rights consist of the following:
| Process Rights | Description |
|---|---|
| Admin | Required to view, add, and edit the Process Rights for a workflow and administer active workflow instances. |
| Start | People with Start rights can start workflow instances assigned to them. |
| View | People with View rights can view reports for all instances of a workflow. |
| View Participate | People with View Participate rights can view reports on only on those workflow instances where they are the originator (submitted the original form), or where they actioned a task. |
| Server Event | This is a special type of permission used for asynchronous server tasks, where an external system completes a server event such as a Send Email step. |
For more information on managing workflow rights and roles see the Manage Workflow Rights and Manage Roles sections within the Workflows topic.