Using the Workflow Designer
The Workflow Designer provides the ability to build workflows using and integrating with SmartObjects, views and forms. The Designer user interface is contained within a web browser which enables the application to be accessible from anywhere.
You can access the workflow designer by launching a web browser and navigating to the Designer site URL, e.g. https://{server}/designer , where {server} is the name of your application server, its network alias, or the name of the server where the web components have been installed. Check with your administrator if you are not sure what the {server} value is for your environment.
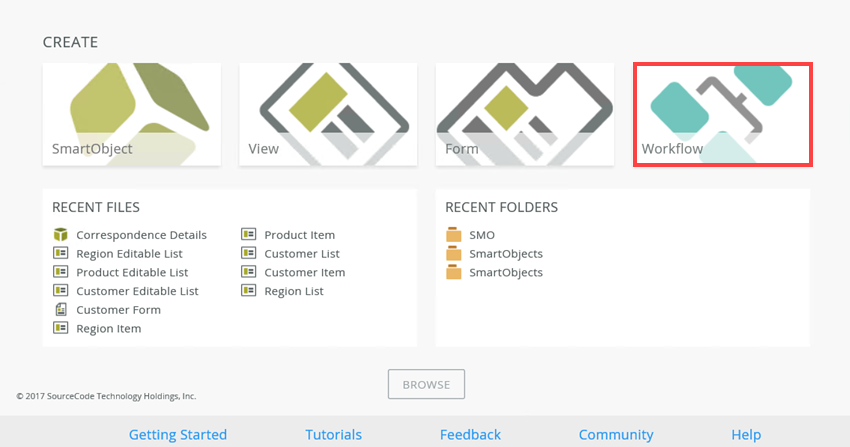
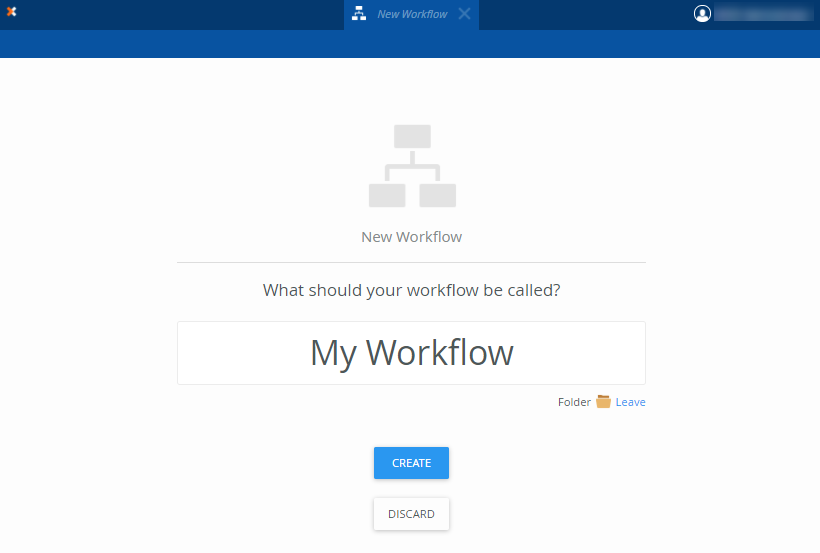
- To create a new workflow, click the Workflow link within the CREATE section.
- The Workflow Designer displays as follows:
- To access previously created workflows, locate the workflow folder in the Designer category tree. This folder contains all the workflows you created and / or deployed. Select the required workflow and click the Edit link.
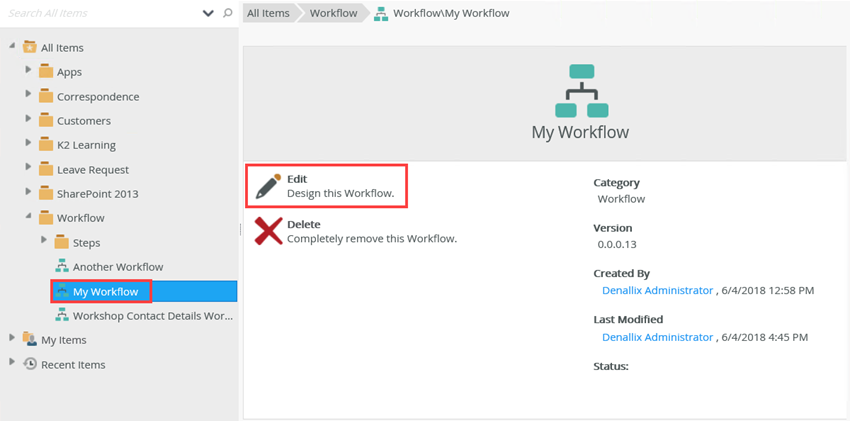
- The Workflow Designer displays as follows:
For more information on how to create a new workflow see the Create a New Workflow topic.
For more information on how to edit a workflow see the Open and Edit an Existing Workflow topic.
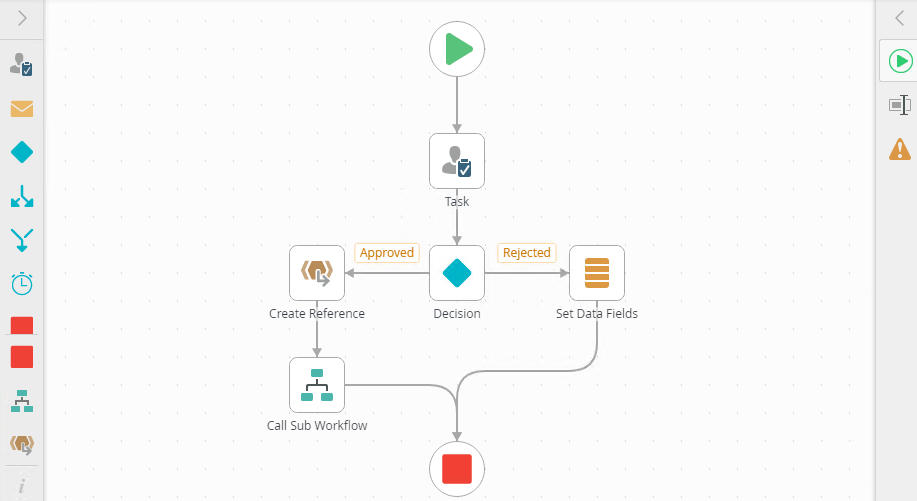
Get to know the Workflow Designer
The image below is an overview of the available areas of the Workflow Designer.
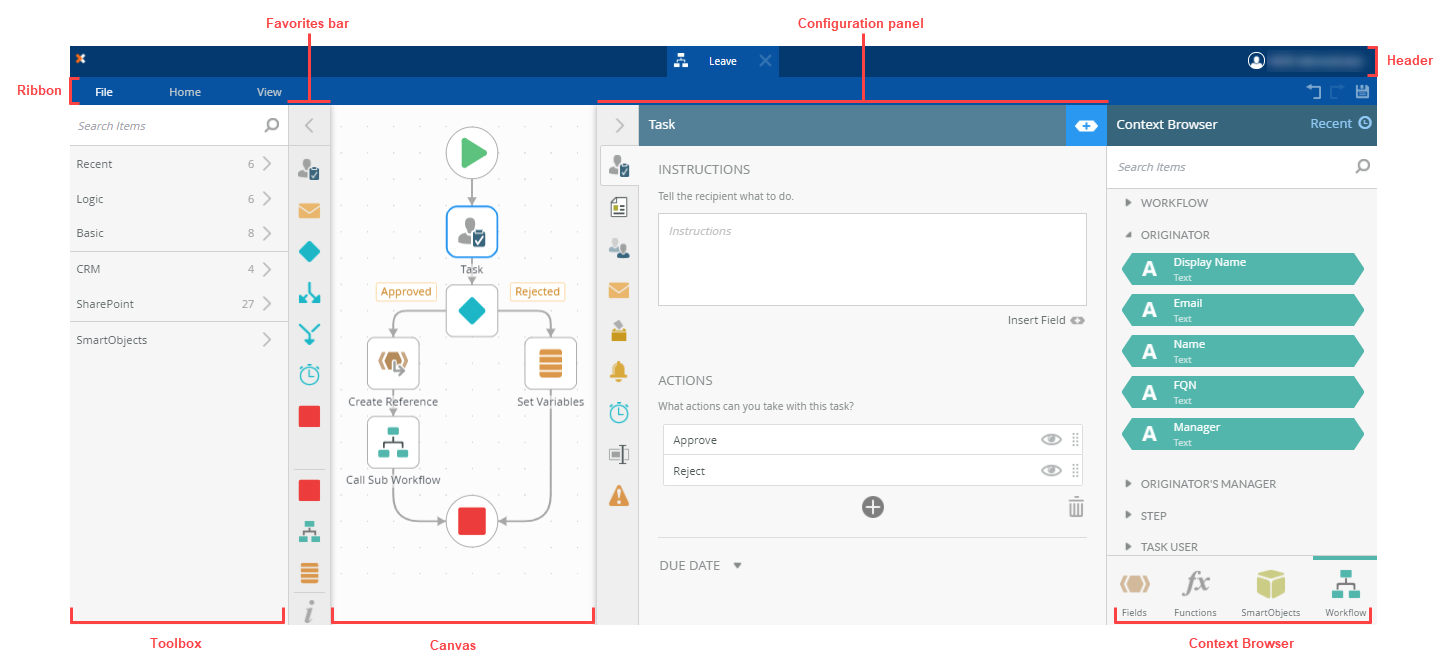
The table below contains quick links to the different areas of the Workflow Designer.
| Area | Description |
|---|---|
| Canvas | The canvas is a user friendly dynamic environment that caters for a quick and easy way of designing business workflows. |
| Navigate the Header | The header contains information on the workflow name and details for the logged in user. |
| Navigate the Ribbon | The navigation ribbon (or toolbar) contains most of the tools and commands you will use to create workflows. |
| Toolbox | The Workflow Designer Toolbox contains steps to build workflows. These steps are dragged onto the canvas and configured within the Configuration Panel as well as the Context Browser. |
| Configuration Panel | The Configuration Panel allows the workflow designer to configure each of the steps added to the workflow. The steps are selected from the Toolbox or the Quick Access Panel and dragged onto the canvas. When selecting steps, the configuration panel displays configurable properties in the available properties tabs. |
| Context Browser | Use the context browser to create pre-configured dynamic values by dragging Functions, Fields, SmartObjects and Workflow related items into the fields. |
| Rules Designer | Use the rules designer to create custom business logic to direct the flow of the processes in a workflow. |