Identity Providers
K2 Cloud supports using different Identity Providers (IdPs) that you can use to authenticate and authorize users in your environment. For example, you may have a repository of user accounts in Google, and you want these users to use their Google logins to authenticate against and use your environment.
There are two main aspects for Identity Providers in K2 Cloud:
- Provisioning of user information from an identity store to the product.
The product leverages the System for Cross-domain Identity Management (SCIM) specification to provision/retrieve user information from SCIM 2.0-compliant IdPs that support OAuth Bearer tokens. Using SCIM to synchronize user identities from your identity store to the product requires that you implement a SCIM provider application that calls the K2 SCIM endpoint. For reference information to create a SCIM provider to pass user identity information to the K2 SCIM endpoint, see the SCIM integration with an Identity Provider: Manual/Custom approach and the SCIM API Reference topics. - Authenticating users when they log in to applications.
The product leverages OpenID Connect (OIDC), which is an authentication layer on top of OAuth 2.0. This mechanism allows the product to authenticate users against IdPs that support OIDC.
While the product uses OIDC OAuth flow, it does not support every authentication provider supported by OIDC.
For more on the architecture of Identity Providers in the product, please see the topic Identity Providers Architecture.
- Contact Support to have your Identity Provider onboarded to your environments. As part of this process, you must provide the support team with information for an 'admin' user for each domain you want to add to your the product subscription. You need to provide the following information for each Identity Provider and each domain you want to enable in your the product subscription:
- The name of the Identity Provider (e.g. Google, Azure Active Directory, etc.)
- For each Identity Provider domain to be registered, provide information for the admin user that will be used to authenticate with the product to perform the SCIM synchronization:
- Admin user Fully-Qualified Name
- Admin user Full Name
- Admin user Email
- Admin user Phone Number
- For Okta, create an app in Okta to provide the following information:
- Client secret
- Client ID
- For PingFederate, provide support with the following information:
- Client Secret
- Client ID
- For onelogin, create an app in onelogin to provide the following information:
Client ID
Client Secret
Domain Name
KUID - Environment unique identifier
Admin user name (onelogin)
Only one Okta domain can be connected at a time.
Every Okta integration requires two apps to be configured in Okta. The first (described below) is to provide the client secret and client ID to the onboarding team, and the second is for integration with the product. The second app is documented in the topic Configuring Okta SCIM integration for K2 Cloud. - You will receive a .json file configured with values for the specified Identity Provider and domain.
- Use this json file or the information in the json file to create a SCIM application in your Identity Provider that synchronizes user identity information between the Identity Provider and the product. See the topic SCIM integration with an Identity Provider: Manual/Custom approach for more information on how to build the SCIM application. Note that other users will only be able to authenticate with the product once the initial user synchronization has completed, and the SCIM application should send updated user information to the product as necessary to keep user information synchronized.
- Create an app in Okta to provide the Operations team with a Client secret and Client ID.
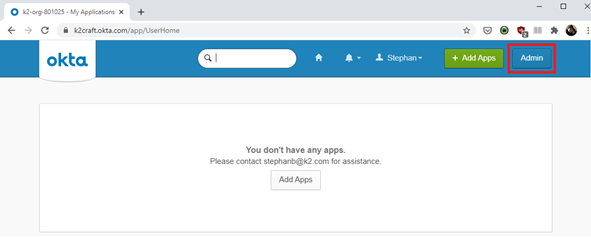
- From the Okta home page, navigate to the admin portal.
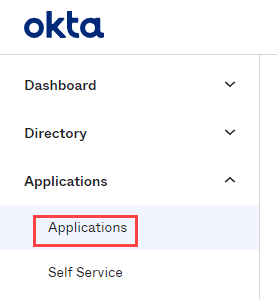
- Click Applications in the menu on the left.
- Click Create App Integration.

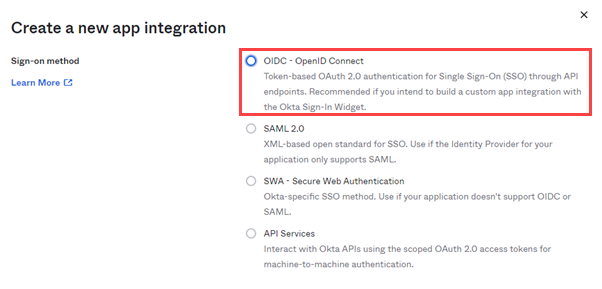
- Select OIDC – OpenID Connect.
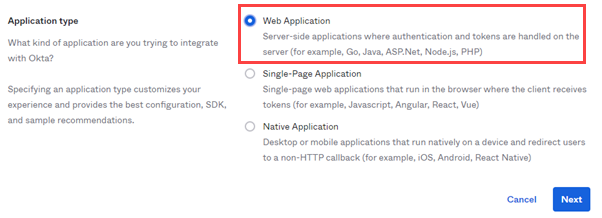
- Then select Web Application and click Next.
- Fill in the New Web App Integration form with the following information:
- Give your app a name in the App integration name field.
- Remove any Sign-in redirect URIs and add the following:
- https://login.onk2.com/signin-okta
- https://login.onk2.com/signin-okta1
- https://login.onk2.com/signin-okta2
- https://login.onk2.com/signin-okta3
- https://login.onk2.com/signin-okta4
- https://login.onk2.com/signin-okta5
Remove any Sign-out redirect URIs and add the following:
https://login.onk2.com/signout-callback-okta
- Under Assignments, select the Skip group assignment for now radio button.
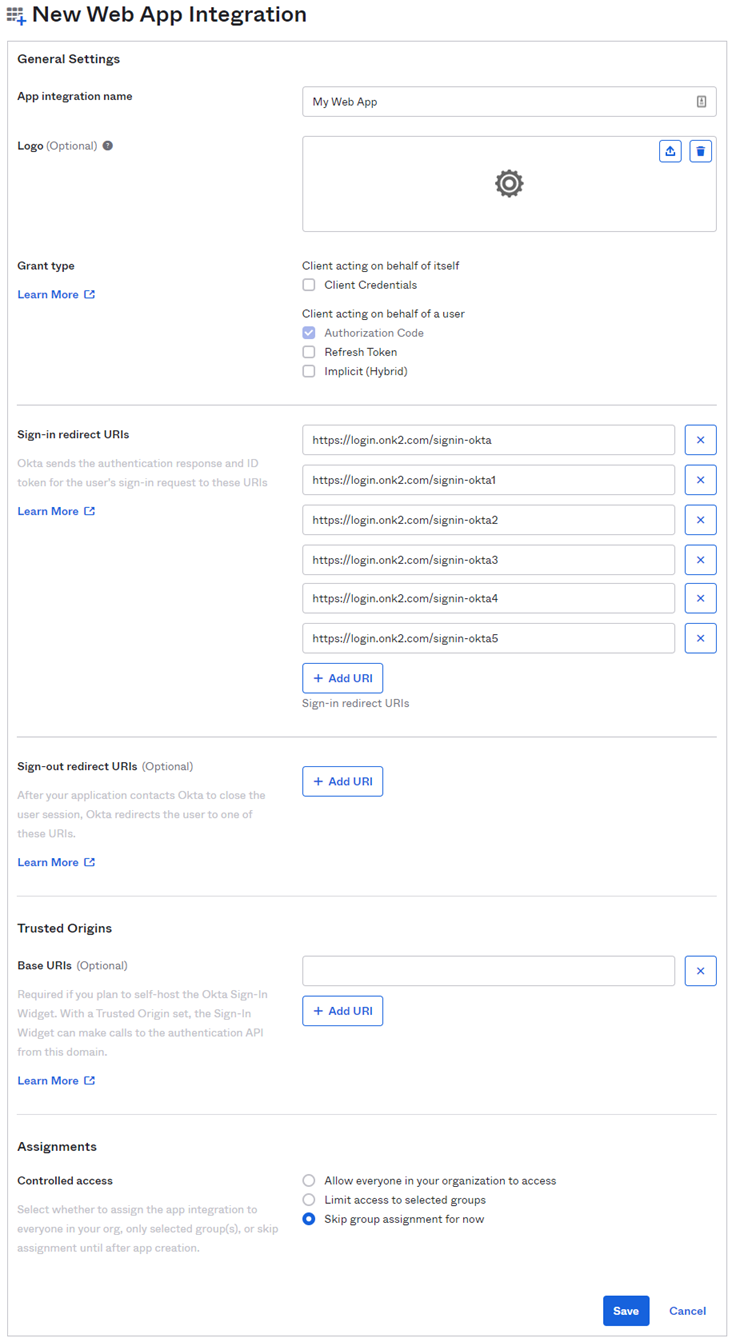
- Save the Client ID and Client secret.
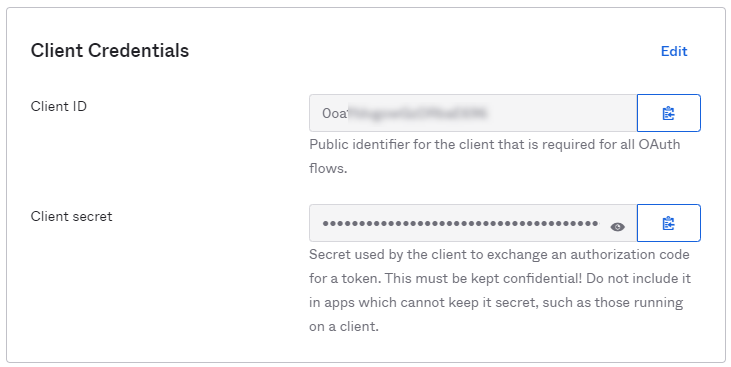 The Client ID, Client secret, and your Okta domain (e.g. nintexdocs.okta.com) must be supplied to the Operations team.
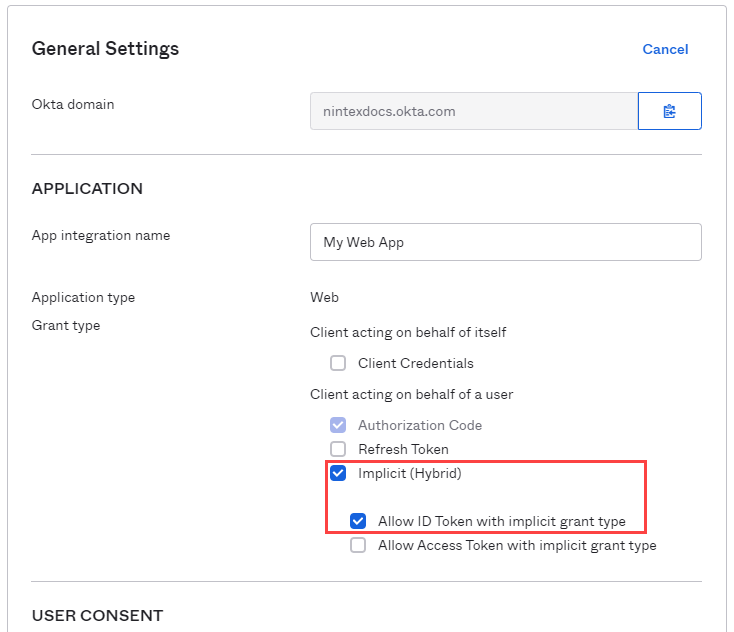
 - Under General Settings, click Edit. Then select Implicit (Hybrid) under the Grant type / Client acting on behalf of a user section. Make sure the Allow ID Token with implicit grant type check-box is selected. Click Save at the bottom of the form to save your changes.
- From the Okta home page, navigate to the admin portal.
- Assignments
- Navigate to the Assignments tab and use the Assign button to add assignments.
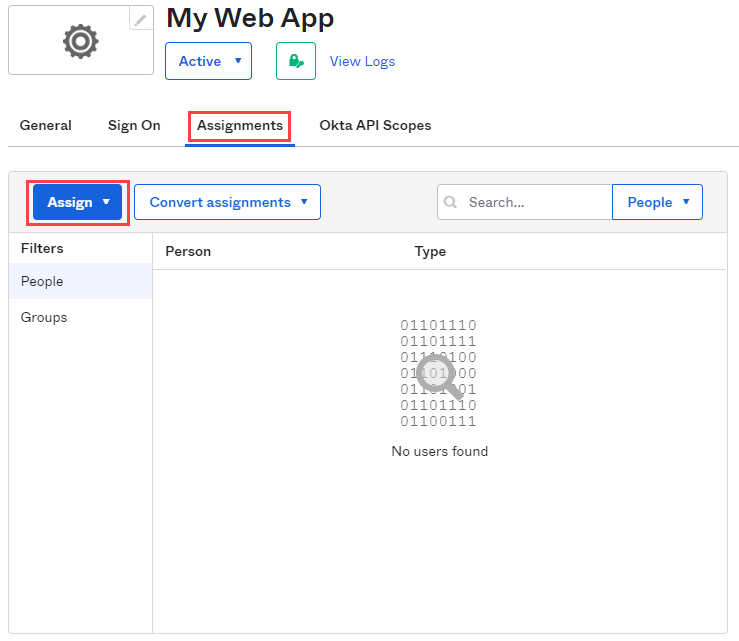
- Click Assign to People

- Click Assign next to the user you wish to add. On the next screen, click Save and go back, no modifications are needed.
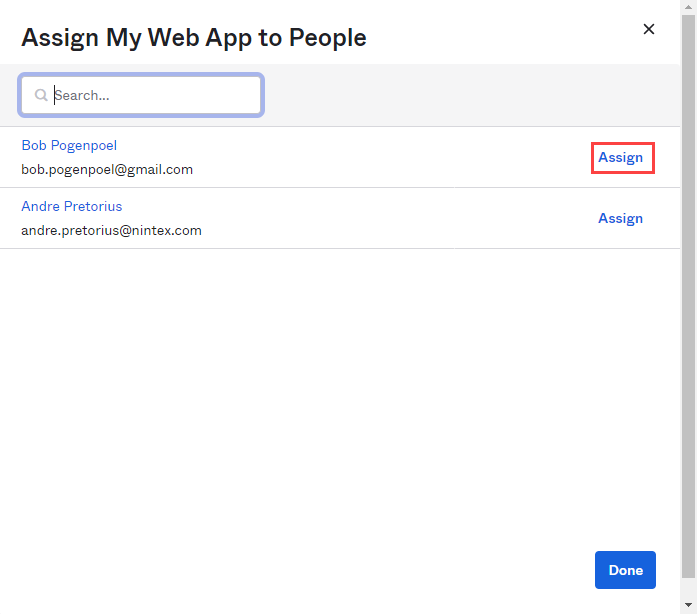
- Once you have assigned all the desired users, click Done.
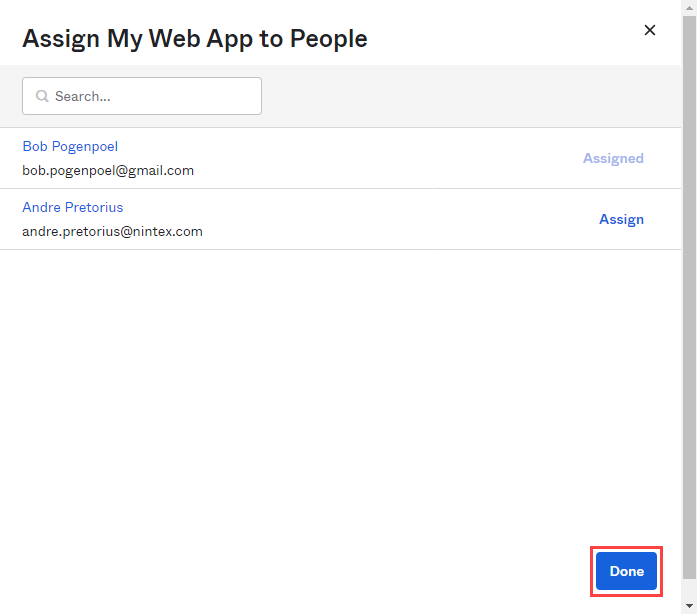 Users that are not assigned will not be able to successfully authenticate and login using the app.
- Navigate to the Assignments tab and use the Assign button to add assignments.
The Okta app creation is now complete.
Create an app in onelogin to provide the Operations team with the relevant details.
- From onelogin Administration, click Applications in the menu at the top, then click Add App.

- Search for and select OpenId Connect (OIDC).

- Give your app a name in the Display Name field and click Save.

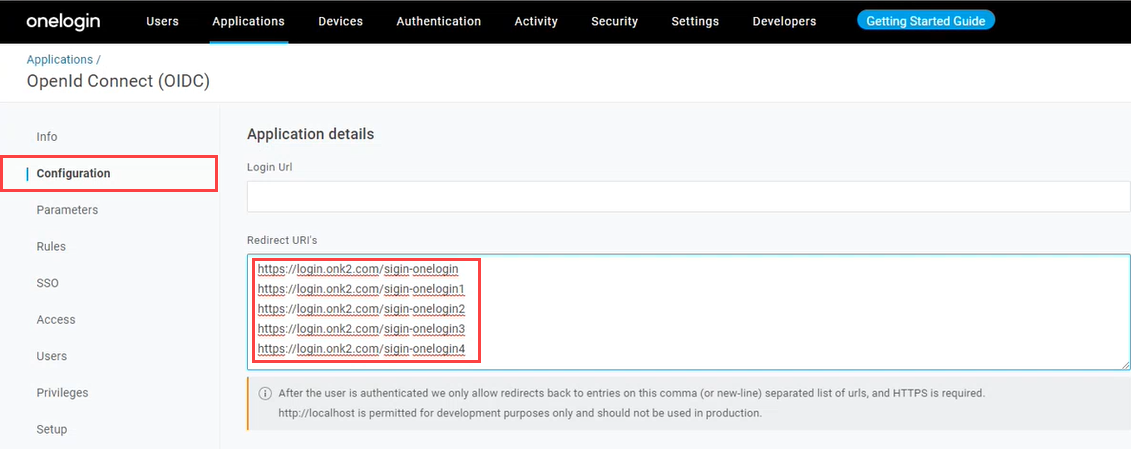
- Select the Configuration tab in the menu on the left and add the following under Application Details>Redirect URI’s:
- https://login.onk2.com/signin-onelogin
- https://login.onk2.com/signin-onelogin1
- https://login.onk2.com/signin-onelogin2
- https://login.onk2.com/signin-onelogin3
- https://login.onk2.com/signin-onelogin4
- From the SSO tab, under Token EndPoint, change the Authentication Method to POST, then click Save to save the app.
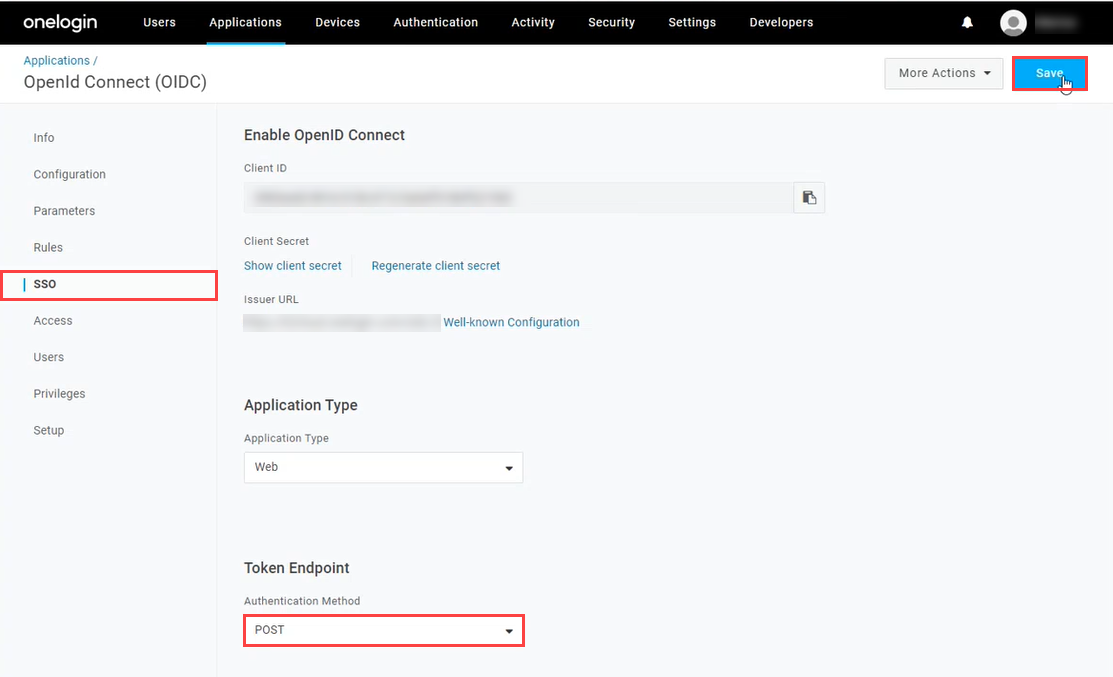
- Select the SSO tab again and copy and save the Client ID and Client secret.
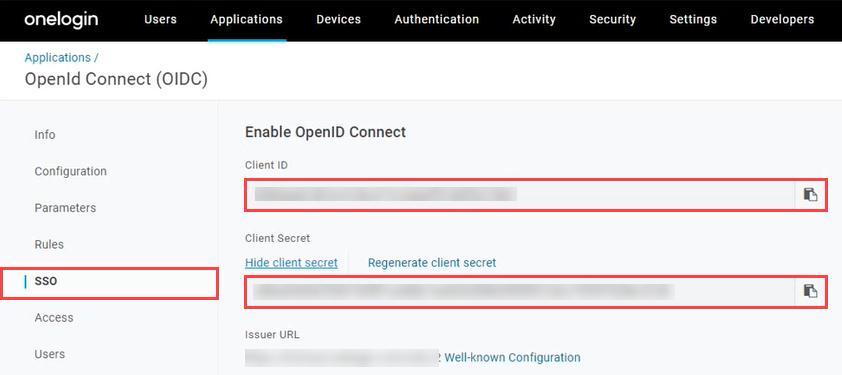 The following must be supplied to the Operations team:
- Client ID
- Client Secret
- Domain Name (e.g. nintex.onelogin.com)
- KUID - Environment unique identifier
- Admin user name (onelogin)
The onelogin app creation is now complete.