Configuring Okta SCIM integration
Use this guide to configure and install the Nintex K2 Cloud app in Okta. The app lets you use OAuth 2.0 Authorization Code grant flow as your method of authentication and SCIM as your method of identity provisioning.
Definitions:
- Nintex K2 Cloud instance: the Nintex K2 Cloud platform provisioned by the Nintex Cloud Ops team.
- Nintex K2 Cloud app: the application in Okta set up to provision identities using the SCIM protocol.
Prerequisites
Ensure that you have the following before you start configuring Okta:
- An Okta account with admin privileges
- An On-boarded Nintex K2 Cloud instance with SCIM, by the Nintex Cloud Operations team, and have the following information from them:
- Authority
- BaseUrl
- Token
Supported Features
The following items are the current features supported by the Okta SCIM integration for a Nintex K2 Cloud instance:
- SP-initiated SSO
- Create Users
- Update User Attributes
- Deactivate/Reactivate Users
- Group Push
Procedure
Use these steps to configure the Nintex K2 Cloud app in Okta.
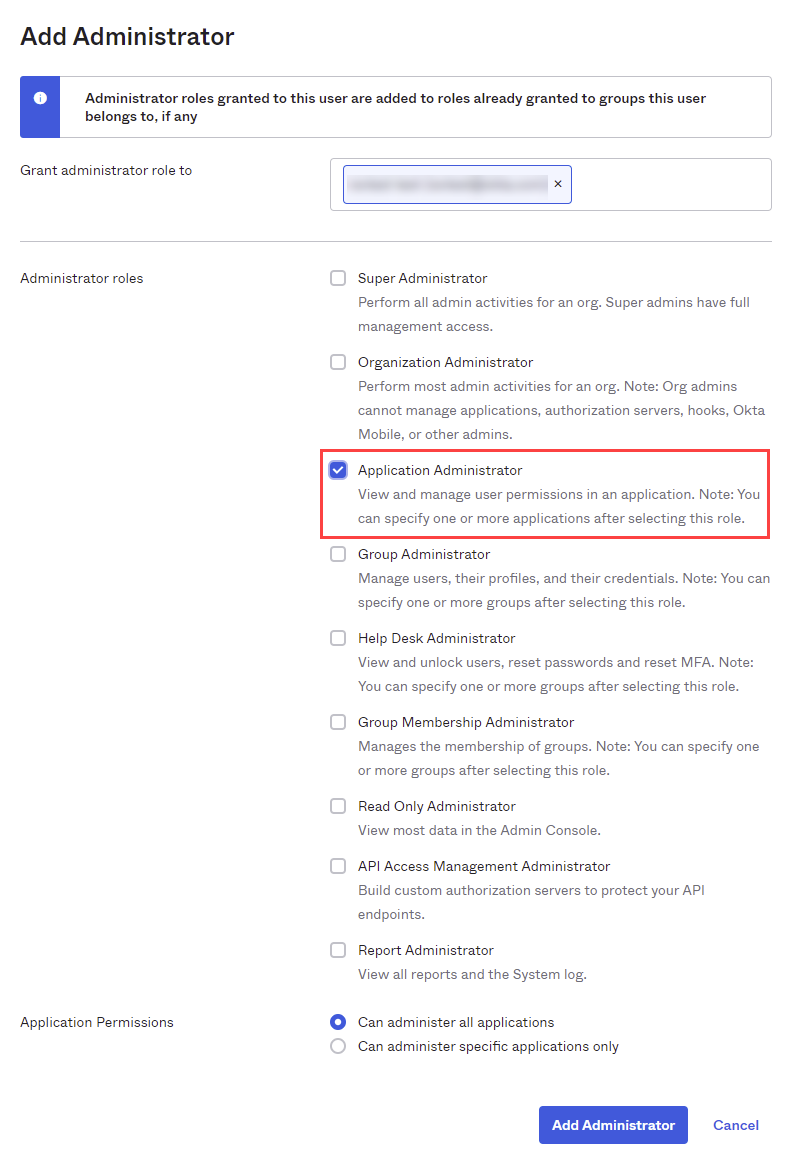
For this step you need the Authority, BaseURL, and Token mentioned in the prerequisites section above:
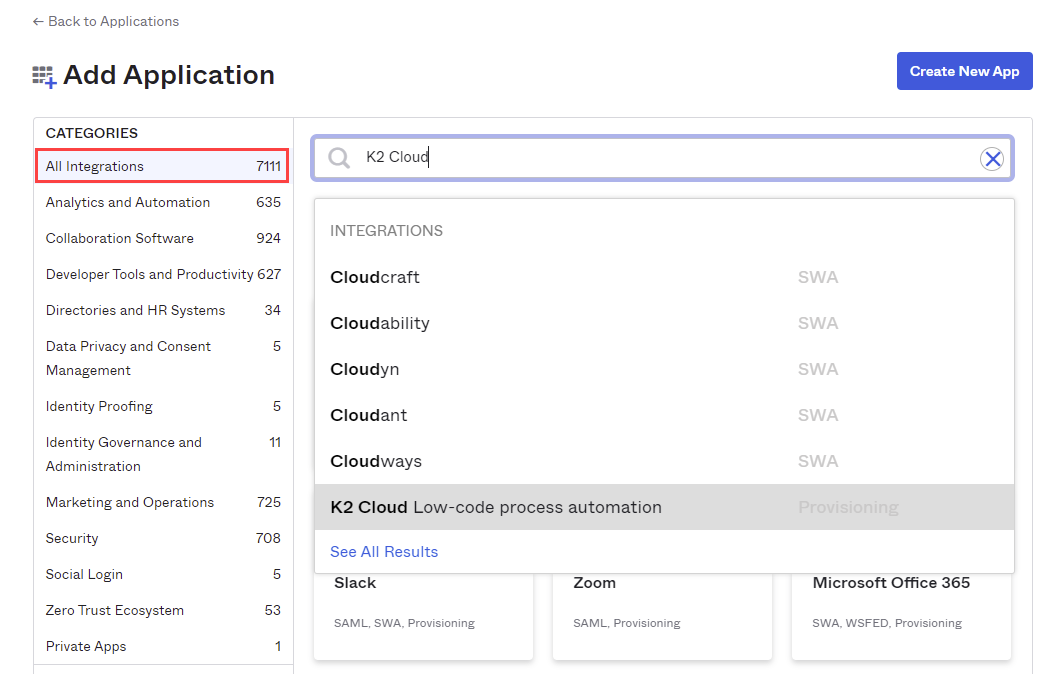
- Log in to Okta and add the Nintex K2 Cloud app by clicking Add Application:

- Select the All integrations tab, search for and select the Nintex K2 Cloud Low-code process automation app.
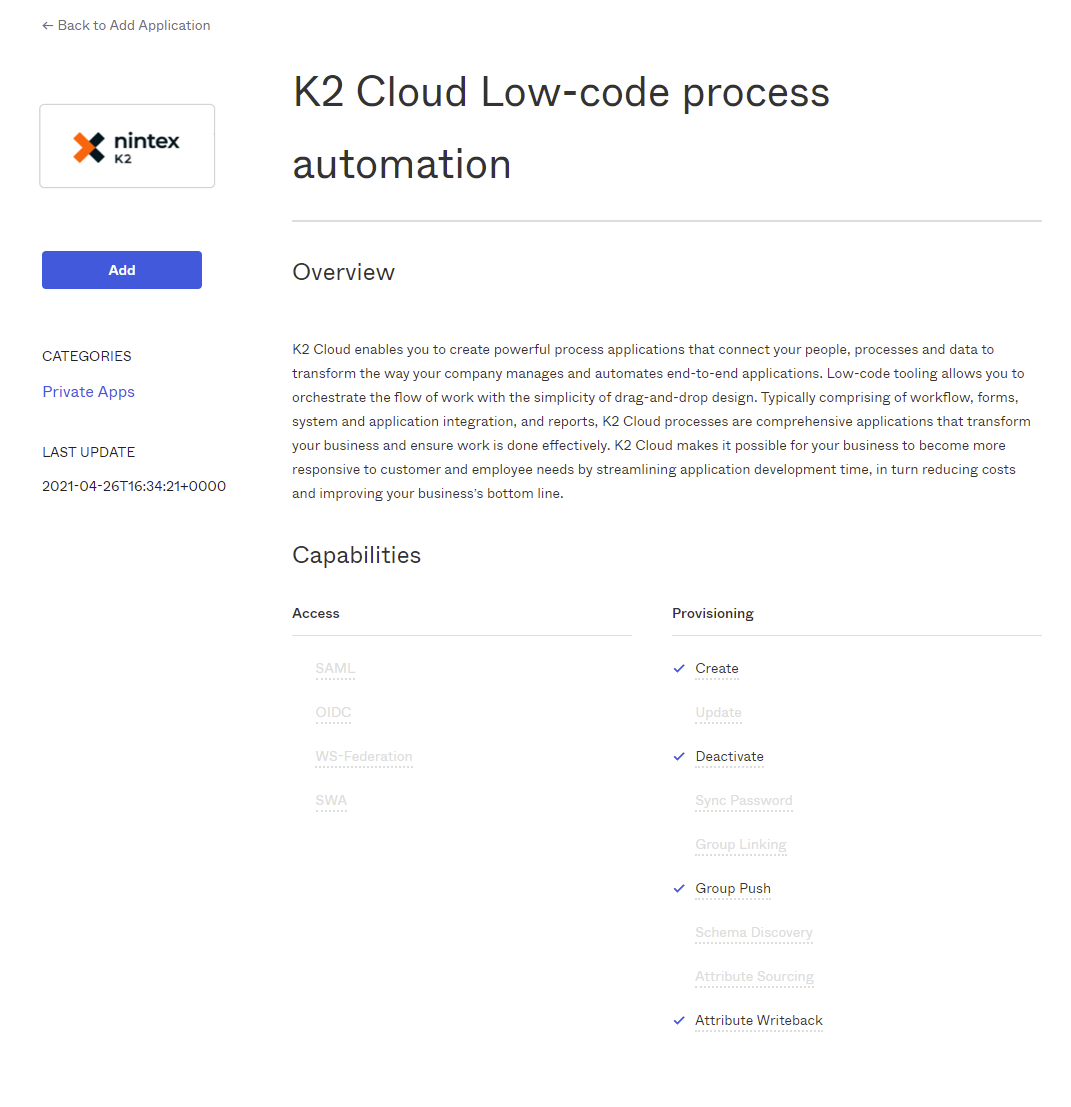
- Click Add to provision the app.
- Configure the app by filling the App Settings with the information Nintex DevOps supplied when you were on-boarded. Also check the Application visibility check boxes so that the application icon is not shown to users or in the Okta Mobile app, as in the image below. Click Save to continue.
For example:Received from DevOps Description Example Authority This URL/token maps to the App Authority value in Okta https://login.onk2.com/42705858-CCFF-40AE-BD24-307B4D49AA03 BaseURL The domain part of this URL maps to the Scim domain value in Okta. The BaseURL received from DevOps is https://scim.onk2.com/. The domain part is: onk2 onk2 Token This GUID maps to the SCIM Config Token value in Okta E91A3376-8D6B-4496-8D5E-17F651204526 
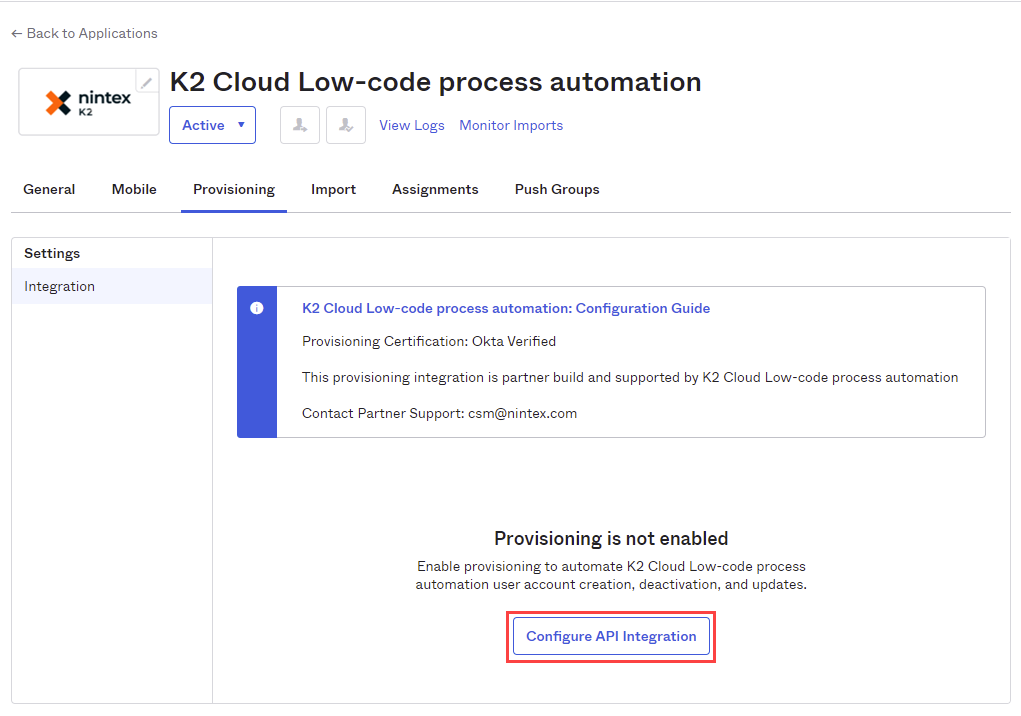
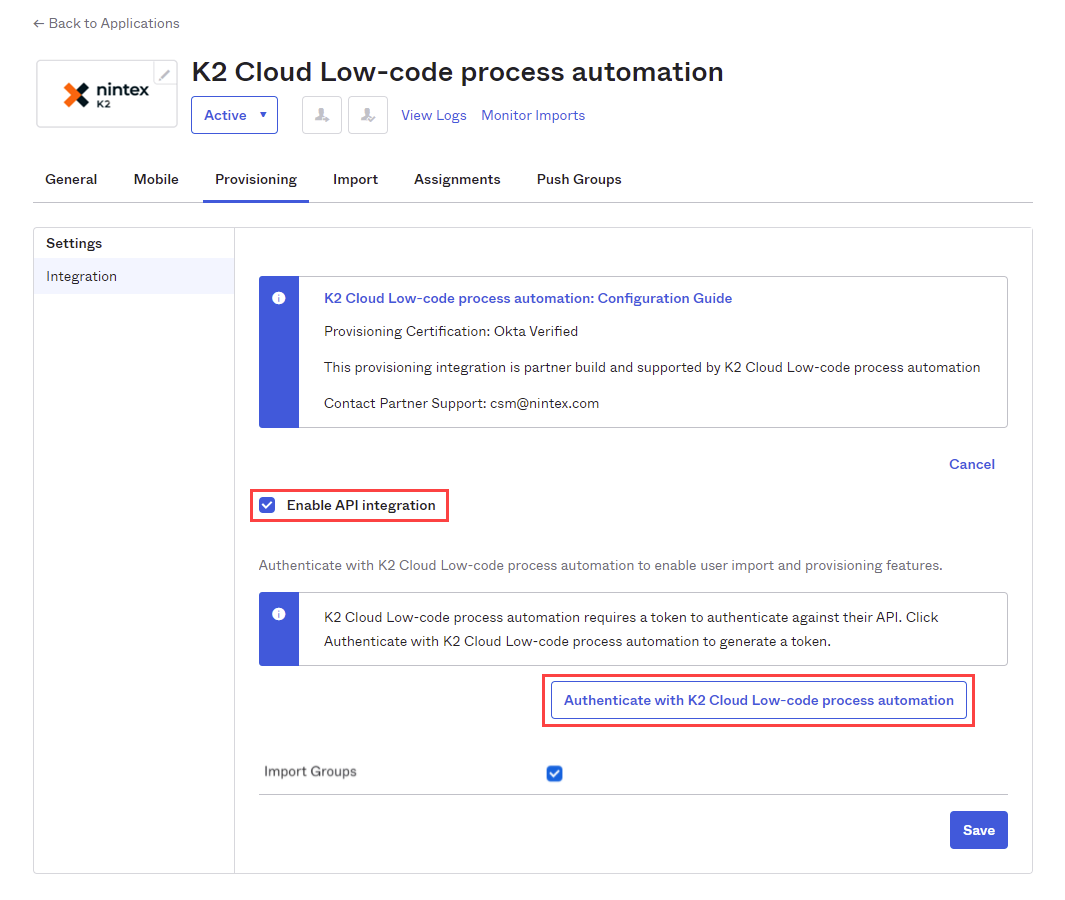
- On the Provisioning tab, click Configure API Integration.
- Check the Enable API integration check box and click Authenticate with K2 Cloud Low-code process automation to enable provisioning features.
The identity token service login page opens. Select your Okta domain (dev-xxxxxx.okta.com) and login to continue.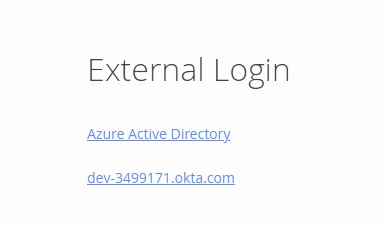
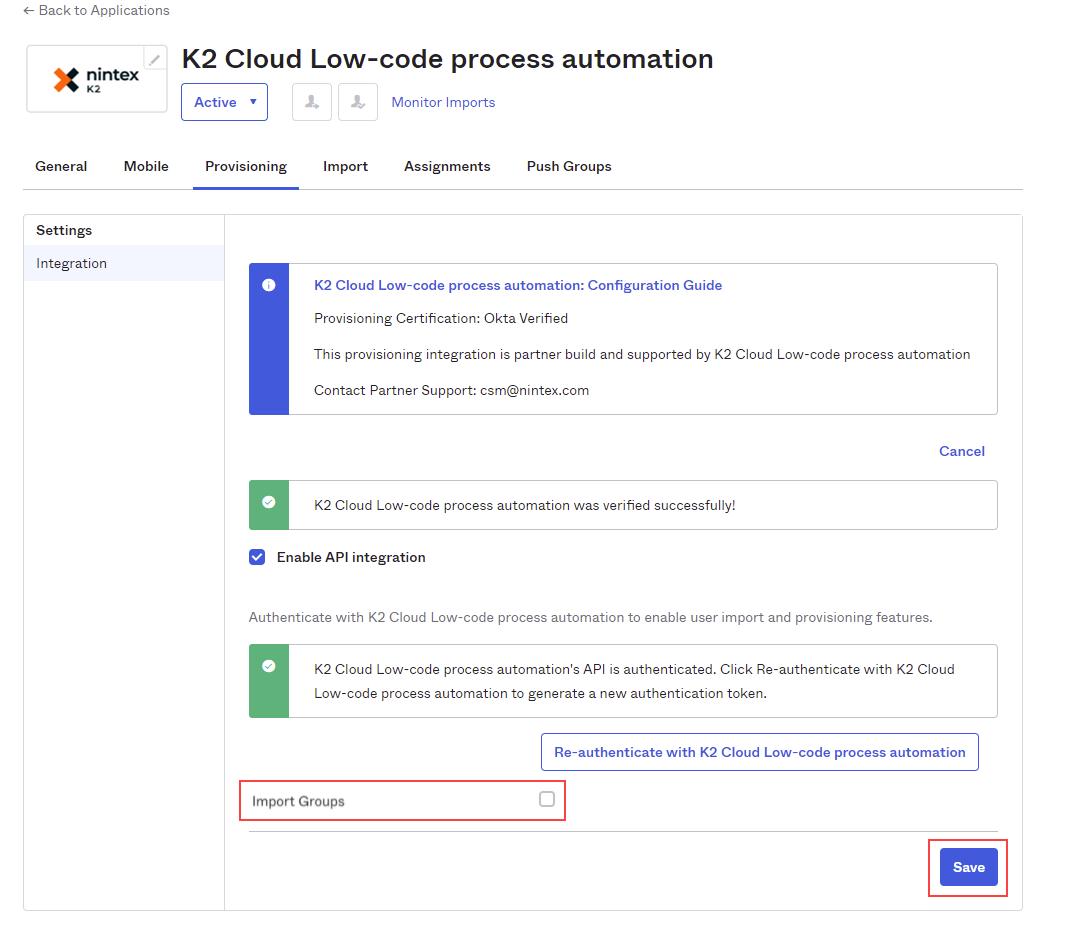
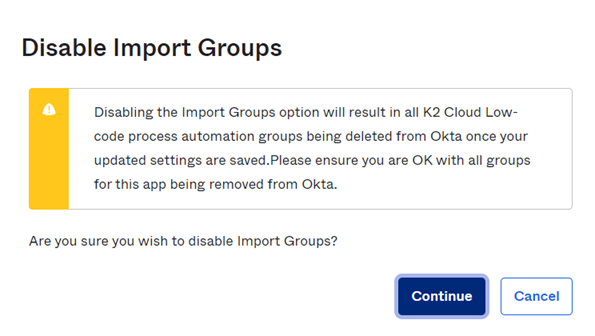
You are returned to the Okta provisioning page after logging in. - Uncheck the Import Groups check box. The Nintex K2 Cloud identity sync service does not support Okta importing groups from Nintex K2 Cloud. Click Continue in the pop-up dialog, then click Save to continue.
When you uncheck the Import Groups box, this dialog shows, click Continue:
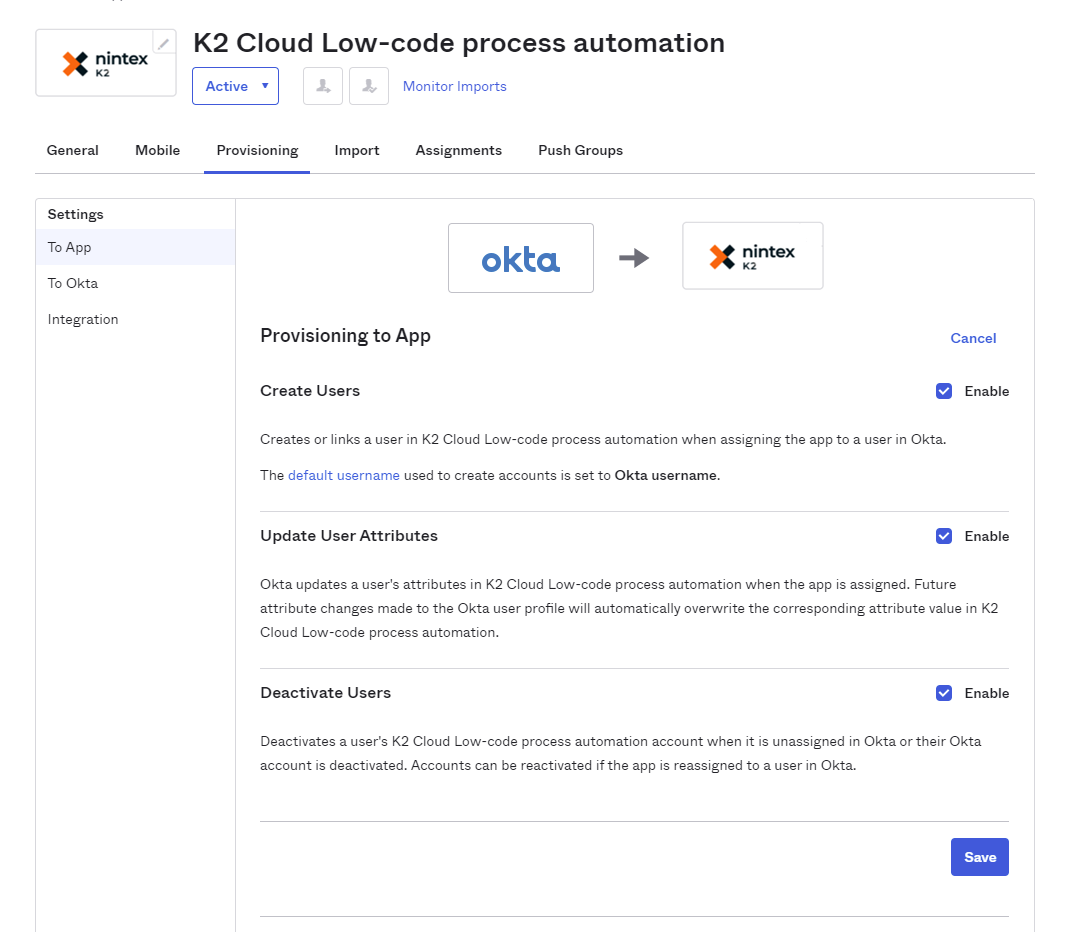
- Click To App under Settings. Click Edit and select Enable for each of the options you'd like to have from the supported features listed above. For example:
- Create Users
- Update User Attributes
- Deactivate Users
- On this same page, take note of the Attribute Mappings. No action is required. The top attribute is the Okta attribute mapped to the SCIM attribute underneath it.A user's username and a group's name are immutable properties in the product. They cannot change after they have been created, because of this, the product doesn't support renaming users and groups in Okta.
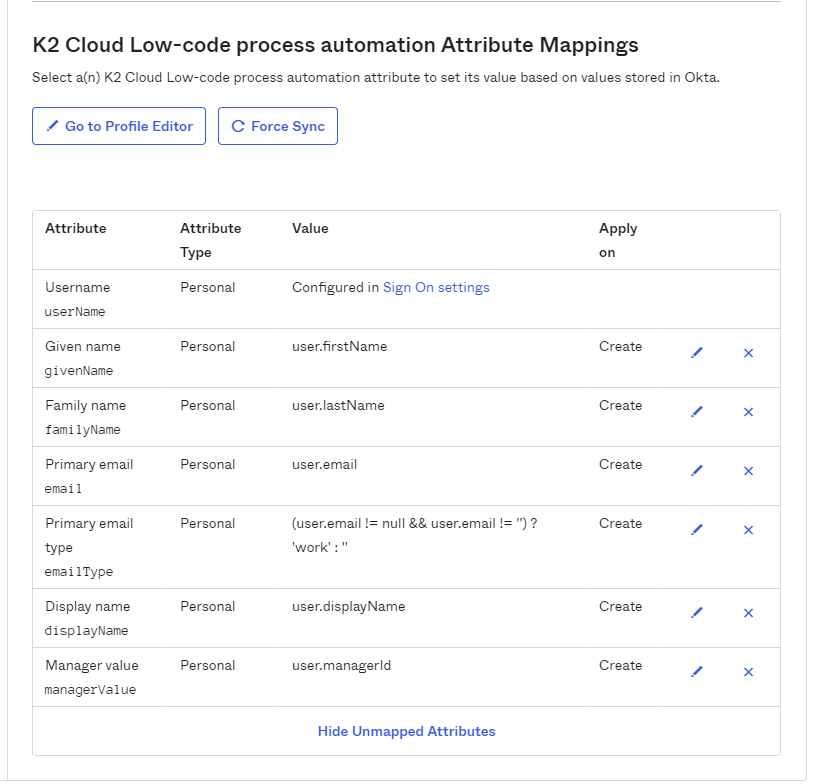
Supported Okta attribute mappings:
Okta attribute mappings not supported by the product: - username
- givenName
- familyName
- emailType
- displayName
- managerValue
- honorificPrefix
- middleName
- honorificSuffix
- title
- nickname
- profileUrl
- primaryPhone
- primaryPhoneType
- addressType
- streetAddress
- locality
- region
- postalCode
- country
- formatted
- preferredLanguage
- locale
- timezone
- userType
- employeeNumber
- costCenter
- organization
- division
- department
- entitlements
- roles
The Nintex K2 Cloud identity sync service does not support Okta importing users from Nintex K2 Cloud. In Okta, on the To Okta page, leave the default configuration.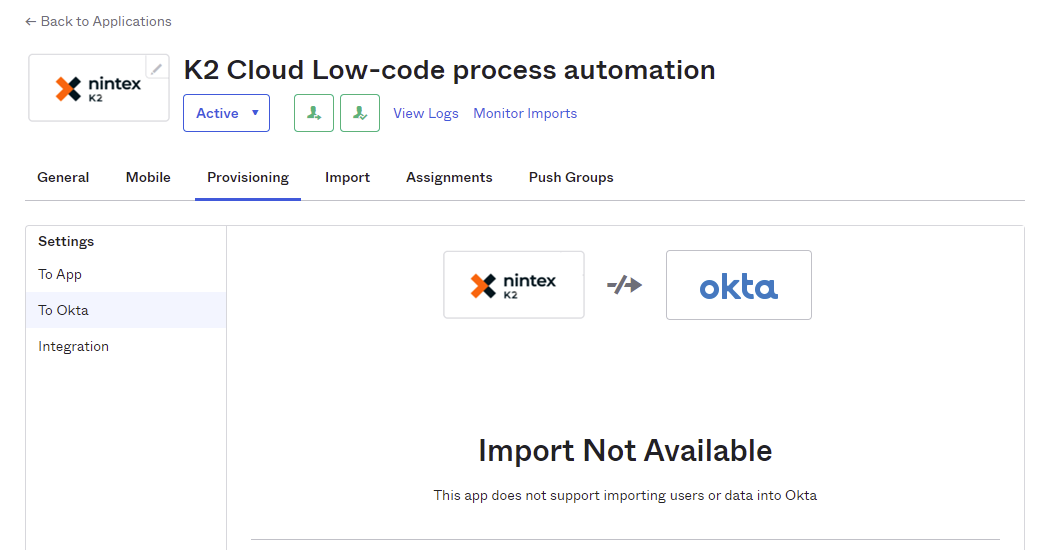
After creating the Nintex K2 Cloud app, you must assign people, groups, and group membership details to it for provisioning. Assign people and group names from the Assignments tab, and create the group membership details from the Push Groups tab. This section describes the process for both.
People
- Click on the Assignments tab and select People from the left-hand pane. Then click Assign and choose Assign to People.
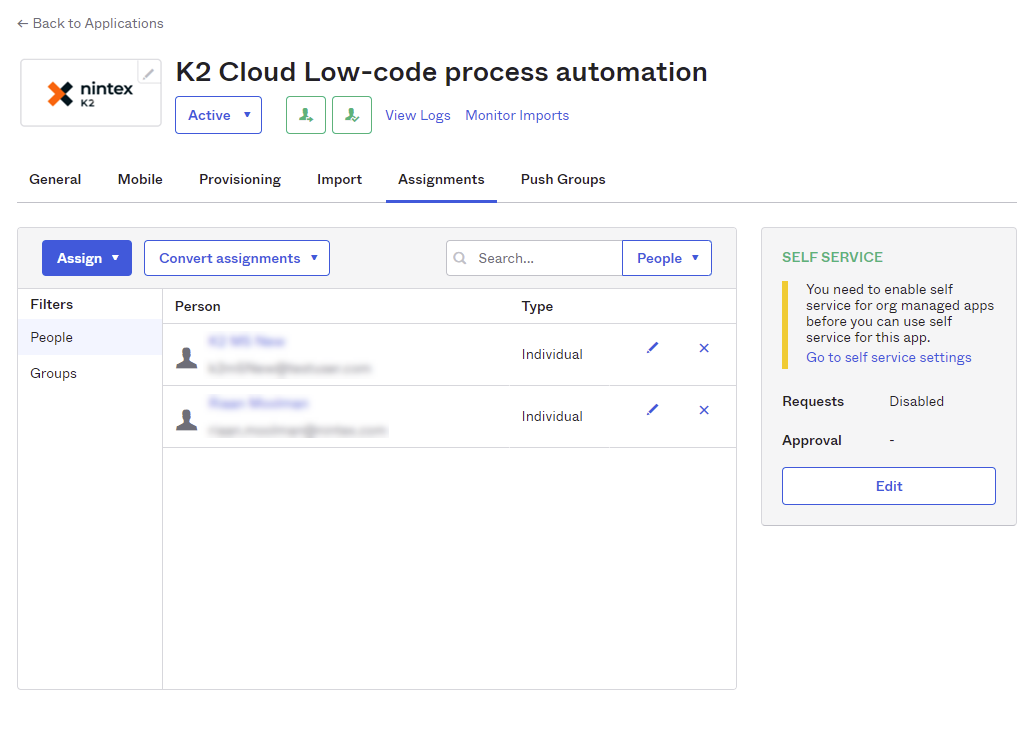
- Search for and Assign the required people. When you click Assign, a page of details for the chosen person opens, as shown in step 3 below.
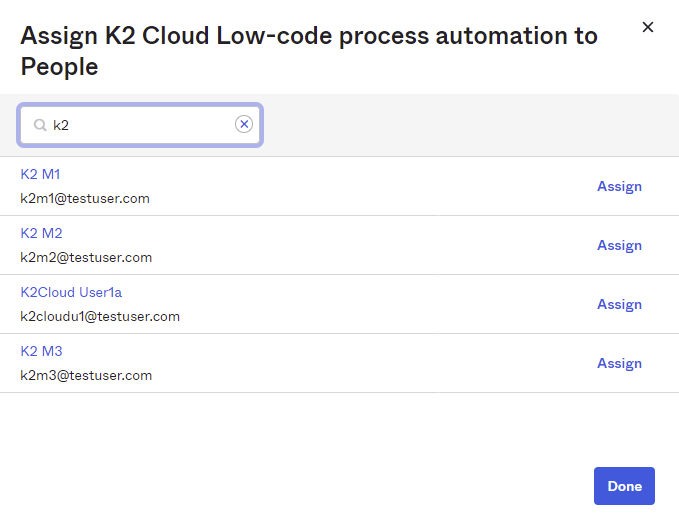
- Click Save and Go Back to assign another person, or click Done when you have assigned everyone you want to. Note that only the supported Nintex K2 Cloud attribute mappings as listed above in supported Attribute Mappings will apply during the provisioning into the Nintex K2 Cloud Identity Database.
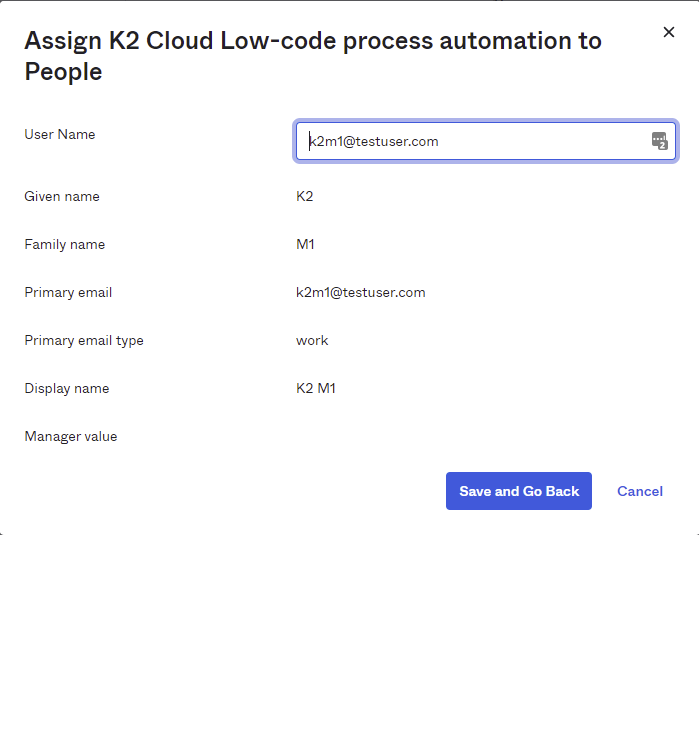
At this point Okta provisions the assigned users via the Nintex K2 Cloud app (using the SCIM protocol), into the Nintex K2 Cloud Identity Database.
Groups
Assign groups to the Nintex K2 Cloud app using the same steps as when assigning people, as described in the section above. Okta will only provision the members of that group into the Nintex K2 Cloud Identity Database, the group itself will not be provisioned. To provision groups, use the Push Groups tab.
Push Groups
Use the Push Groups tab to provision group membership details to the Nintex K2 Cloud Identity Database. If you push a group but have not assigned the members of that group (or the group itself) to the Nintex K2 Cloud app, the group is provisioned without members.
- Select the Push Groups tab, then select Find groups by name from the drop-down.
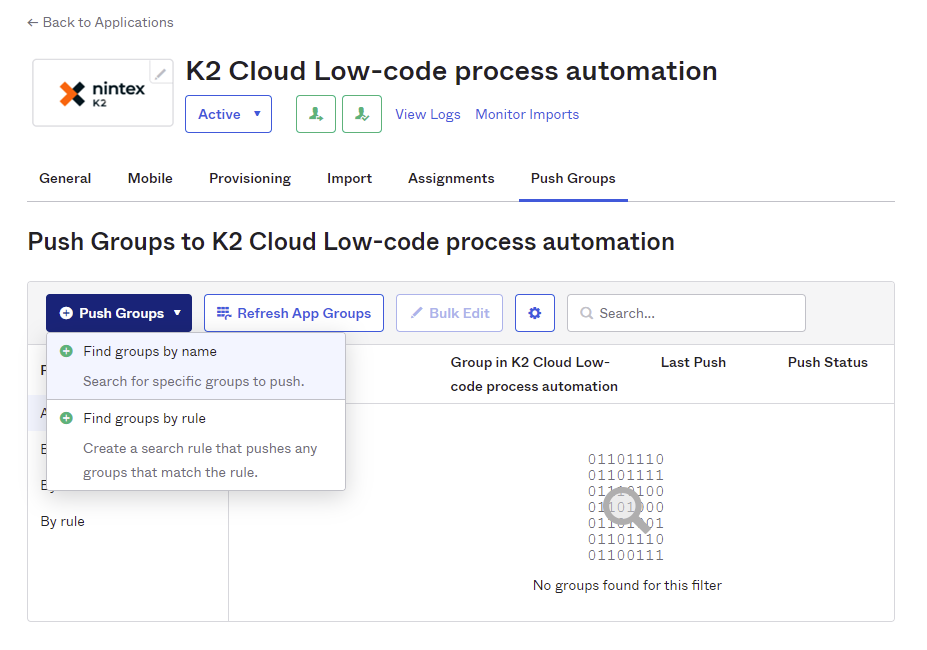
- Search for the groups you want to provision to the Nintex K2 Cloud instance. Check the Push group memberships immediately option. Click Save & Add Another to search for and add another group. When all the groups you want provisioned are added, click Save to finalize group membership.
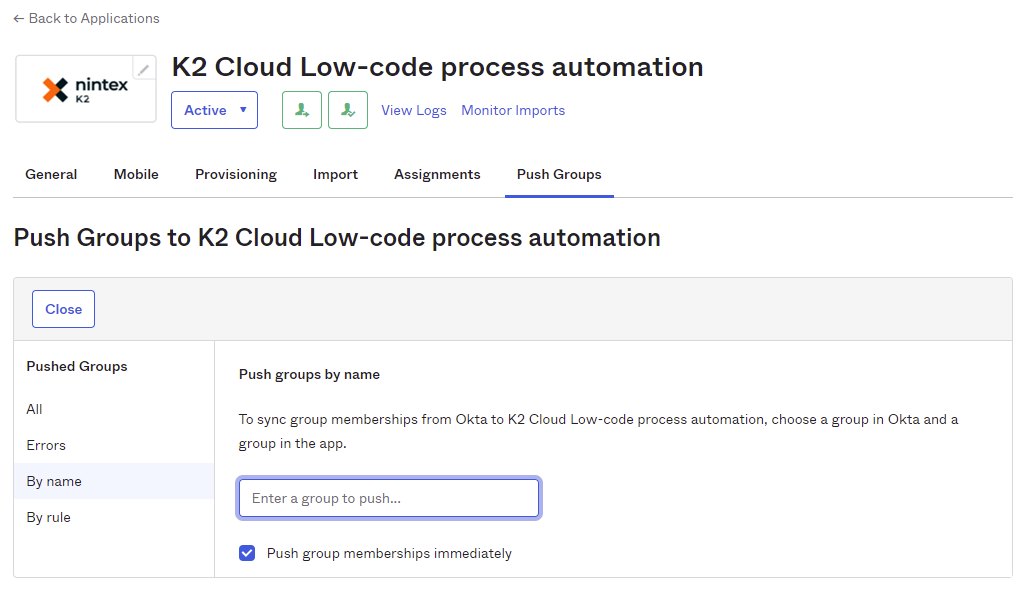
Use the Okta Dashboard to check for provisioning errors that occurred during the assignment of people and groups, or while pushing groups. You can retry the action that caused the error and if that does not correct the issue, log a ticket with Nintex support. The following points show an example of error checking.
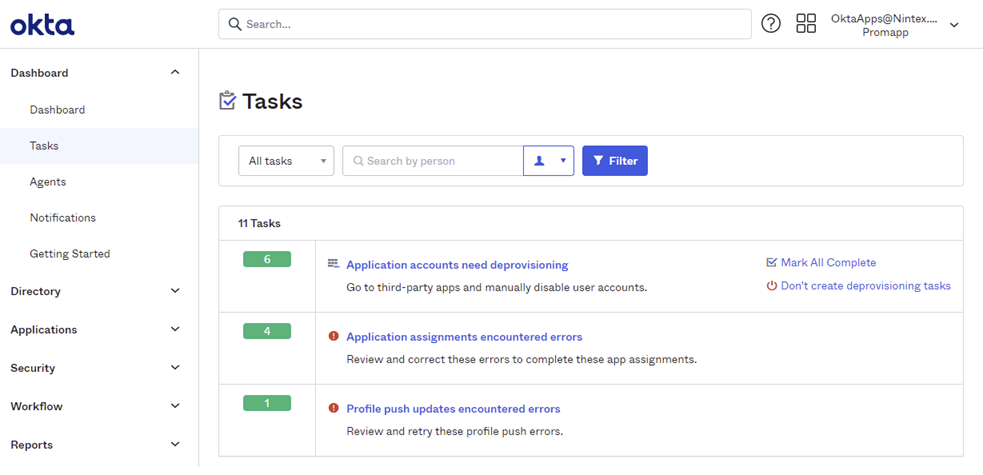
- Navigate to Dashboard and select Tasks. Clicking on an error opens a page where you can retry the failed operation.
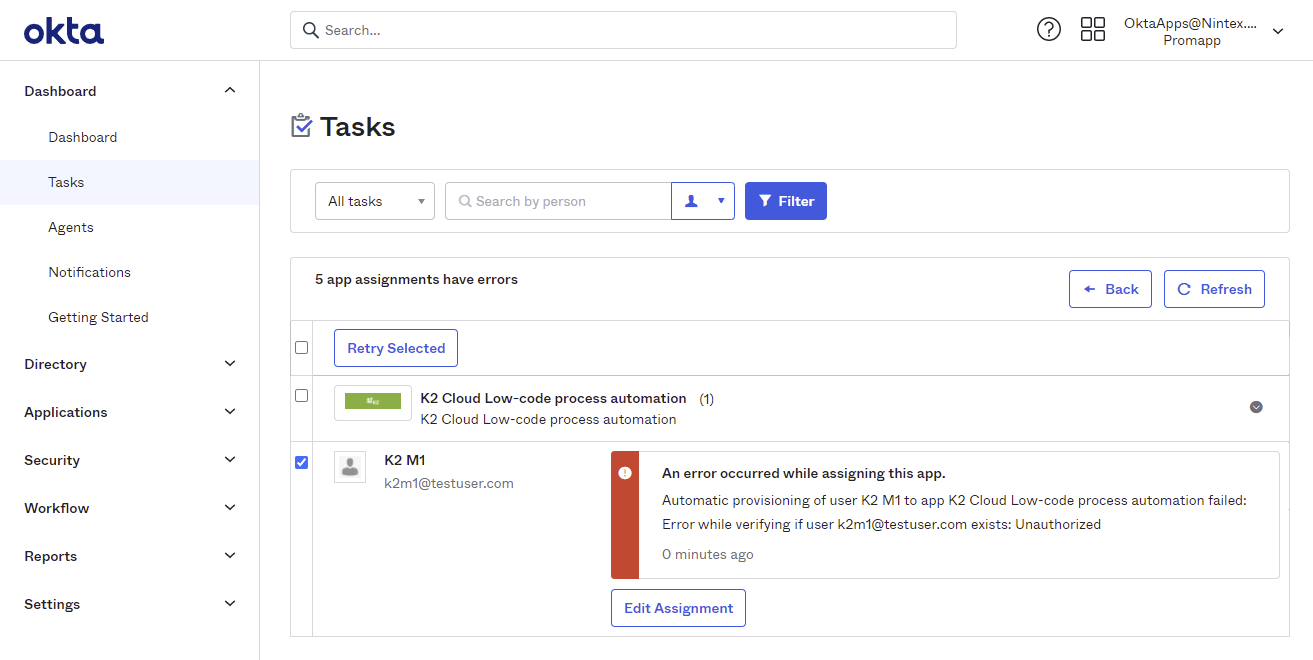
- In this case, there was an error authenticating. Check the error item and click Retry Selected. Log a ticket with Nintex Customer Central if retry does not work.
Nintex K2 Cloud next steps
Sign into any Nintex K2 site within your Nintex K2 Cloud tenant using login credentials for an Okta account that was assigned in Step 2: Assign people and groups to the Nintex K2 Cloud app.
If you cannot sign in, the two most common errors and their troubleshooting tips are:
- User not found error – this user is not in Sync Engine, and there may be a problem with the provisioning in Okta. See the Step 3: Error checking section in this guide.
-
ClaimTypeMapping not found - there may be a problem with the Nintex K2 Cloud on-boarding process. Contact Nintex Customer Central to log a support ticket.
- FQN not found error - ETL is not yet complete. The time it takes for ETL to complete depends on the number of users being provisioned but is usually less than 30 minutes. If you believe there's a problem, contact Nintex Customer Central to log a support ticket.
For more information on Identity Providers in Nintex K2 Cloud and the Nintex K2 Sync Service, see the User Guide Identity Providers topic.