How to: Use the SmartObject Get List custom filter
This topic shows you how to use a custom filter on a SmartObject Get List method to return a list of items. To configure the custom filter, you use a SmartObject property to create a criteria. Use operators, such as equal, not equal, greater than, less than, contains, starts with, and ends with to build criteria. You can create one or more criteria to filter.
Use the list options to return the first, the last, or all matching records. You can order the filtered data with a SmartObject property and sort it ascending or descending.
To add a custom filter, drag a SmartObject Get List method property into a SmartField. In the Smartfield Composer select the Custom option and open the List Method Configuration panel. From here, you use the Filter and Properties panels to add criteria and build your custom filter. Type or drag Fields, Functions, SmartObjects, or Workflow-related properties from the Context Browser.
This How To assumes that you are familiar with K2 for SharePoint.
Using a custom filter to return a specific list of items
Scenario
Your company uses a Track Leave Days workflow to keep track of the amount of leave days each employee has. This workflow runs at the beginning of every month and runs on a scheduled start.
As per your leave policy, employees with 15 or more available leave days need to submit leave or lose the days. You need to inform employees with an email if they have excess leave days.
To do this you use a custom filter to extract a list of employees with excess available leave days. In this filter you specify a criteria to send the email if they have 15 or more leave days available.
Steps
In this scenario, you begin by creating a custom SharePoint List. This list captures the employee and available leave days remaining. You need to populate this list with employee details.
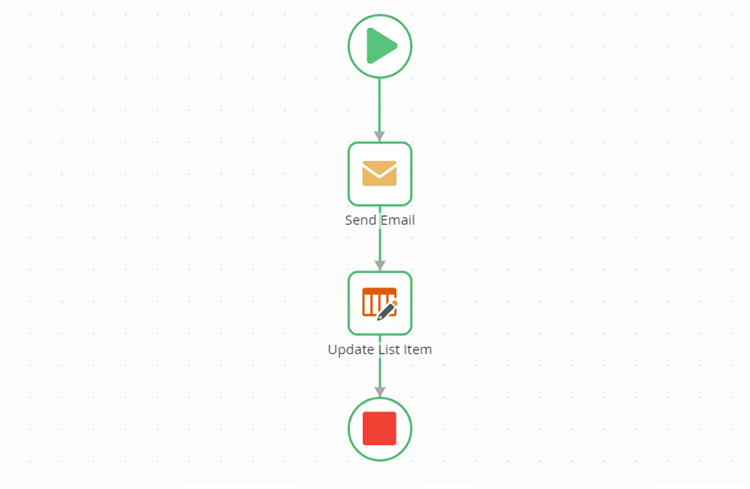
Next you create a workflow that contains a Send Email, Update List Item, and End steps. You use the Send Email step to configure the criteria and create the custom filter. The Update List Item step updates the SharePoint list to show who received an email.
The final piece of this solution is adding a workflow schedule to start the workflow the first day of every month.
Setup Steps
The following steps set up the scenario from start to finish. If you want to skip the setup steps and view the topic step, go to Configure the SmartObject Get List Custom filter.
- Create a SharePoint Custom List that contains employee and leave detail properties (such as name, department, email, available leave days, update email sent). Also add custom columns (Name (text), Department (text), Email (text), Available Leave Days (number) and Update Email Sent (text).) to the list and populate them with list items.
- Create a new SharePoint Custom List. Name the list
Employee Details.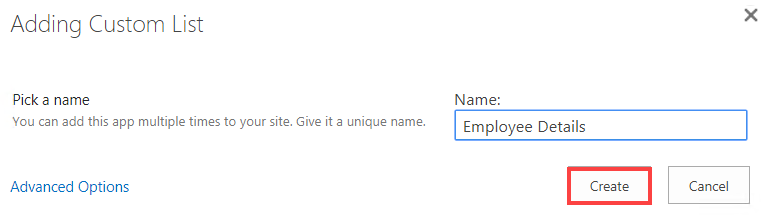
- Select the Employee Details list and click edit.

- Add the following columns: Name (text), Department (text), Email (text), Available Leave Days (number) and Update Email Sent (text).
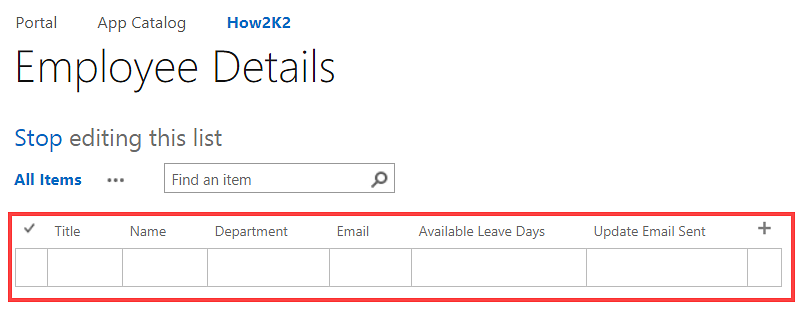
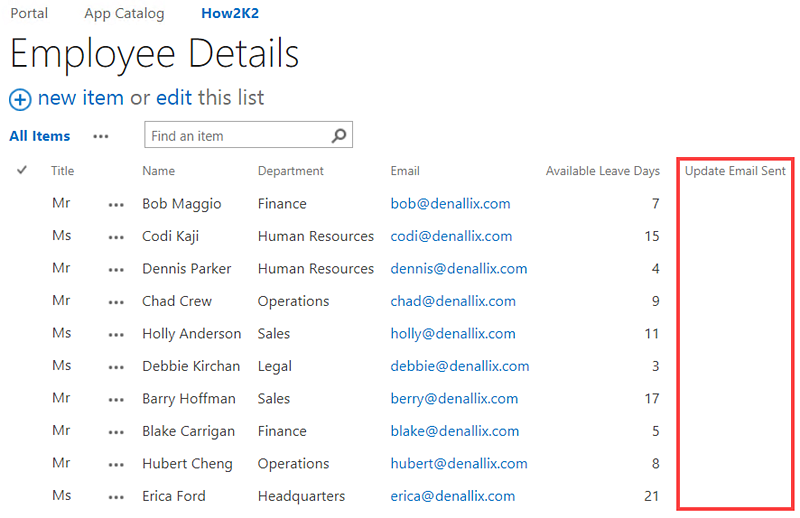
- Select new item and add the list items shown in the image below.
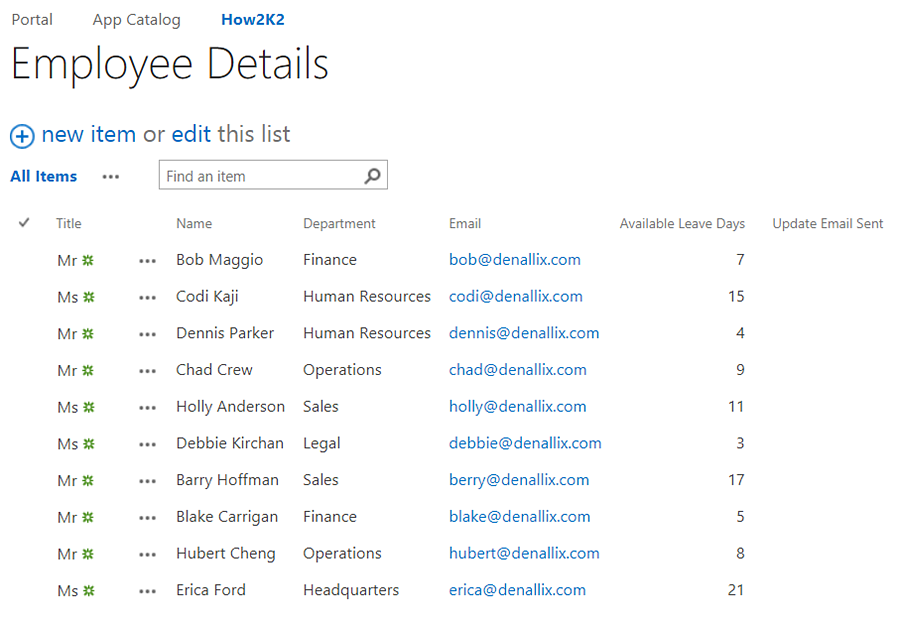
- You have now added employee details to your list. You reference this list in your workflow and use the Available Leave Days column (in step 3) to configure the SmartObject Get List custom filter.
- Create a new SharePoint Custom List. Name the list
- Create a workflow called Track Leave Days.
- From the Designer click New and select Workflow
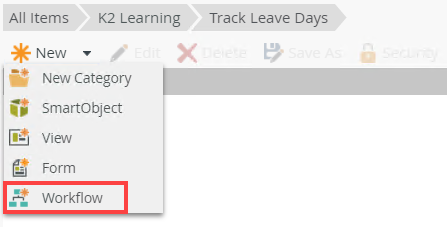
- Name this workflow Track Leave Days and click Create.
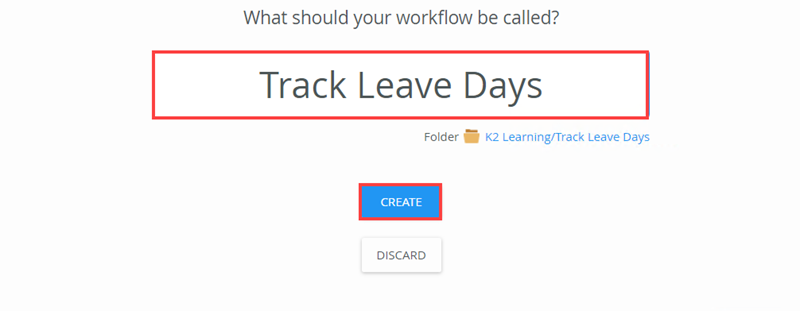
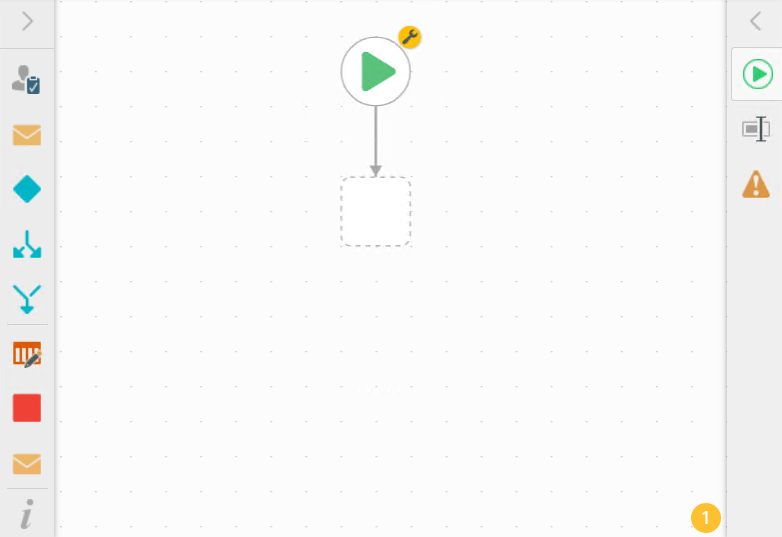
- The Track Leave Days workflow opens ready for you to start building it.
- From the Designer click New and select Workflow
Configure the SmartObject Get List custom filter
The following step describes how to configure a SmartObject Get List custom filter. You add the filter on the Send Email step in the To address field. The property you use to filter with is Available Leave Days. In this scenario, you use the filter to return a list of employees with 15 or more available leave days. A notification email is sent to these employees.
- Configure the SmartObject Get list custom filter on the Send Email step
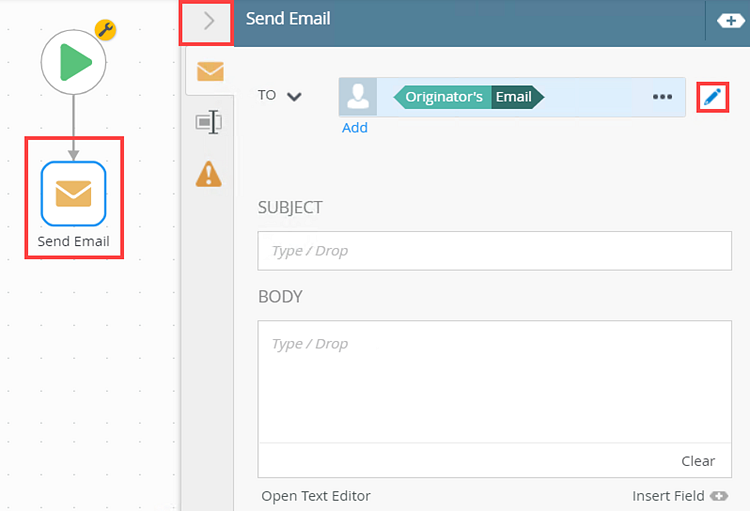
- From the Toolbox, click the Basic category and drag the Send Email step onto the canvas. Click the expand / collapse toggle to expand the Configuration Panel. You can also double click the step to expand the panel. Click the Edit button to enable editing in the To field.
- Delete the Originator's Email and expand the Context Browser. Select Functions tab and drag the Join function, from the Text section, into the To field.

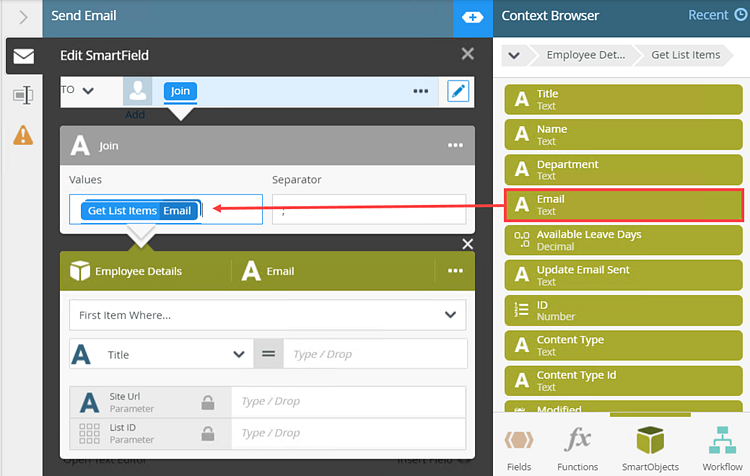
For more information on the Join function and how to configure it with the All items as a collection option, see the How to: Use the All items as a collection option. - The Smartfield Composer opens. Select SmartObjects tab and browse to the SharePoint Employee Details SmartObject Get List items method. Drag the Email property into the Values field. This property contains the email address of each employee on the SharePoint Employee Details list.
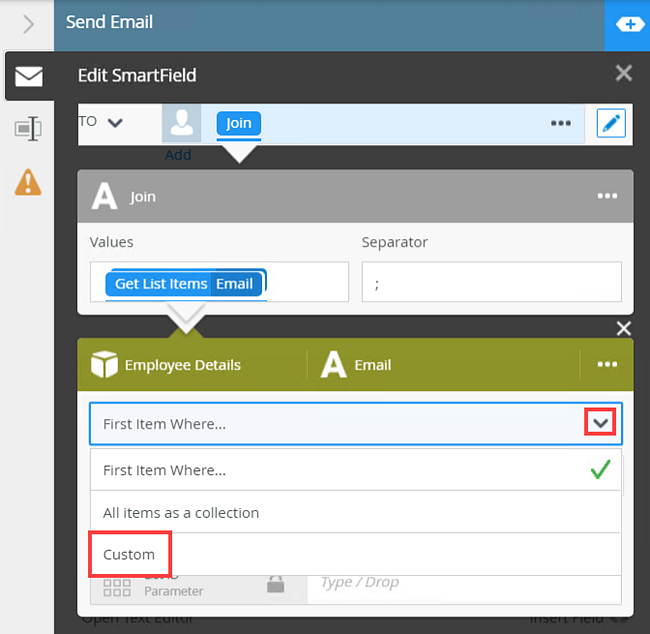
- In the Customer SmartObject properties section drop down select Custom. This is how you add a custom filter.
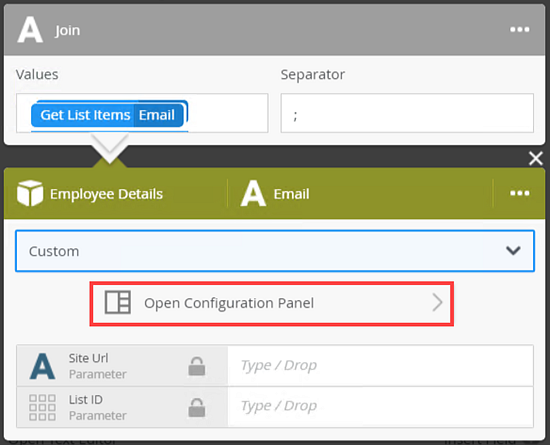
- Click Open Configuration Panel to open the List Method Configuration panel. You configure the custom filter criteria here.
- The List Method Configuration panel opens.
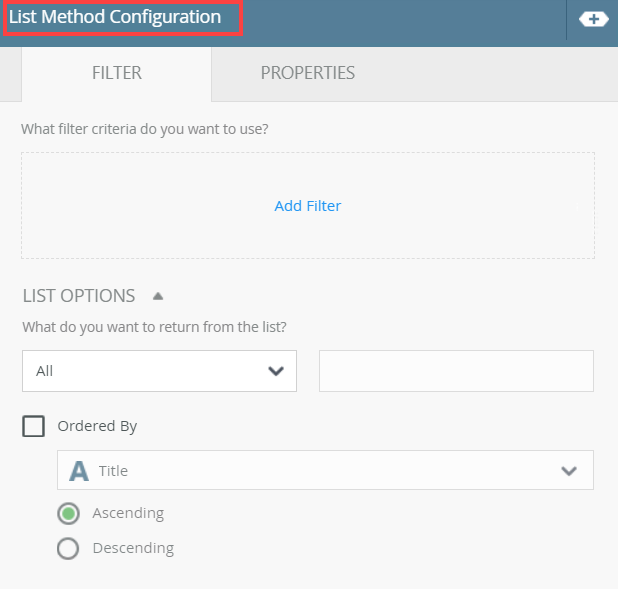
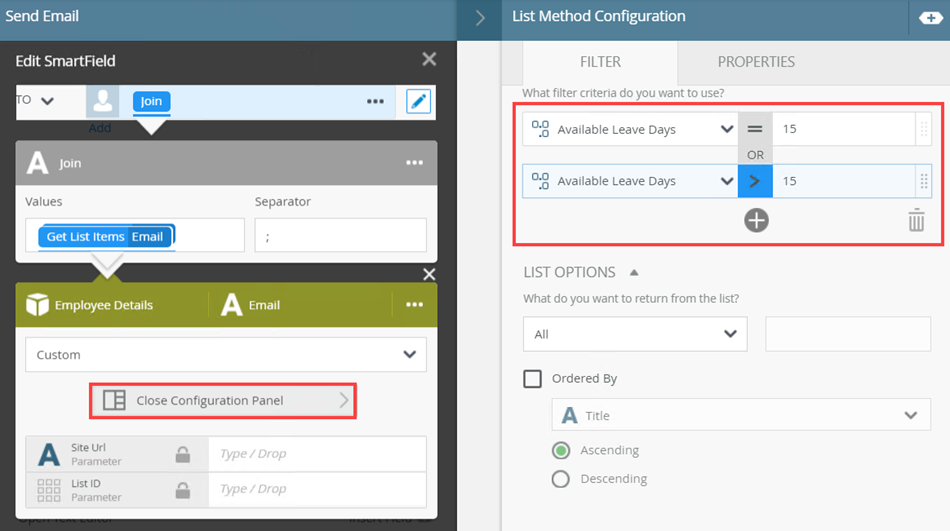
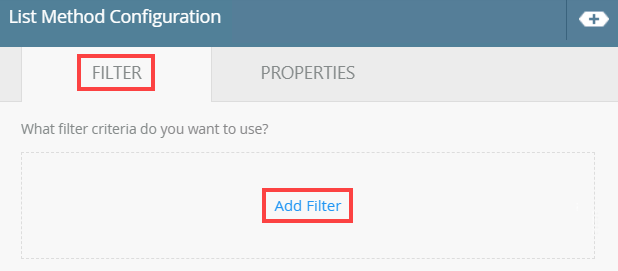
- To add a custom filter, select the Filter tab click the Add Filter link.
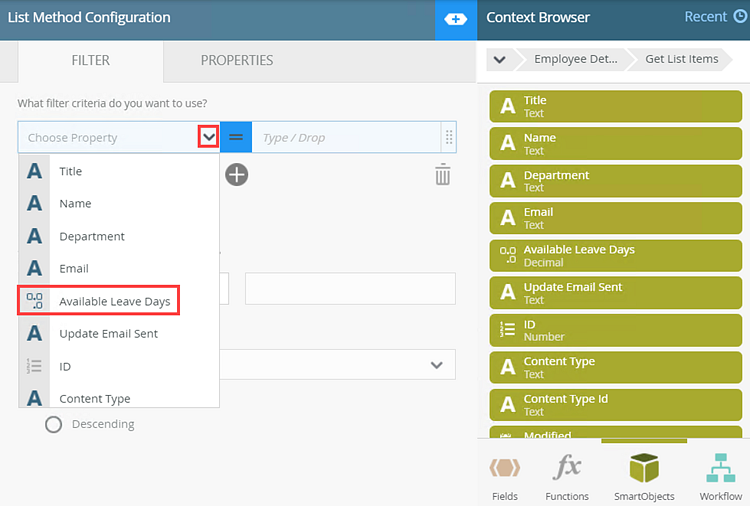
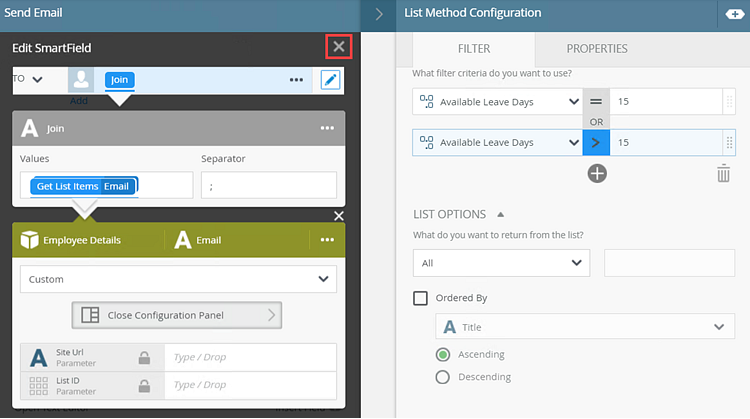
- On the Filter tab you specify the filter criteria. Select a property from the Choose Property menu. This menu contains all available properties in the SmartObject. In this example you see all properties from the Employee Details SmartObject. Select Available Leave Days property from the menu.
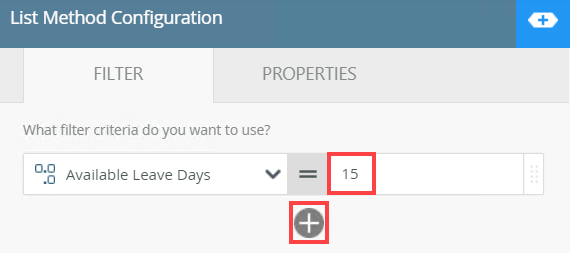
- Expand the Context Browser. Type or drag Fields, Functions, SmartObjects, or Workflow-related properties to customize the filter. In this example, you need to filter the list to only show items where the Available Leave Days property has a value of 15 or more. This filter consists of two parameters. One to filter 15 days and one to filter more than 15 days. To create the first part, type 15 as the value. Click Add to add another filter criterion.
- For the second part, select Available Leave Days from the Choose Property menu. Click = to show the operators and select Greater Than.
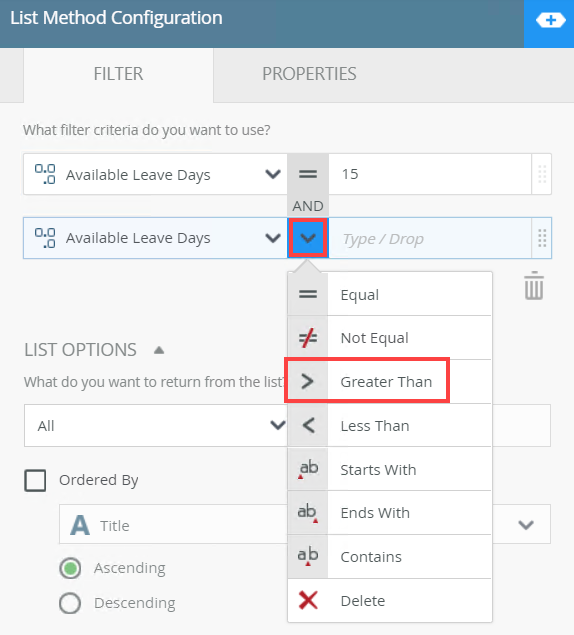
- Type 15 as the value. Click AND and change it to OR. The parameter is set and the filter finds all employees with 15 or more available leave days.
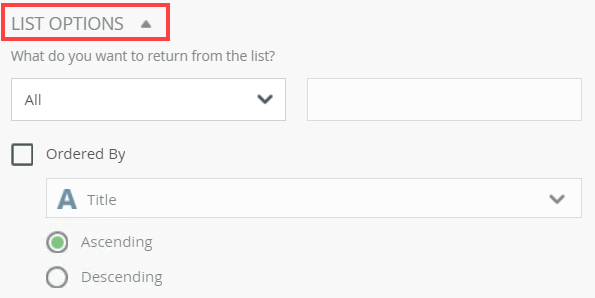
- In the List Options section, keep the default values as shown below.
- Click X to close the Smartfield Composer.
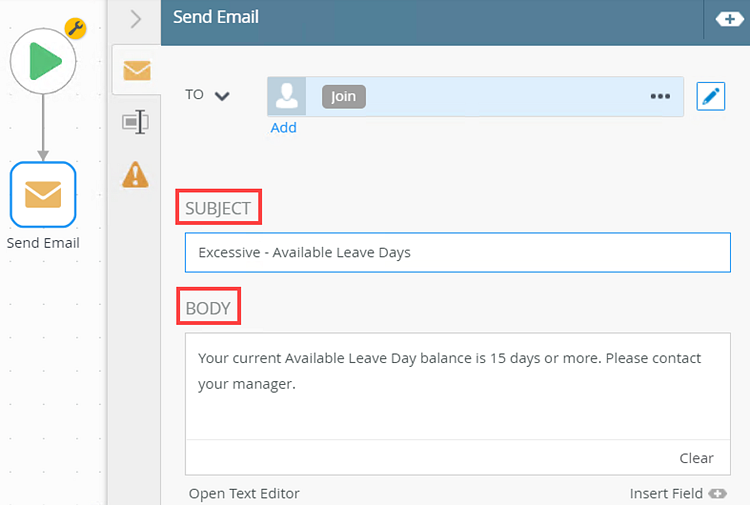
- Configure the Subject and Body of the email as shown below.
- From the Toolbox, click the Basic category and drag the Send Email step onto the canvas. Click the expand / collapse toggle to expand the Configuration Panel. You can also double click the step to expand the panel. Click the Edit button to enable editing in the To field.
- Configure and complete the rest of the workflow. In this step you also deploy the workflow.
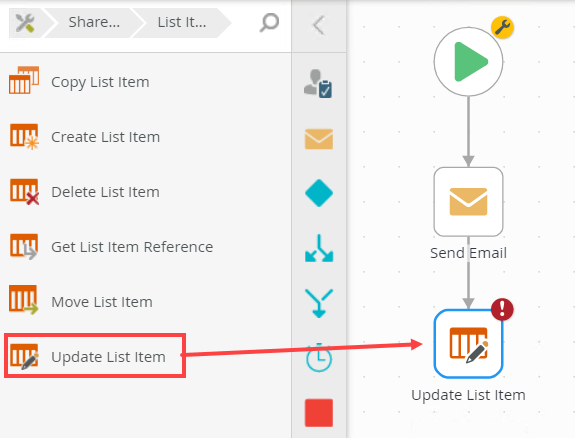
- From the Toolbox click the SharePoint category, the List Items category, and then drag the Update List Item step onto the canvas. Connect the step to the Send Email step. In this scenario, you use the Update List Item step to update the Update Email Sent column on the Employee Details SharePoint list. After the email is sent to the employee, the current date and time is set in this field.
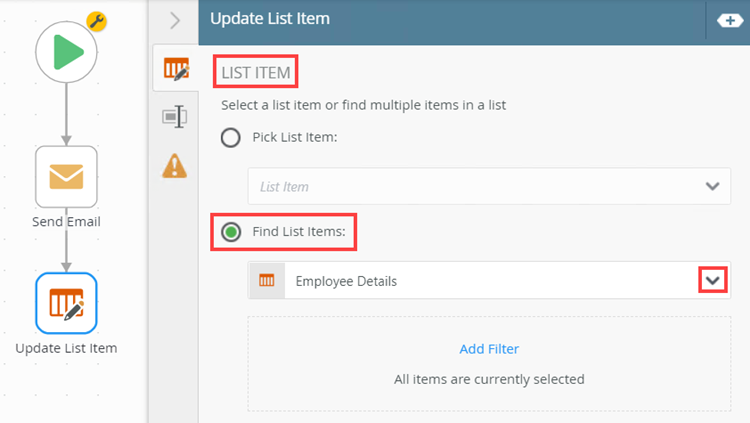
- In the List Item section select Find List Items and browse to the Employee Details list.
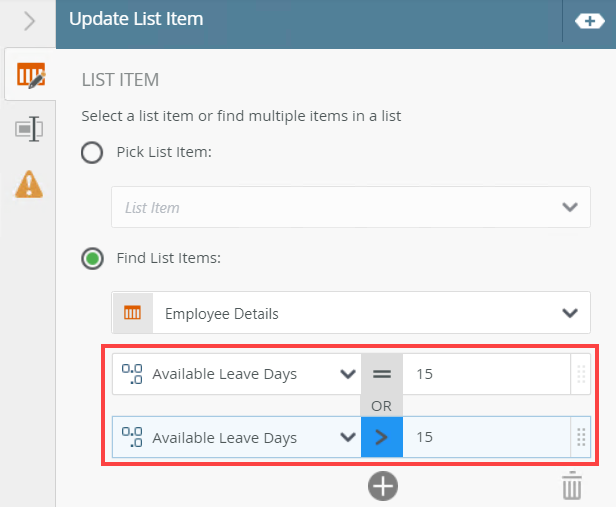
- You need to add a filter to make sure the correct list item gets updated. In this scenario, only employees that received the email need to be updated. Click the Add Filter link. Configure the filter as shown below.
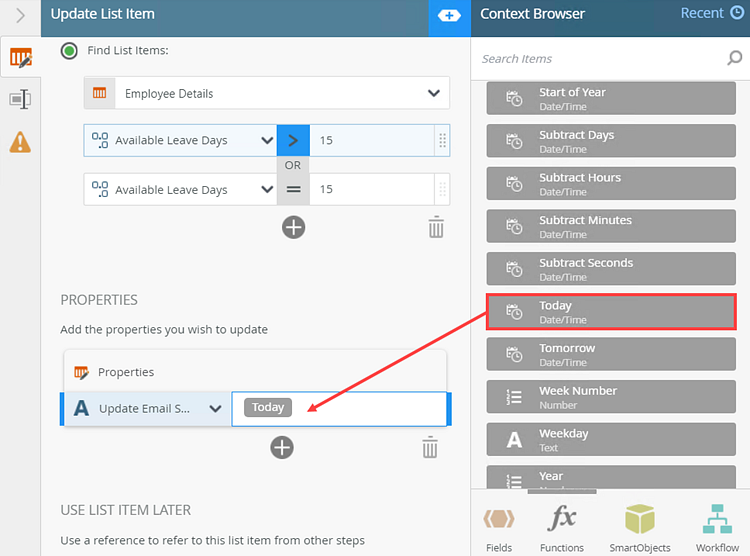
- In the Properties section, specify the property you want to update and what it should be updated with. To add a property click Add. Select Update Email Sent from the menu and drag the Today (Date and Time) function from the Context Browser as the value. In this scenario, the Update Email Sent field in the SharePoint list is updated with today's date and time for employees who received a warning email.
For more information on the Update List Item step, see Update List Item Step. - From the Toolbox, click the Logic category and drag the End step onto the canvas. Connect the step to the Update List Item step.
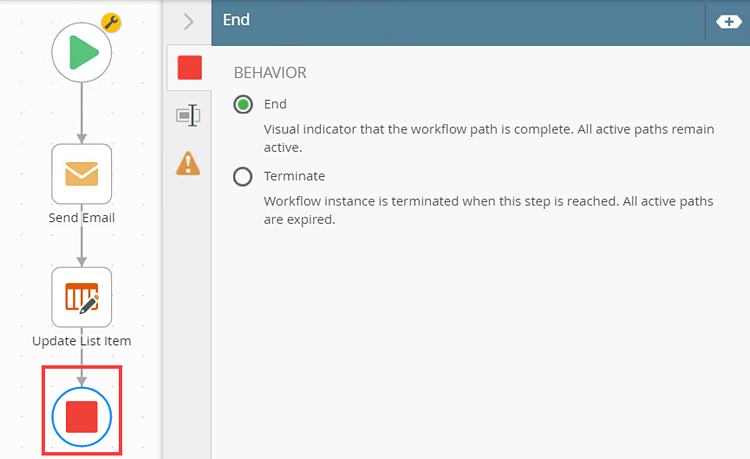
For more information on the End step, see End step. - The final thing to do is to deploy your workflow. From the File menu select Deploy.
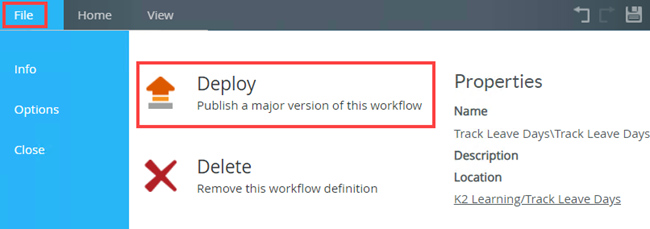
For more information on deploying a workflow, see Deploy a Workflow.
- From the Toolbox click the SharePoint category, the List Items category, and then drag the Update List Item step onto the canvas. Connect the step to the Send Email step. In this scenario, you use the Update List Item step to update the Update Email Sent column on the Employee Details SharePoint list. After the email is sent to the employee, the current date and time is set in this field.
- Add a workflow schedule to start the Track Leave Days workflow on the first day of every month. For more information on how to schedule a workflow, see the Start a Workflow with a Schedule.
- Test the solution. In this step you manually start an instance of the Track Leave Days workflow. The workflow references the Employee Details SharePoint list and sends an email to all employees with 15 or more available leave days using the custom filter you created. It then updates the Update Email Sent column with today's date and time.
- Open the Employee Details SharePoint list. Notice that no updates shows on the Update Email Sent column.
- From Management start a new instance of the Track Leave Days workflow.
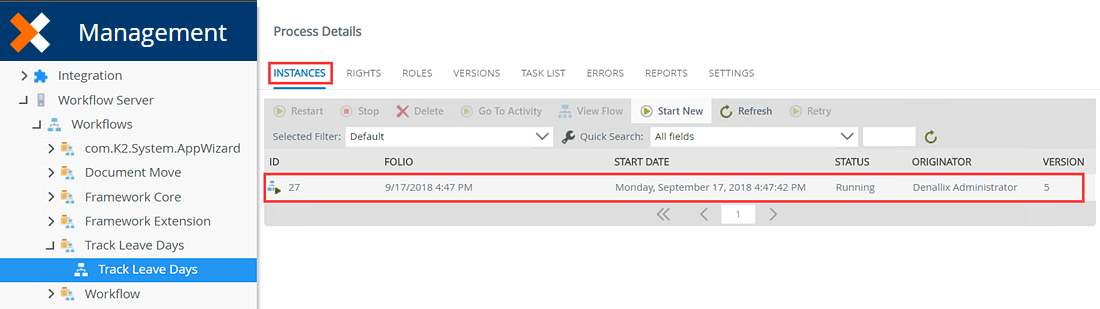
For more information on manually starting a workflow, see Start a Workflow Manually in Management. - From Management select the Reports tab. Locate the Track Leave Days workflow in the All Instances section and click View Flow.
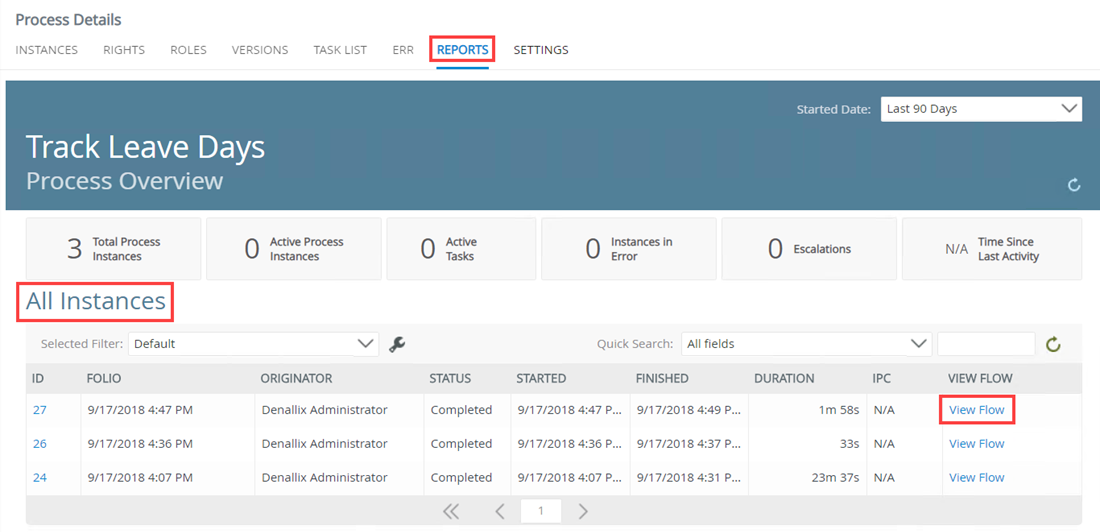
For more information on reporting, see Reports. - On the View Flow report, notice that the workflow completed successfully.
For more information on View Flow, see View Flow. - Open the Employee Details SharePoint list. The Update Email Sent field for Codi, Barry and Erica updated with today's date.
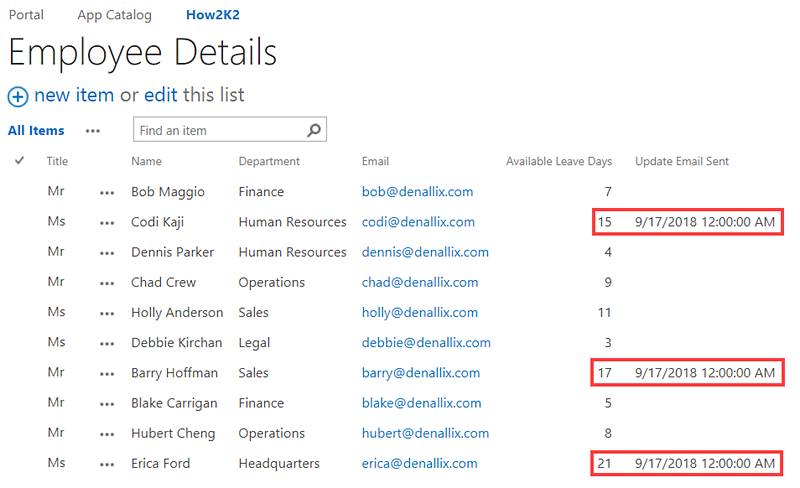
- Open Codi's email. The email was sent to three employees.

- Open the Employee Details SharePoint list. Notice that no updates shows on the Update Email Sent column.
Review
You learned how to use a custom filter on a SmartObject Get List method to return a list of items. You used this custom filter to create criteria to send an email to specific people.