K2 Out of Office - Add Destination Users in SharePoint Process Portal
 |
Contextualized Assistance: Out of Office - Forward User and Out of Office - Exception User. These scenarios are created in K2 Workspace but the principles remain the same when using Out of Office in SharePoint Process Portal. |
When configuring K2 Out of Office it is necessary to assign destination users who will receive the shared K2 Worklist items. The destination users can be set by the user In SharePoint or alternatively by the administrator in SharePoint 3.0 Central Administration or in a Process Portal site.
The K2 Out of Office configuration screen in SharePoint Process Portal is accessible from your Portal site > Administration > Out of Office Users node.
The default setting of In the office can be changed to Out of the office. Then browse and select the user you want to add with whom all the work should be shared with. This list displays the users that will view and process the work on behalf of the out of office user, whilst the user is absent. The user will be able to add and delete destination users(forwarded users) to and from this list. By adding a user(s) to this list, all K2 Worklist items will be shared with the listed destination user(s). Completion of this section is compulsory to enable sharing of K2 Worklist items.
Add Destination User
 |
Select the Out of the office radio button |
 |
Click on the Browse 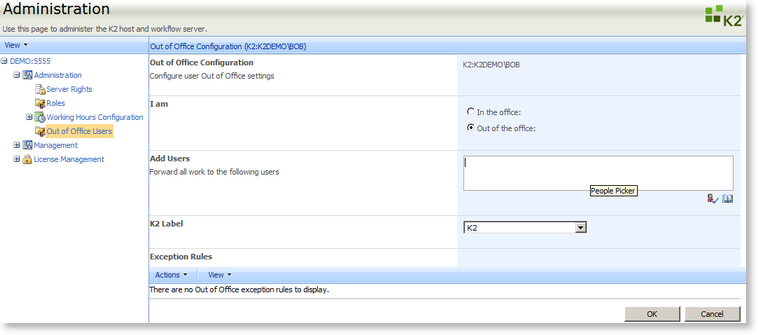
Fig. 1. Configuration screen |
 |
Perform a search, select the user and click OK. 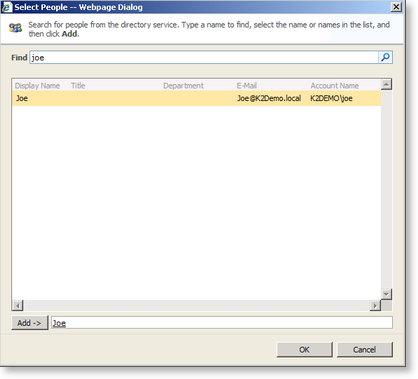
Fig. 2. User search |
 button in the Add Users section.
| Feature | What it does |
|---|---|
| Find | The user will enter a string in this text box. The search will be filtered according to what the user enters here. |
| Search | The search button will take into consideration all criteria specified in the Find text box. The destinations will be displayed in the list below. |
| Add | All destinations (Names and types) will be displayed in this list after the user clicked the Add button. Some destinations that are not currently available will be grayed and cannot be selected. |
 |
Destination users added to the Add Users (Forward Users) list, are validated and displayed in the relevant section. 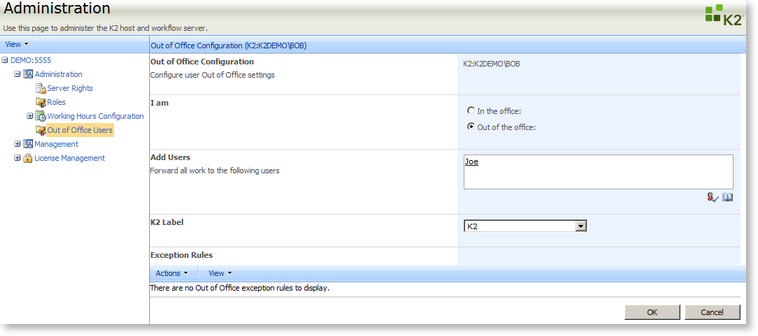
Fig. 3. Forward Users |
 |
Click OK on the configuration screen. Out of Office users are now displayed in this list with status as configured. 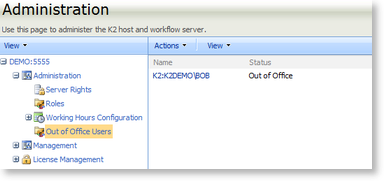
Fig. 4. Out of Office User configured |
 |
If a user is added to the Forward all work to the following users section, he will be able to view and action all K2 Worklist items of the Out of Office user |
Edit or Remove Destination User
|
Select the Out of Office user for which you want to change the forward destination user(s) and click Edit. 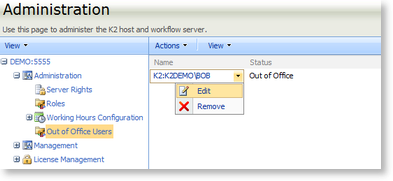
Fig. 5. Edit Out of Office settings
|
||
|
The Out of Office Configuration screen opens and Forward Users can be removed by means of keyboard functionality.
Fig. 6. Edit Forward Users |

