This documentation is in maintenance status and may not reflect the latest product updates. Please see the release notes for product updates.
REST
A Representational State Transfer (REST) Application Programming Interface (API) uses HTTP requests to , , and data. The REST executes a call to a REST web service from within a .
Using the Rest action, you can:
- Query information from a REST server.
- Initiate a process using a REST request.
Some examples of using the REST action are:
- Query for information to update a database.
- Initiate a process performed on the REST server such as starting an instance of a Nintex Workflow Cloud workflow.
Add a REST action to a botflow
These are the steps required to add a REST action to a botflow. The Action Builder field and button descriptions table given below the procedure fully describe required and optional configuration fields.
To add a REST action to a botflow:
- On the Actions List, click Advanced and then click REST from the Programming list.
The Action Builder window for REST displays.
- Set the REST settings.
General
- Type: Select the required REST method needed to invoke the web service from the drop-down list.
- Url: Specify the URL, starting with
https://
, and enter the remainder of the web address.
- Headers: Add any required headers by clicking the plus sign (
) and completing the fields in the Header window.
- Body: When the POST, PUT, DELETE, or OPTIONS methods are selected, specify the body of the request that
will be sent to the web service.
- Encoding: Select the required encoding from the drop-down list.
Authentication
- Authentication: If required, select the Authentication check box and then select the required authentication type from the drop-down list.
Response
- Save content: Select the required option to save the content of the REST action:
- File: Enter the file name with file path in the field.
- Variable: Enter the variable name in the field.
- Save status code: If required, select the Save status code check box to enter a code in the Save status code field.
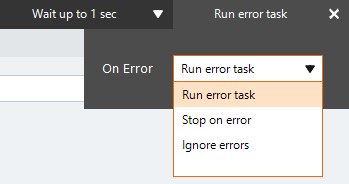
- If needed, adjust the Run Error Task settings to fine tune how the action runs.
- If needed, adjust the Run Switch setting to create the action without running it.
- Optionally, add an action note.
- Click OK to add the REST action to the botflow.
REST Action Builder field and button descriptions
REST options/settings |
General
- Type: Select the required REST method needed to invoke the web service from the drop-down list:
- GET (read)
- POST (create)
- PUT (update)
- DELETE (delete)
- HEAD (read with no message body)
- OPTIONS (describes the communication options for the target resource)
- Url: Specify the URL, starting with
https:// , and enter the remainder of the web address, or use the Expression Builder to build the action settings using variables or other token values.
- Headers: Add any required headers by clicking the plus sign (
) and completing the fields in the Header window:- Key: Enter a key in the Key field, or select the required key from the drop-down list:
- accept (request type header)
- content-type (content type header)
- Value: Enter a value in the Value field, or select the required value from the drop-down list (you must first make a selection from the Key drop-down list to see these values in the Value drop-down list):
- default
- application/json (request/content body format is JSON)
- application/xml (request/content body format is XML)
- test/json (request/content body format is JSON)
- test/xml (request/content body format is XML)
- Body: When the POST, PUT, DELETE, or OPTIONS methods are selected, specify the body of the request that
will be sent to the web service or use the Expression Builder to build the action settings using variables or other token values.
- Encoding: Select the required encoding from the drop-down list:
- Default
- ASCII
- Unicode
- UTF7 (Unicode Transformation Format)
- UTF8
- UTF32
- Custom: Enter the custom type coding in the field or use the Expression Builder to build the action settings using variables or other token values.
Authentication
- Authentication: If required, select the Authentication check box and then select the required authentication type from the drop-down list:
- Basic auth:
- Credential: Select the required credential from the drop-down list.
- Confirm: Type the password used when creating the credential.
- Bearer token:
- Credential: Select the required credential from the drop-down list.
- Confirm: Type the password used when creating the credential.
- NTLM:
Response
- Save content: Select the required option to save the content of the REST action.
- File: Enter the file name with file path in the field, select the file using the folder icon, or use the Expression Builder to build the action settings using variables or other token values.
- Variable: Enter the variable name in the field, select the variable from the drop-down list, or use the Expression Builder to build the action settings using variables or other token values.
- Save status code: If required, select the Save status code check box to enter a code in the Save status code field, select a code from the drop-down list, or use the Expression Builder to build the action settings using variables or other token values.
|
Run error task |
- Click Run error task.
- Open the On Error drop-down list and select the required setting:
- Run error task: A botflow containing an error task automatically runs the error task in the event of an error. If the botflow does not contain an error task, the botflow stops in the event of an error.
- Stop on error: The botflow stops in the event of an error.
- Ignore errors: The action is skipped in the event of an error and the botflow attempts to execute the next action
- Click X to close the drop-down and save the setting.
|
Note |
(Optional) Type a Note to document
any special instructions or functionality.
|
Run Switch |
The Run Switch toggle controls how Nintex RPA runs an
action when adding or editing an action in a botflow.
- Run: To run the action automatically when you click OK, turn the toggle to Run.
- Don't Run: If you do not want to run the action automatically when you click OK, turn the toggle to Don't Run.
|
OK/Cancel |
Click OK to save the action or click Cancel to discard the action or any changes. |