Custom Click
This article provides information on the following topics:
Note: The Actions Quick Reference provides a complete list of actions that you can print for easy reference.
What is the Custom Click Action?
The Custom Click Action sends a custom mouse click to a target, such as a button. The click can be customized in many ways, including which mouse button to use to perform the click, how many times to click, how fast to repeat the clicks, and how long to hold the mouse down for each click.
The Custom Click Action should only be used when a standard Click, Double Click, or Right Click Action cannot be used.
The Custom Click Action is mainly used to create a Click, Double Click, or Right Click to regulate the speed at which the click is performed. However, the Custom Click Action can also be used to create exotic clicks such as a Triple Click, Middle Click or Double Right Click.
Top of Page
Creating a Custom Click Action
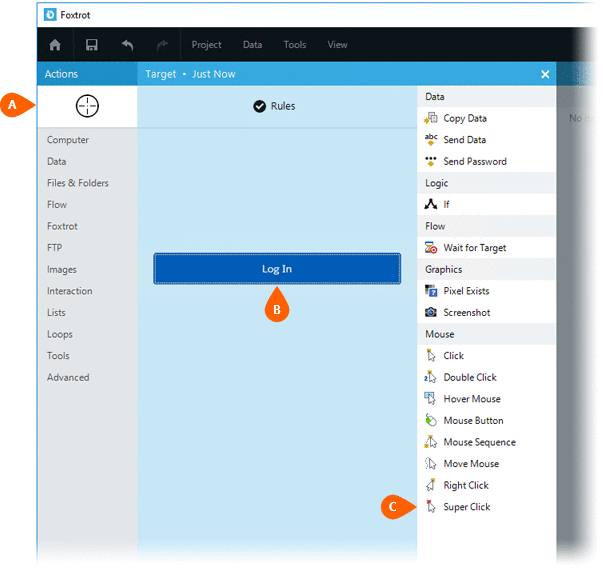
Drag and drop the Selector![]() onto the target to display
the Target Preview
onto the target to display
the Target Preview ![]() .
Choose the Custom
Click
.
Choose the Custom
Click ![]() Action to display
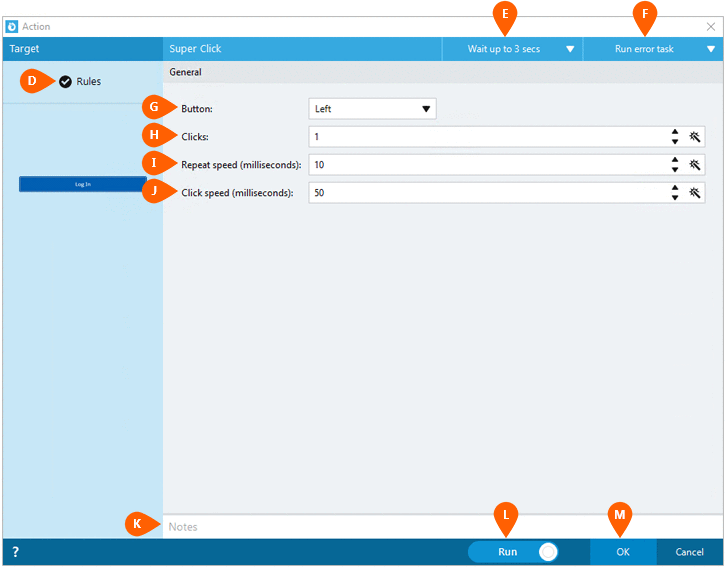
the Action Builder.
Action to display
the Action Builder.

Select the Rules
 to modify how Foxtrot will find the target.
Both the Timing
  and
Error
  settings
for this action may be configured to fine tune the how the Action will
run.
Note: For more information about Timing and Error settings, read the Action Builder article.
Select the mouse
button  to use for the
click. Options include Left button,
Middle button and Right
button.
Specify the Click
count  which is the number of times to click
the target.
Enter a Repeat
speed  which is the number of milliseconds
to wait between each click. This setting is only used if the Click count (
 )
is a value greater than 1.
Enter a Click speed which is the number of milliseconds between the
Mouse Down and Mouse Up of each click. This regulates how quickly
the clicks "hit" the target.
Note: Some targets do not respond to clicks that are performed too quickly. Remember this when selecting a Click speed.

Optionally add Notes
 to the Action to document any special instructions
or functionality. When the Run Switch
 is set to Run, the action
will be executed after clicking OK.
Note: The run switch is set to Run by default. To create or modify this action without executing it, click the slider to change the option to Don't Run. For more information, see Action Builder.
Click the OK
button  to
save the Action.