Send List
The Send List action An instruction within a botflow. sends a list in a botflow Automated steps that you can design for each bot that will run. to a target, such as an Excel workbook.
Using the Send List action, you can send the contents of a list to:
- Microsoft Excel spreadsheets.
Some examples of applications for the Send List action are:
- Microsoft Excel spreadsheets.
Add a Send List action to a botflow
This example provides the steps necessary to add a Send List action to a Botflow.
To add a Send List action to a botflow:
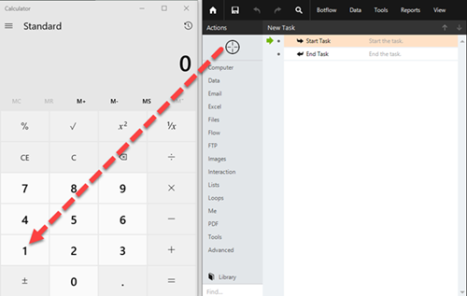
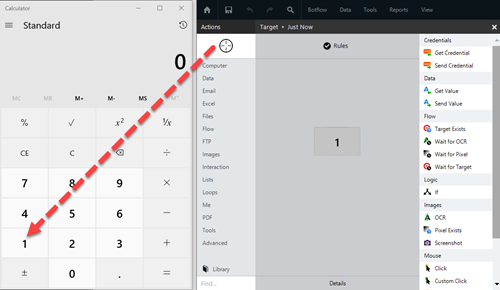
- Drag the Target Selector from the Build Pane Area to add new actions and edit existing actions. The Build Pane displays after you select a targeted element in a Windows application. The center of the Build Pane is referred to as the Task Editor Pane. and drop it onto an application to display the Target Preview.
- Select Send List from the Data actions list.
- Set the Send List settings.
- List: Type a source list name in the List field.
- Send: Select the file send option from the drop-down.
- Include Headers: Select the check box to include the list headers of the sent list.
- Include "Item No' column: Select the check box to include the Item Number column from the sent list.
- Change case: Select the check box to change the case of the contents of the sent list.
- Remove spaces: Select the check box to remove spaces from the contents of the sent list.
- If needed, adjust the Rule settings to modify how Nintex Bot finds the application target.
- If needed, adjust the Run Error Task settings and Timing settings to fine tune how the action runs.
- View the action Details settings.
- If needed, adjust the Run Switch setting to create the action without running it.
- Optionally, add an action note.
- Click OK to add the Send List action to the botflow.
The Action Builder window for Send List displays.
General
Options
Send List field and button descriptions
| Field or button | Description |
|---|---|
| Target Selector |
The Target Selector allows you to choose the target element the botflow interacts with, such as a button, text field, or check box. Ensure that your machine's Windows Settings (Start Menu > Settings) are set as follows when using the Target Selector:
You can use the Target Selector to:
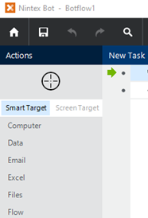
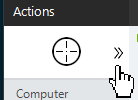
Drag the Target Selector from the Task Pane onto the desired application target An element within an application Nintex RPA LE interacts with, such as a button, text field, or checkbox. and select the appropriate action from the Build Pane Area to add new actions and edit existing actions. The Build Pane displays after you select a targeted element in a Windows application. The center of the Build Pane is referred to as the Task Editor Pane.. Smart Target and Screen Target options The Target Selector can be used with the Smart Target or Screen Target options. The options are displayed as shown in the image below. Smart Target is selected by default.
|
| Build Pane |
The Build Pane displays after you select a targeted element in a Windows application. In the Build Pane, you can:
Selected target elements display in the Build Pane with a list of actions supported by the targeted item. The Build Pane also displays how long the item has been targeted.
|
| Recent Target |
The most recent target may be accessed by clicking the Recent Target button to the right of the Target Selector.
This is useful when creating Excel, Emulator, and Web Table Targets allowing you to create new actions with existing targets. |
| Field or button | Description |
|---|---|
| Send List Options/Settings |
General
Options
|
| Rules |
Some actions have rules required to locate a target and vary based on the targeted application. Rules of a targeted application element are configured and saved with the action. The rules are then used to locate the proper targeted element, such as a Microsoft Excel workbook. Other notes about rules:
To set up the most common rules:
The Rules window displays the rules available for the selected targeted application. |
| Preview | All actions created using the Target Selector include a preview of the targeted element. |
| Details |
When directed by Nintex Support, click Details from the Preview Panel of the Action Builder. If needed, Nintex Support will supply additional information. |
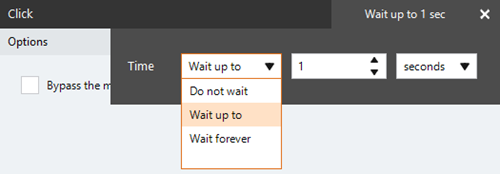
| Timing Settings |
Some actions have timing settings and vary based on the targeted application. The timing settings of a targeted application element are configured and saved with the action. The timing settings are then used to control when the action starts.
|
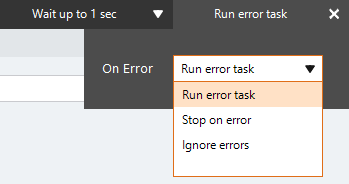
| Run error task |
|
| Note |
(Optional) Type a Note to document any special instructions or functionality.
|
| Run Switch |
The Run Switch toggle controls how Nintex Bot runs an action when adding or editing an action in a botflow.
|
| OK/Cancel | Click OK to save the action or click Cancel to discard the action or any changes. |