Assign a task to multiple users
Use the Assign a task to multiple users action A tool for building the processes, logic, and direction within workflows. Actions are the steps the workflow performs to complete a process. to assign a task to one or multiple users at the same time. The workflow will continue based on the outcomes provided by the assignees.
When you configure an Assign a task to multiple users action, a Form-based, Express approval, or combination task type is created. The workflow sends the task to the task assignees Recipient of a task. and then pauses until an outcome is decided. Depending on the completion rule you select, the task can be completed by assignees when the rule is satisfied; otherwise, the default outcome is used.
Configure the Assign a task to multiple users action
Emails from tenants with a trial license can be sent only to email addresses of domains registered in the tenant. To see the list of registered domains in your Nintex Workflow tenant, go to Settings > Organization > Domain management. For more information about domain management, see Domain management.
-
Add the action to the workflow and open the action configuration panel. For more information, see Add an action to the workflow.
- Type a Task name.
- Type a Task description.
- Enable the Task type toggle you want for the action. The following options are available:
- Task form
- Express approval
- You must select at least one task type or both. For more information, see Task type.
- If you enable the Task form toggle as the Task type, you will need to configure the form:
- Click Design form to open the Form designer.
- Define controls, rules, and styles as required for this task form.
- Click Apply changes.
Note: After you design a form and apply changes, this changes to Edit form in the configuration panel. You can then click Edit form to make additional changes to the task form.
-
Define the Outcomes for the task. For more information, see Add multiple outcomes. The outcome fields displayed will vary based on the selected Task Type and Outcomes.
- To define task outcomes, enable the Multiple outcomes toggle and type the Outcomes you want.
- To add more outcomes to the action, click Add outcome. A branch is created for each task outcome you define.
- If you enable Express approval toggle as the Task type, type the Express approval term that your assignees must respond with to complete the task.
Note: Express approval term field is only displayed when the Multiple outcomes toggle is disabled and the Express approval toggle is enabled.
- Select Completion rules.
-
To require users to sign in to Nintex Workflow to access the task form, enable the Assignee authentication toggle. For more information, see Enable Assignee authentication.
-
Add the Assignees and select the Assignment behavior.
- In the Message section, type the Subject and the Message body. To expand the message body window and to see more options in the toolbar, click
 (Expand editor). For email file attachment information, see
Add file attachments to the task email.
(Expand editor). For email file attachment information, see
Add file attachments to the task email. 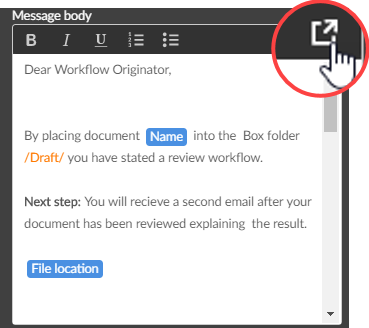
-
To send reminders to the assignees at intervals you specify, enable the Reminders toggle. For more information, see Assign a task to multiple users fields, buttons, and settings.
-
To escalate the action and send the task to the recipient you specify, or complete the task with an Autocomplete outcome, enable the Escalation toggle. For more information, see Define the task escalation.
With the Assignee Authentication toggle enabled, you can require task assignees to sign in to Nintex Workflow to access and complete the task. If disabled, assignees can access and complete the task without signing in, and the form supports anonymous access.
- User directory lookup configuration is recommended for assignee authentication. The prerequisite to user directory lookup is to configure Identity federation. For more information, see User Management.
- Currently, you can only connect to Azure Active Directory to assign tasks to users in your directory.
-
Open the action configuration panel. For more information, see Add an action to the workflow.
-
In the Assignee section, enable the Assignee authentication toggle (enabled by default).
- Type in the Assignees field to filter and select a user. Only the following users can be selected:
- Users who are already listed in the User Management page.
- Users from your Azure Active Directory, provided you have configured User directory lookup. Once an assignee is selected from the Azure Active Directory, the assignee's account will be auto-onboarded into the User Management page.
The selected users will need to sign in to Nintex Workflow to access and complete the task.
If you're using a variable instead of selecting users, the variable should be in the email address format.
For more information, see Assign a task to multiple users fields, buttons, and settings.
You can configure the Assign a task to multiple users action to retrieve one or more files from previous points in the workflow, and send the files as attachments with the task email to the assignees.
Note: Attachments must be a File or a Collection (of Files). If an attachment is a URL pointer to a document (URL in a text variable), the task email will not be sent.
-
Open the action configuration panel. For more information, see Add an action to the workflow.
- In the Message section, click the File attachments field.
- Click + Insert.
- Click the variables representing the files you want to attach. You can use Collection and File type variables. If there are no existing variables, you may need to create a variable first before you can insert it.
- Click Insert.
For more information, see Assign a task to multiple users fields, buttons, and settings.
You can define multiple outcomes and let the task assignees choose how they respond to the task. Each outcome you specify creates a separate branch for the action in the workflow. The workflow is directed along the corresponding path based on the outcome selected by a task assignee. If you select multiple outcomes, you need to have at least two outcomes defined. You can add, remove, or rename outcomes as needed. Approve and Reject are included by default.
For more information, see Outcomes.
-
Open the action configuration panel. For more information, see Add an action to the workflow.
- In the Outcomes section, enable the Multiple outcomes toggle.
- Edit the Reject or Approve Outcomes as required.
- To add a new outcome, click Add outcome.
- Type the new outcome name.
For more information, see Assign a task to multiple users fields, buttons, and settings.
You can configure the due date for the task. If the assignees don't respond to the task within the time frame you set, then the action does one of the following:
- Escalates by sending the task to another assignee.
- Autocompletes the task with a selected outcome.
-
Open the action configuration panel. For more information, see Add an action to the workflow.
- In the Escalation section, enable the Escalation toggle, and select to use a date variable or calculate the amount of time:
Use a date variable.
- Click Use date variable.
- For Due date, select a date variable.
Calculate the amount of time.
- Click Calculate date.
- For Number, type a value or select a variable (decimal or integer type).
- For Unit of time, select a time unit.
- Select an Activity on due date.
-
If you select Escalate, in the Escalation assignee field, type an email address. Optionally, enable the Customize email toggle to send a customized message when the task is escalated.
-
If you select Autocomplete, select an Autocomplete outcome.
Note: You can choose an Autocomplete outcome only when the Multiple outcomes toggle is enabled. If Multiple Outcomes toggle is disabled and Express approval toggle is enabled, the Express approval term is selected automatically. If the Multiple Outcomes toggle is disabled and the Express approval toggle is disabled, the Autocomplete outcome is automatically set to Autocompleted.
For more information, see Assign a task to multiple users fields, buttons, and settings.
When the Assign a task to multiple users action is configured, the following variables are created based on the task name:
- First Response - An object variable that contains the name of the first responder and the response outcome. It also includes the Response method and Express approval comments, if the Express Approval toggle is enabled and a comment is provided. For more information, see Express approval.
- Task Responses - A collection variable that contains the names and outcomes of all responders to the task, including the first responder.
Both variables contain the same type of information. The only difference is that First Response includes only the first responder's details, while Task Responses includes every response.
To find them in the Insert variables or Variables panel, click the task name object for the Assign a task to multiple users action.
The First Response object is a single-value variable that can be referenced directly. However, Task Responses is a collection of objects formatted as a JSON string, and cannot be referenced directly.
To access individual values in the Task Responses collection, use Loop for each action in your workflow. When configuring the Loop for each action, set the Target collection field to Task Responses.
For more information, see Add an action to the workflow and Loop for each.
Once the Loop for each action is configured, you can reference the individual values in the collection using the Insert variables or Variables panel. Click Loop for each variable > Loop for each Object > Current item object.
The task response variables will then be available for selection and use in your workflow.
When using the Task Form task type, the following variables are created:
-
Form URL - The URL that an assignee can use to access the form.
-
Task name (Form link) - A hyperlink to the form URL using the task name.
Additionally, with this task type, the First Response object and the Task Responses collection include a form variables section. This allows data entered into controls on the task form to be accessed in the following workflow actions.
You can only use these variables in the Message body of the Assign a task to multiple users action.
Note: When you use Start event variables or workflow action variables in your workflow, the workflow object is dynamically added to the form toolbox. You can use the data from these object variables in a form. For more information, see Workflow Objects.
For more information on using variables in workflows, see Variables.
|
Section |
Field | Description |
Variable types |
||||||||||||||||||||||||||||||||||||||||||||||||||||||||||||||||||||||||||||||||
|---|---|---|---|---|---|---|---|---|---|---|---|---|---|---|---|---|---|---|---|---|---|---|---|---|---|---|---|---|---|---|---|---|---|---|---|---|---|---|---|---|---|---|---|---|---|---|---|---|---|---|---|---|---|---|---|---|---|---|---|---|---|---|---|---|---|---|---|---|---|---|---|---|---|---|---|---|---|---|---|---|---|---|---|
|
(Unlabeled)
|
Task name |
The name of the task. For more information, see Tasks. |
Text, Decimal, Integer, Boolean, DateTime, Collection |
||||||||||||||||||||||||||||||||||||||||||||||||||||||||||||||||||||||||||||||||
|
Task description |
Description of the task the action sends to the assignee. |
Text, Decimal, Integer, Boolean, DateTime, Collection |
|||||||||||||||||||||||||||||||||||||||||||||||||||||||||||||||||||||||||||||||||
| Task type |
Task form |
Allows you to design and save a task form for the action. You can use this task type when you want to collect information. For example, use a task form to collect information from a new employee or for a support ticket. Users can respond to the task via My Nintex, Click Design form to open the Form designer. Note: After you design a form and apply changes, this changes to Edit form in the configuration panel. You can then click Edit form to make additional changes to the task form. |
(n/a) |
||||||||||||||||||||||||||||||||||||||||||||||||||||||||||||||||||||||||||||||||
| Disable send email | When enabled, task email notifications are not sent to assignees. This option doesn’t apply to Express approval tasks and isn’t displayed when the Express approval toggle is enabled. | ||||||||||||||||||||||||||||||||||||||||||||||||||||||||||||||||||||||||||||||||||
| Express approval |
Use this task type when you need a simple outcome from users, like Accept or Reject. Users who respond via email can also enter comments (up to 500 characters) with the task response. Note:
You can also use this task type with an action with only one branch when assignees do not need to select an outcome, but are required to acknowledge that they have completed the task. For example, use this task type with one branch (no multiple outcomes) if you simply need users to acknowledge a task. When Express approval toggle is enabled, the Smart response detection toggle is displayed. This is available only if the feature is enabled in the AI features for the tenant. When Express approval toggle is enabled and Multiple outcomes toggle is disabled, the Outcomes are not displayed and you can specify the Express approval term. When Express approval toggle is disabled and Multiple outcomes toggle is enabled, you can configure the action to allow assignees to select an outcome. Users can respond to the task via My Nintex |
(n/a) | |||||||||||||||||||||||||||||||||||||||||||||||||||||||||||||||||||||||||||||||||
| Smart response detection |
Displayed when the feature is selected in the AI features for the tenant and the Express approval toggle is turned on for the action. Enable the toggle to turn on smart response detection for express approval task responses. With this enabled, task responses from assignees don’t need to be an exact match to one of the Express approval terms. Smart response detection will analyze and evaluate the response, considering things like the tense, spelling mistakes, and similar terms, and select the closest approval term. Smart response detection requires a certain confidence level to function effectively. If the response doesn't meet that level and seems too unclear, it's taken as an invalid response. The task assignee will get an email about the invalid response and is asked to respond again. |
(n/a) | |||||||||||||||||||||||||||||||||||||||||||||||||||||||||||||||||||||||||||||||||
| Outcomes |
Multiple outcomes |
Enable to allow task assignees to choose from multiple task response options. Each outcome has its own branch in the action. When Multiple outcomes toggle is disabled and Express approval toggle is enabled, the Express approval term field is displayed, which requires assignees to respond with the Express approval term. Note: Disabling the Multiple outcomes toggle deletes all branches and contained actions and causes any form rule that references the outcomes to error. |
(n/a) |
||||||||||||||||||||||||||||||||||||||||||||||||||||||||||||||||||||||||||||||||
| Express approval term |
This field is displayed only when the Multiple Outcomes toggle is disabled and the Express approval toggle is enabled. The message that you want an assignee to respond with after completing a task. The Express approval term you specify is displayed in the Footer text of the email that is sent to assignees. For information about what's displayed in the footer, see Footer text. |
Text | |||||||||||||||||||||||||||||||||||||||||||||||||||||||||||||||||||||||||||||||||
|
Outcomes |
The possible responses for completing the task. The outcomes you define here determine the branches of the action. By default, the Assign a task to multiple users action creates Reject and Approve outcomes. You can add, edit, and delete outcomes. To edit an outcome name, type in the outcome name field. If you add a new outcome, another branch is added to the action. The outcomes appear as options in the Required outcome and Default outcome drop-downs. |
(n/a) |
|||||||||||||||||||||||||||||||||||||||||||||||||||||||||||||||||||||||||||||||||
|
Add outcome |
Click to add task outcomes. If you add a new outcome, another branch is added to the action. If you add an outcome while the Multiple outcomes toggle is disabled, the Multiple outcomes toggle switches to enabled. The maximum outcomes that you can add is 30. |
(n/a) |
|||||||||||||||||||||||||||||||||||||||||||||||||||||||||||||||||||||||||||||||||

|
Deletes an outcome. The Delete icon is displayed only if you define more than two outcomes. |
(n/a) | |||||||||||||||||||||||||||||||||||||||||||||||||||||||||||||||||||||||||||||||||
| Completion rules |
The rule that determines the overall outcome of the task based on the response from assignees. Select one of the following options:
Note: The Default outcome, Required percentage, and Required outcome fields that are displayed depend on the completion rule you choose. |
(n/a) | |||||||||||||||||||||||||||||||||||||||||||||||||||||||||||||||||||||||||||||||||
| Default outcome |
The outcome to use if the required outcome is not received or if the required percentage of a response is not achieved. The field is displayed only if you select one of the following completion rules:
|
(n/a) | |||||||||||||||||||||||||||||||||||||||||||||||||||||||||||||||||||||||||||||||||
| Required percentage |
The percentage of a specific response from assignees that must be achieved. The Required percentage field is displayed only when you select Wait for percentage of a response. |
Integer | |||||||||||||||||||||||||||||||||||||||||||||||||||||||||||||||||||||||||||||||||
| Required outcome |
The response that must be received or achieved before a task is completed. The field is displayed only if the Multiple outcomes toggle is enabled and options for the required outcome depend on the outcomes you specify. |
(n/a) | |||||||||||||||||||||||||||||||||||||||||||||||||||||||||||||||||||||||||||||||||
| Assignee | Assignee authentication |
If the Assignee authentication toggle is disabled and the Express Approval toggle is enabled, the Verify responder's email address is displayed. |
(n/a) | ||||||||||||||||||||||||||||||||||||||||||||||||||||||||||||||||||||||||||||||||
| Verify responder's email address |
Requires assignees to respond only from their email address. Responses received from other email addresses will not be accepted. This field is available only if you enable the Express approval toggle and disable the Assignee authentication toggle. |
||||||||||||||||||||||||||||||||||||||||||||||||||||||||||||||||||||||||||||||||||
| Assignees |
Recipients of the task. Type in the Assignees field to filter and select users. Use semicolons to separate multiple email addresses. Note:
Tip: If you're using a variable in the Assignee field, we recommend using the assignee's email address in Text format. Searching for a user's first name and last name may not return a unique value, causing the action to fail. |
Text, Collection | |||||||||||||||||||||||||||||||||||||||||||||||||||||||||||||||||||||||||||||||||
| Assignment behavior |
The order that a task is assigned to users.
|
(n/a) | |||||||||||||||||||||||||||||||||||||||||||||||||||||||||||||||||||||||||||||||||
| Message |
Sender display name |
The From name in the email that the action sends. The sender display name is followed by the default sender. For example, if your Sender display name is "Marketing Team" and the default sender is nintex@workflowcloud.com, the From field in the email displays as: Marketing Team <nintex@workflowcloud.com>. If you don't enter a sender display name, then the email shows the default sender in the From field. |
Text, Decimal, Integer, Boolean, DateTime, Collection |
||||||||||||||||||||||||||||||||||||||||||||||||||||||||||||||||||||||||||||||||
| Cc recipients | Email addresses for the Cc line in the email message sent by this action. Cc recipients receive a copy of the task email, and all recipients can see who was included in Cc. Use commas or semicolons to separate multiple email addresses. Do not select a null variable. A maximum of five recipients is supported. If more than five addresses are added, only the first five will receive the email. |
Text, Decimal, Integer, Boolean, DateTime, Collection | |||||||||||||||||||||||||||||||||||||||||||||||||||||||||||||||||||||||||||||||||
| Bcc recipients | Email addresses for the Bcc line in the email message that the action sends. Bcc recipients receive a copy of the task email, but their addresses are hidden from all other recipients. Use commas or semicolons to separate multiple email addresses. Do not select a null variable. A maximum of five recipients is supported. If more than five addresses are added, only the first five will receive the email. |
Text, Decimal, Integer, Boolean, DateTime, Collection | |||||||||||||||||||||||||||||||||||||||||||||||||||||||||||||||||||||||||||||||||
|
Subject |
Subject of the email message that the action sends. |
Text, Decimal, Integer, Boolean, DateTime, Collection |
|||||||||||||||||||||||||||||||||||||||||||||||||||||||||||||||||||||||||||||||||
|
File attachments |
Variables representing files to attach to the email that the action sends. |
Collection, File |
|||||||||||||||||||||||||||||||||||||||||||||||||||||||||||||||||||||||||||||||||
|
Body of email message that the action sends. To expand the message body window and to see more options in the toolbar, click
|
Text, Decimal, Integer, Boolean, DateTime, Collection |
||||||||||||||||||||||||||||||||||||||||||||||||||||||||||||||||||||||||||||||||||
|
When the toggle is enabled, footer text is automatically added to the end of the message body in the email that the action sends. The footer text that is included is based on the task type.
This footer text cannot be edited. If you want to add your footer text, disable the Footer text toggle and append the required footer text to the end of the message body. When the Footer text toggle is disabled, the email the action sends does not automatically include footer text after the message body. You can add your own Task form links using variables so your assignees can access the forms and respond appropriately. |
(n/a) |
||||||||||||||||||||||||||||||||||||||||||||||||||||||||||||||||||||||||||||||||||
|
Reminders
|
Reminders |
When you enable the Reminders toggle, the action sends reminders to the assignees at intervals you specify. When disabled, reminders are not sent to the assignees. Example: If you enable the Reminders toggle, set Number to 1 and Unit of time to Hour(s), a reminder will be sent 1 hour from the start of the task assignment. |
(n/a) |
||||||||||||||||||||||||||||||||||||||||||||||||||||||||||||||||||||||||||||||||
|
Number |
Displays when you enable the Reminders toggle. The quantity of Unit of time before the action sends the first email reminder to the assignees. |
Decimal, Integer |
|||||||||||||||||||||||||||||||||||||||||||||||||||||||||||||||||||||||||||||||||
|
Unit of time |
Displays when you enable the Reminders toggle. Time unit used with the Number field for the first email reminder. |
(n/a) |
|||||||||||||||||||||||||||||||||||||||||||||||||||||||||||||||||||||||||||||||||
|
Customize email |
Displays when you enable the Reminders toggle. Presents the Custom email section and fields for reminder emails the action sends. See the Subject, Message body and Footer text information above. |
(n/a) |
|||||||||||||||||||||||||||||||||||||||||||||||||||||||||||||||||||||||||||||||||
|
Subsequent reminders |
When you enable the Subsequent reminders toggle, the configuration panel presents additional Number and Unit of time fields. The action sends subsequent reminder emails for the task to the assignees as frequently as you define in the Number and Unit of time fields until the task is completed. When disabled, the action does not send additional reminders for a task. Example: If you enable the Subsequent reminders toggle, set Number to 2 and Unit of time to Hour(s), subsequent reminders will be sent for every 2 hours after the first reminder. |
(n/a) |
|||||||||||||||||||||||||||||||||||||||||||||||||||||||||||||||||||||||||||||||||
|
Number |
Displays when you enable the Subsequent reminders toggle. The quantity of Unit of time before the action sends subsequent email reminders to the assignees. |
Decimal |
|||||||||||||||||||||||||||||||||||||||||||||||||||||||||||||||||||||||||||||||||
|
Unit of time |
Displays when you enable the Subsequent reminders toggle. Time unit used with the Number field for the subsequent email reminders. |
(n/a) |
|||||||||||||||||||||||||||||||||||||||||||||||||||||||||||||||||||||||||||||||||
|
Escalation
|
Escalation |
When you enable the Escalation toggle, the configuration panel presents additional fields. The action escalates and sends the task to the recipient you specify, or completes the task with the selected Autocomplete outcome. By default, Use date variable is selected, which presents Due date and Escalation assignee fields. When you do not enable the Escalation toggle, the action neither escalates nor autocompletes. |
(n/a) | ||||||||||||||||||||||||||||||||||||||||||||||||||||||||||||||||||||||||||||||||
|
Use date variable / Calculate date |
Select to either use a date variable from your workflow or a set amount of time after the task is first created to escalate the task. This is selected, by default. |
(n/a) |
|||||||||||||||||||||||||||||||||||||||||||||||||||||||||||||||||||||||||||||||||
|
Due date |
Displays when you select Use date variable. The date the action escalates or autocompletes the task. |
DateTime |
|||||||||||||||||||||||||||||||||||||||||||||||||||||||||||||||||||||||||||||||||
|
Number |
Displays when you select Calculate date. The quantity of Unit of time before the action escalates or auto-completes the task. Example: If you enable the Escalation toggle with Calculate date, set Number to 2 and Unit of time to Hours(s), an escalation email will be sent 2 hours after the start of the Assign a task to multiple users action. |
Decimal |
|||||||||||||||||||||||||||||||||||||||||||||||||||||||||||||||||||||||||||||||||
|
Unit of time |
Displays when you select Calculate date. Time unit used with the Number field for the escalation email that is sent to the assignees. |
(n/a) |
|||||||||||||||||||||||||||||||||||||||||||||||||||||||||||||||||||||||||||||||||
| Activity on due date |
Defines the activity that occurs when an assignee fails to respond to a task by the due date. Select one of the following:
|
(n/a) | |||||||||||||||||||||||||||||||||||||||||||||||||||||||||||||||||||||||||||||||||
|
Escalation assignee |
The recipient of the task escalation. This field is displayed only when Activity on due date is set to Escalate. For information on how tasks can be reassigned or delegated, see Tasks. |
Text |
|||||||||||||||||||||||||||||||||||||||||||||||||||||||||||||||||||||||||||||||||
|
Customize email |
Presents the Custom email section and fields for escalation. See the Subject, Message body and Footer text information in the Message section above. This field is displayed only when Activity on due date is set to Escalate. |
(n/a) |
|||||||||||||||||||||||||||||||||||||||||||||||||||||||||||||||||||||||||||||||||
|
Autocomplete outcome |
The outcome that is applied automatically when an assignee fails to respond to a task. These are the options for the Autocomplete outcome:
This field is displayed only when Multiple Outcomes toggle is enabled, Escalation toggle is enabled, and Activity on due date is set to Autocomplete. When a task is autocompleted, the status of the task in the Tasks page is displayed as Autocompleted. |
(n/a) |


