Managing Worklists with the legacy K2 Workspace
One of the most common administrative tasks in K2 is redirecting a process instance from one user to another. There are a number of reasons you might do this, one being the destination user (or the user assigned a task) is not available and the originator wants to move the workflow along prior to them returning. At other times, a destination user might contact you and ask that the workflow be redirected to another user for making the task decision. When you redirect a user task, the task is then removed from the original destination user's worklist and placed on the target user's worklist.
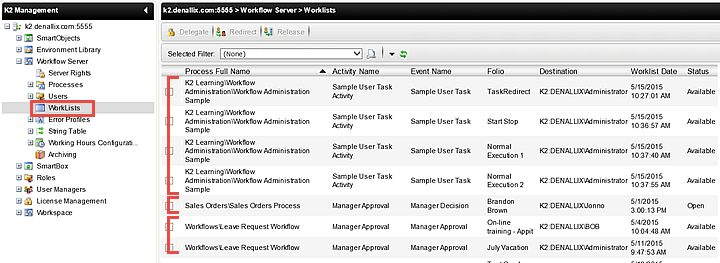
The K2 Administrator can see all user tasks from the Worklists option found under the Workflow Server node. Both K2 Administrators and task-assigned users have the ability to redirect worklist tasks; users can redirect tasks using the standard K2 worklist screens or web parts.
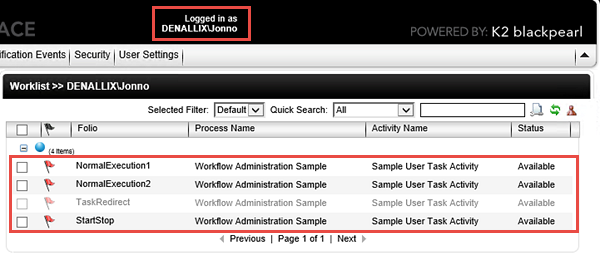
K2 Administrator Worklist shows processes and process instances for all users
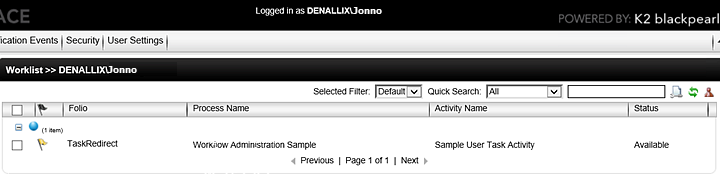
User Worklist on K2 Workspace landing page shows their tasks only

In this step, we will redirect a worklist item from one user to another. Prior to redirecting the worklist item, we will open Internet Explorer for both users and observe their worklists. We want to observe how the worklist item is completely removed from the original destination user and subsequently added to the new destination user's worklist.
Step 1 Tasks
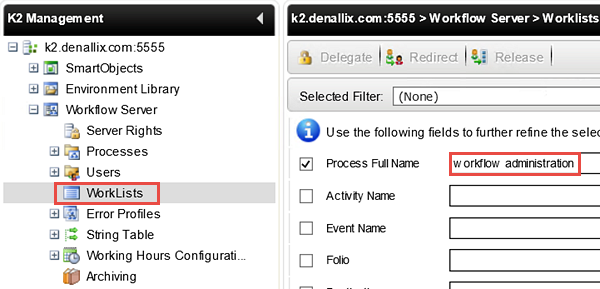
- Navigate to, and select, the Worklists option found under the Workflow Server node in the Management Console.
- On the Worklist Filter screen, search for
workflow administration
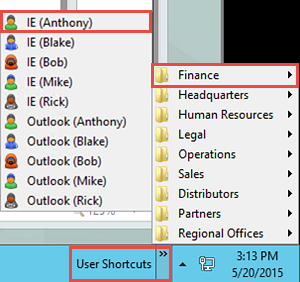
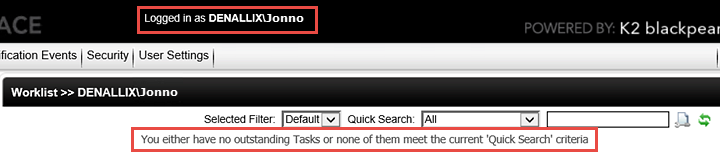
then observe the worklist items and who they are assigned to. - Open a second instance of Internet Explorer for Anthony using the User Shortcuts > Finance > IE (Anthony) links. Open K2 Workspace for Anthony (https://k2.denallix.com/workspace/). Observe that Anthony does not have any Workflow Administration Sample tasks assigned to him. (NOTE: Depending on the K2-provided virtual environment, you may need to enter the URL without a secure connection:
http://k2.denallix.com/workspace/) - Return to the Administrator's Worklists screen. Redirect the task with the Folio named TaskRedirect to Anthony. Confirm the Destination now displays Anthony.
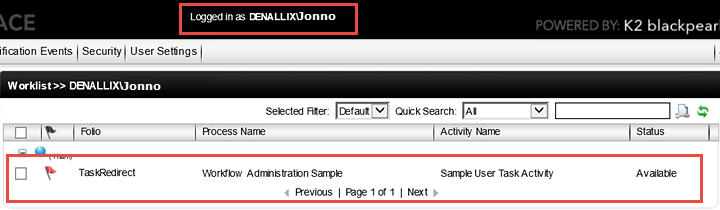
- Return to Anthony's Worklist and refresh the page. Confirm Anthony now has a task assigned to him.
- Open K2 Workspace if it is not already open. Navigate to the Worklists node found in the Management Console. (Management Console > K2 Server > Workflow Server > Worklists)
- After clicking on Worklists, the Worklist Filter screen will appear. In the Process Full Name field, enter
workflow administration
then click Search. (If you wanted to return all worklists for all users, leave the filter fields empty and click Search.) - We will now open a second instance of Internet Explorer, logged in as Anthony. If you are attempting this tutorial in another environment, please log in as the intended user instead.
Click on the User Shortcuts link found in the lower right corner of your screen. Then expand the Finance folder and finally, click on IE (Anthony). A second instance of IE should open. - Open K2 Workspace on Anthony's IE instance. The URL is
https://k2.denallix.com/workspace/ - Return to Administrator's IE and the Worklists screen. CHECK the box for the worklist item that has the TaskRedirect Folio. Click the Redirect button.
- Click the Home icon to return to the K2 Workspace landing page. Confirm there is no worklist item with a Folio value of TaskRedirect for Administrator.
- Return to Anthony's instance of IE. Refresh the browser. Notice now that Anthony has the TaskRedirect item in his Worklist.
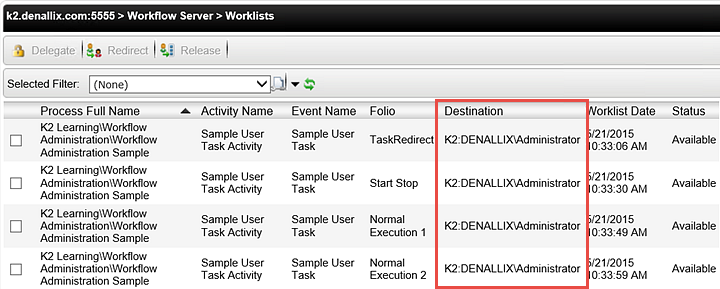
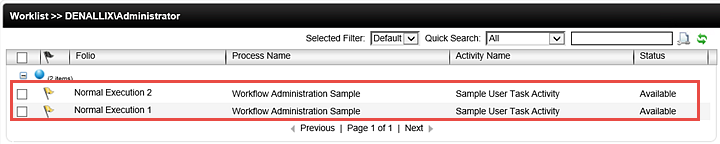
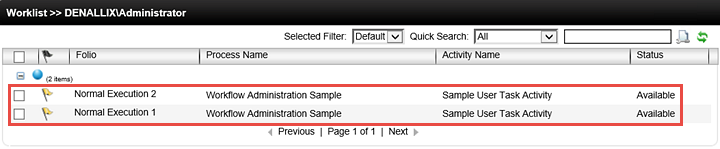
You should now see all of the tasks currently assigned for Workflow Administration Sample Process Instances. Notice the Destination users are all the same, because the same user started the workflow (in our sample, "Administrator" started the workflows).
If you see an error, try the URL without a secure connection.
http://k2.denallix.com/workspace/
(If you are working within your own environment, you may need to contact your K2 Administrator for the K2 Workspace URL. In your own environment, you will not have the User Shortcuts and will need to access another user's computer for these steps.)
Notice that Anthony does not have any worklist items.
Enter
Anthony
into the Search box, then click the search icon. When Anthony's name shows up in the results pane, CHECK the box to select him, then click OK. Click OK again to complete the redirect.
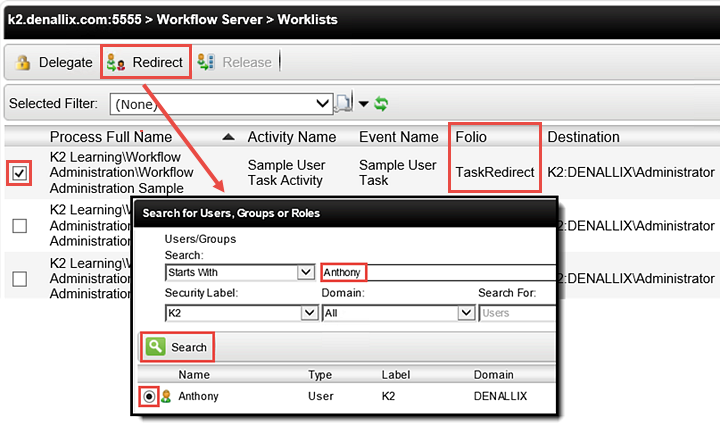
Notice on the Worklists results screen, the TaskRedirect Destination user is now Anthony.
Before we move on to viewing Anthony's worklist, let's confirm that the TaskRedirect item is no longer in Administrator's worklist.
STEP 1 REVIEW
In this step, we redirected a worklist item from Administrator to Anthony. Redirecting tasks is a very common request made to the K2 Administrator. There are many reasons why a user might want to redirect a task to another user. This is a simple process for the K2 Administrator. Redirecting a task completely removes it from the original destination user's worklist. The new destination user will receive any notifications that were configured in the workflow. (The workflow simply restarts the event using the new destination user.)
Out of Office allows a user to delegate their tasks to another user. Delegating a task differs from redirecting tasks in that the task is available to both users. It is not removed from the original user's worklist. Aside from being unavailable, another very common use of the Out of Office feature is for executives, who may want to delegate their task actions to an assistant. In many cases, the destination user assigned in the workflow is the "Manager" and this would include top-level executives as well. By setting up the Out of Office feature (once), they can effectively reassign all of their workflow tasks automatically.
All K2 Administrators can manage Out of Office settings for all users in K2 Workspace. Users can also manage their own Out of Office settings using the standard K2 worklists.
Step 2 Tasks
- Make a note of the current items waiting in Adminstrator's Worklist.
- Set up Adminstrator's Out of Office so that all tasks are forwarded to Anthony. (We do not need to apply any exceptions.) Be sure to make Administrator currently 'Out of the Office'.
- Open Anthony's K2 Workspace and confirm Administrator's items now appear in Anthony's worklist. (You may need to refresh the browser to see the changes.)
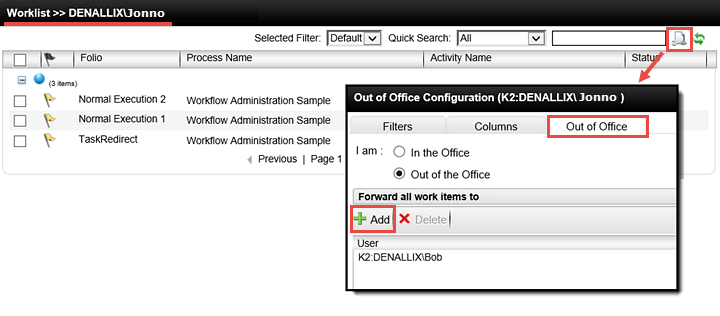
- Still on Anthony's worklist page, access the Settings option (as Anthony) and create an Out of Office, assigning Bob as the user to receive Anthony's worklist items.
- Open IE for Bob, then K2 Workspace and confirm Anthony's items now appear in Bob's worklist.
The URL for K2 Workspace (if using a K2 -provided VM) is
https://k2.denallix.com/workspace/.
- Return to the K2 Workspace landing page for Administrator. Make a note of the current Worklist items.
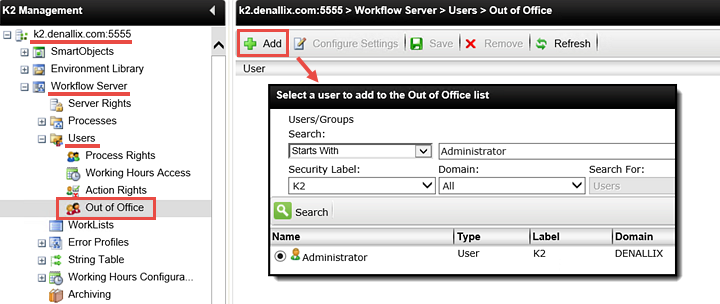
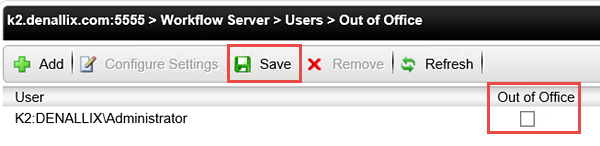
- Access the Users settings (Management Console > K2 server > Workflow Server > Users). Expand the Users node and click Out of Office.
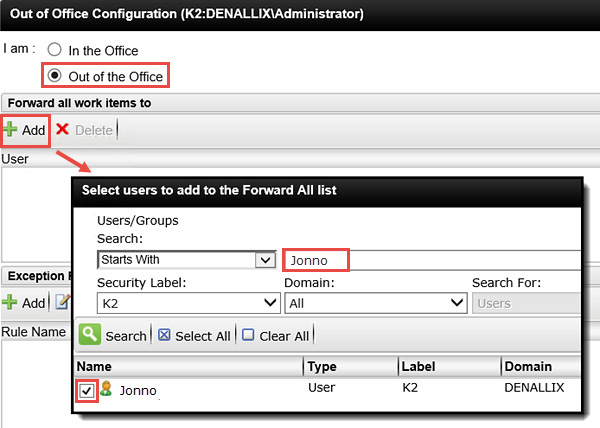
- You should now see the Out of Office Configuration screen. Change the "I am" setting to Out of the Office. In the Forward all work items to pane, click Add. Search for and add Anthony. Click OK twice to complete the configuration.
- Return to the Out of Office settings for Administrator. UNCHECK the Out of Office option and click Save, then OK.
- Now toggle back to Anthony's worklist and refresh the browser. Notice the items for Administrator have been removed.
- Still on Anthony's Worklist screen, click the Settings icon located in the upper right corner of the worklist. Click the Out of Office tab. Add Bob as the recipient of Anthony's forwarded work items.
- Now let's take a look at Bob's Worklist items. Use the User Shortcuts links and open an instance of IE for Bob. (He is also a member of Finance.) Access the K2 Workspace landing page for Bob (https://k2.denallix.com/workspace/ if on a VM)
Now we will configure Adminstrator's Out of Office to forward any tasks to Anthony.
Click Add, then search for Administrator. (We are adding an Out of Office for Administrator.) Select Administrator and click OK.
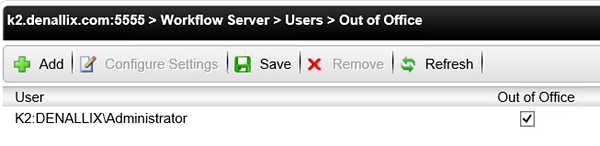
You should now see Administrator added to the Out of Office pane.
Now let's take a look at Anthony's Worklist. Return to the IE instance you opened for Anthony and refresh the browser. You should now see the additional items from Administrator's worklist.
As a K2 Administrator, you might be asked to create and delete Out of Office settings quite often. One option for managing Out of Office users is to not remove them, but to simply UNCHECK the Out of Office check-box (then Save) to toggle back and forth. This will save a great deal of time if your users do not manage their own Out of Office settings. Let's see what happens to Anthony's worklist when we turn off, or disable, the Out of Office setting for Administrator.
Users can also manage their own Out of Office settings as well and do not require additional or special permissions to do so. In this next step, we will add an Out of Office setting while logged in as Anthony.
NOTE: If you see an error with the URL, enter it once again without the secure connection.
(http://k2.denallix.com/workspace/)
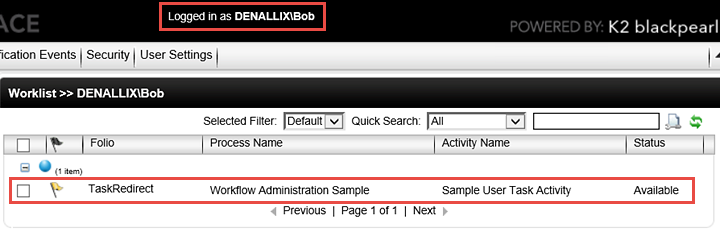
Notice that the TaskRedirect assigned to Anthony now appears in Bob's worklist.
(Administrator's items are not listed, as only a copy is forwarded to Anthony. Only tasks that are specifically assigned to a user are forwarded.)
STEP 2 REVIEW
In this step, we worked with the Out of Office feature and observed how K2 Administrators can manage Out of Office settings for multiple users. Out of Office will forward the task to the designated user, but not permanently reassign the task. Users can also manage their own Out of Office settings by accessing the Settings options directly from their worklist.
The Out of Office feature helps to ensure that workflows continue to move along, even if the destination user is unavailable. Another common use for this feature is to assign Out of Office forwarding for executives that want another user (an assistant perhaps), to manage their workflow tasks.
In the next section, we will take a look at Permissions in K2. If you are ready to continue, click the Managing Permissions link to get started. (If you are continuing on, leave the IE instances open for Anthony and Bob, as we will use them in the next section.)