Managing Permissions with the legacy K2 Workspace
As a K2 Administrator, you will manage Server Rights and Process Rights. In this section, we will take a look at the more common permissions you are likely to assign, and the level of security those permissions grant. Most permissions can be assigned to individual users or groups.
There are mainly three levels of permissions that you (as the K2 Administrator) will work with. The following is a high-level overview:
- K2 Administrator: This user has full-control over the K2 environment. This user will likely interact with other system, network and database resources as well. If this user does not have access to these other resources, they will need to work with the individuals that do. Typically, there are very few K2 Administrators within the organization (one or two perhaps). The K2 Administrator assigns Server Rights and often Process Rights to other users. K2 Administrators manage the entire K2 environment.
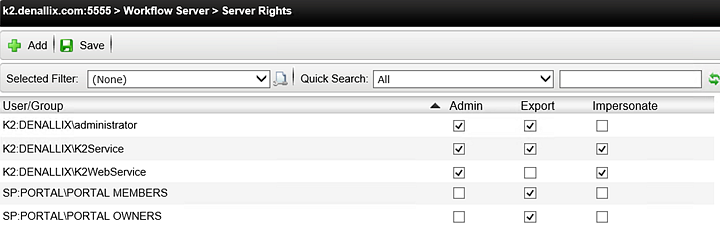
- Server Rights: There are three options for Server Rights permissions.
- Admin: Full control; this is the K2 Administrator. Again, usually only one or two people are full K2 Admins.
- Export: Users with Export rights can publish (deploy) workflows. Assign this right to users that will be building workflows and will need to deploy them, or users that need to use the K2 Package and Deployment tooling to deploy Packages. Some organizations prefer to limit the number of users that actually build and deploy workflows as a quality control measure, while others grant export rights to all of their users.
- Impersonate: This is a system right that allows an account to impersonate another user after the initial connection is established. This is an advanced use case that we will not cover in this tutorial.
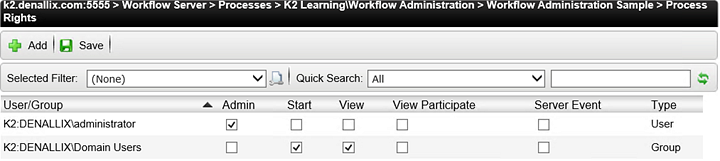
- Process Rights: Process Rights are permissions that are assigned to each individual process. At some point in time, you may build a workflow for a specific target group of users. To prevent other users from submitting the workflow, you can control the workflow access with Process Rights. Process Rights consist of the following:
- Admin: Required to view, add and edit the Process Rights for a deployed process and administer active workflow instances.
- Start: Users with Start rights can start workflow instances.
- View: Users with View rights can report on all instances of a workflow.
- View Participate: Users with View Participate rights can report only on those workflow instances where they are the originator (submitted the original form), or where they actioned a user task.
- Server Event: This is a special type of permission used for asynchronous server tasks, where an external system completes a K2 server event. We will not cover this advanced use case in this tutorial.
In this Step, we will grant Anthony Export rights so that he can deploy (or publish) workflows.
Step 1 Tasks
- Grant Anthony Export rights.
- Launch K2 Workspace (if it is not already open). (Start Button > All Programs > K2 blackpearl > K2 blackpearl Workspace)
- Navigate to the Server Rights node in the Management Console. (Management > Management Console > K2 Server > Workflow Server > Server Rights)
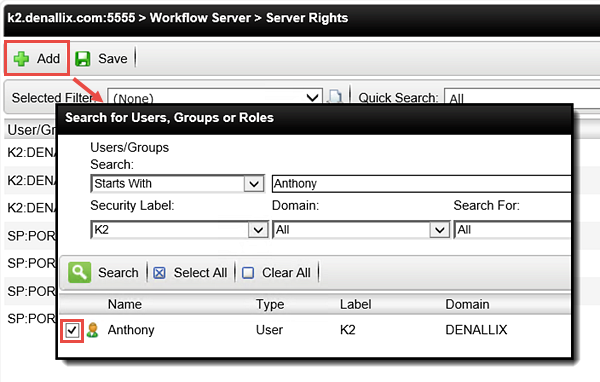
- Click the Add button and search for Anthony. Select Anthony and click OK.
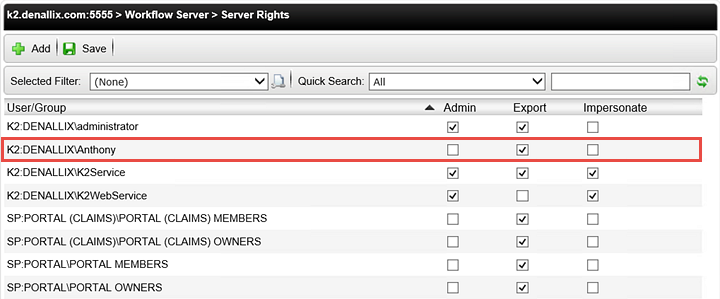
- CHECK the Export box, then click Save.
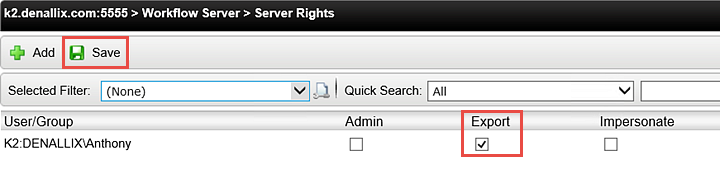
You should now see Anthony added to the list of users and groups that have permissions. (Your screen may not look exactly the same as the image below.)
STEP 1 REVIEW
In this step, we granted Anthony (Export) rights so that he can publish (deploy) workflows. In the image above, notice that all Portal Members and Owners also have Export rights. Typically, you would not grant individual users rights if you have already granted all users Export rights. (The assumption is that all users are included in the Portal Members group.) Some organizations may grant Export rights to a handful of users as a quality control measure. Users in this scenario are most likely application designers and have had more advanced training than the typical user. Other organizations grant all users Export rights and allow everyone to build and deploy workflows.
Now we are going to work with Process Rights, or permissions assigned to a single Process. In the following steps, we will grant Bob (Admin) rights to the Workflow Administration Sample Process. We want Bob to be able to manage the permissions for this process. We will then grant all other users (Start) rights so that everyone can start this workflow.
Step 2 Tasks
- Grant Bob (Admin) rights for the Workflow Administration Sample Process.
- Grant Domain Users (Start) rights on the same process.
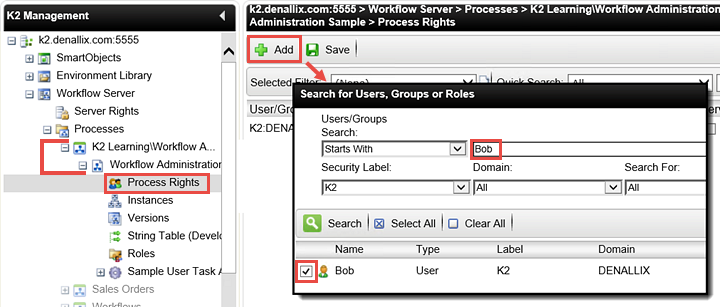
- Still in the Management Console > Workflow Server pane, expand Processes > K2 Learning\Workflow Administration > Workflow Administration Sample Process. Click on Process Rights to expose the Process Rights screen.
- In the Process Rights screen, click Add. Search for, and select, Bob. Click OK.
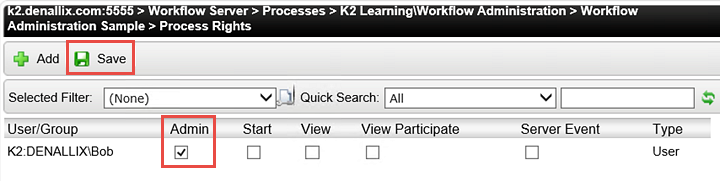
- You should now see a screen displaying Bob's name and the Process Rights options. CHECK the box for Admin, then click Save.
- Click Add once again. This time, search for
Domain Users
then CHECK the box to select Domain Users in the results pane and click OK.
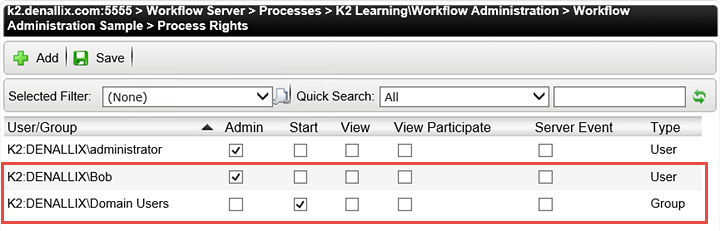
On the next screen, CHECK the Start box for Domain Users, then click Save. Your screen should look like the image below.
At this point, you should see that Administrator is the only user with Process Rights. (If on a K2-provided VM.) Now we are going to add Bob and give him Admin rights. This will allow Bob to grant permissions for this single Process as he needs to.
Now we will grant Start rights to all users. This is allow anyone to submit the Workflow Administration Sample Process.
STEP 2 REVIEW
In this final step, we granted permissions, or Process Rights, to the Workflow Administration Sample Process. With Admin level rights, Bob can now assign permissions for this process as he needs to. All Domain Users now have the ability to Start this workflow. In assigning Process Rights, we observed how we can assign rights to both individuals and groups. To delete the Process Rights for a user/group, simply UNCHECK the rights options and save.
You have now completed the Administering K2 tutorial. If you would like to review the topics covered, or work through some Challenge exercises, continue on to the Summary and Challenge Steps section.