Save List
The Save List action An instruction within a botflow. saves a list to a file in a botflow Automated steps that you can design for each bot that will run..
Using the Save List action, you can save lists from:
- A list of imported data.
- Within a list in a botflow.
Some examples of applications for the Save List action are:
- Saving a list created in the Nintex Bot Botflow Pane.
- Saving an existing list of items extracted from a list created using the Create List action.
Add a Save List action to a botflow
This example provides the steps necessary to add a Save List action to a botflow.
To add a Save List action to a botflow:
- On the Actions List, click Lists and then click Save List from the List list.
- Set the Save List settings.
- List: Type a source list name in the List field.
- Save as: Select the list file save as option from the drop-down.
- Overwrite: Select the check box to overwrite a file or variable with the same name.
-
- Delimiter: Select the required delimiter for the file.
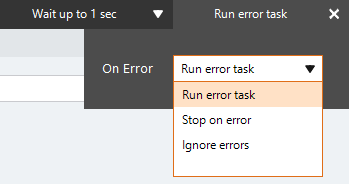
- If needed, adjust the Run Error Task settings to fine tune how the action runs.
- If needed, adjust the Run Switch setting to create the action without running it.
- Optionally, add an action note.
- Click OK to add the Save List action to the botflow.
The Action Builder window for Save List displays.
General
Options: Select the delimiter option for Delimited, Text, or Variable files.
Action Builder field and button descriptions
| Field or button | Description |
|---|---|
| Save List Options/Settings |
General
Options: Select the delimiter option for Delimited, Text, or Variable files. Select the sheet name for a Microsoft Excel file. There is no option for a Microsoft Access file.
|
| Run error task |
|
| Note |
(Optional) Type a Note to document any special instructions or functionality.
|
| Run Switch |
The Run Switch toggle controls how Nintex Bot runs an action when adding or editing an action in a botflow.
|
| OK/Cancel | Click OK to save the action or click Cancel to discard the action or any changes. |