List
A List is a custom list of information that you define for use in your script. Lists allows you to look up list information in real time as your script is running.
Create a list
- On the Botflow Pane, click Add Item.
- Select List.
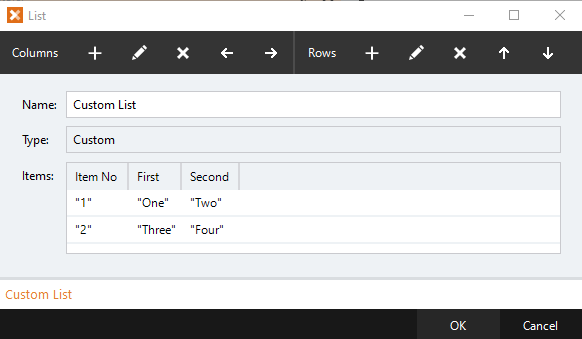
- Enter a unique Name for the List.

The list type displays in the Type field. A Custom Type is displayed when lists are created manually.
Note: The Create List action can be used to create other types of Lists.
- Add Columns and Rows using the Option Bar tools.
- Right-click in the Preview List to use the Context Menu tools.
A preview of the List displays as columns and rows are added and edited.
Define columns and rows
- Nintex Bot searches for a List from top to bottom. The first qualified match in the list is used. Use the Move Up and Move Down options in the Options Bar to control the order of the rows in the List.
- At least two columns must be created before a List can be saved.
- At least one column must be created before rows can be entered.
- Enter an Exception Value to return for a column if an entry in the List could not be found.
- Select the Keep window open to add another row to rapidly enter a large number of rows.
- Select the Keep window open to add another column to rapidly enter a large number of columns.
- Each defined column in the List appears as a field. This list of fields changes depending on what columns are defined in the List. Enter the desired value for each column option.
Use lists
Access Lists through the Loop action builder and the Expression Builder.
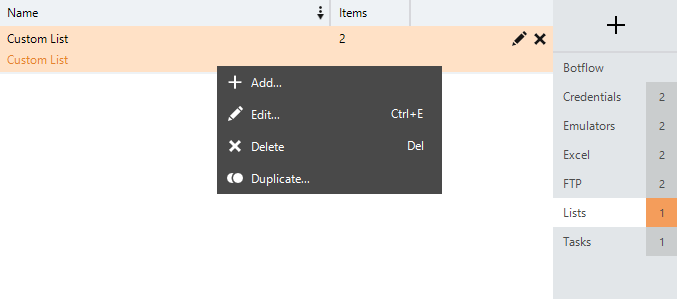
Manage lists
- On the Botflow Pane, navigate to Lists.
- Right-click on the List.
- Use the Context Menu to add, edit, delete, and duplicate Lists.