Using Process Capture
Steps to capture a process:
- Create a new process in Process Manager.
- In the Edit tab of the process select the Capture option. Click the image to view it:
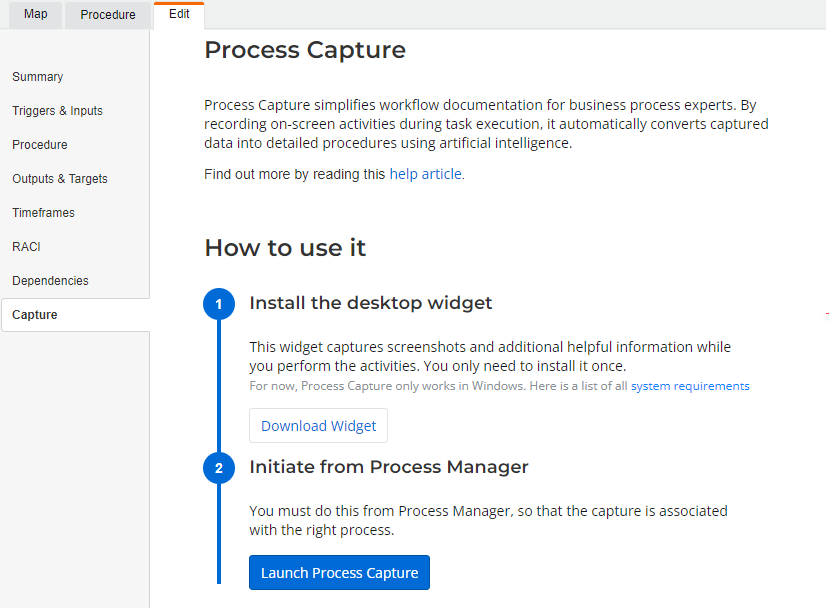
- If you have not installed the Process Capture widget you must download and install it.
 Steps to install the widget
Before installing the Process Capture widget application, see the Requirements.
- From the Install the desktop widget screen, click the Download Widget button.
- The button will then show an animation indicating that the download has started. Once the installer is downloaded the Download Complete notification shows in green next to the Download Widget button.
- Open and run ProcessCapture.exe.
- When the Nintex Process Capture installer screen shows, click Next to start the installation.
- Click Finish when the Installation complete message shows.
The Process Capture widget is now installed.
- Click the Launch Process Capture button.
Note: If you see a pop-up asking permission to open the application, click Open Nintex Process Capture. If you see the Something went wrong error message, click the Try again button.
- Click the Start capturing button. If you are not ready to capture this process click Abort.
- The recording widget should show on your desktop.

- Perform all the step or tasks needed for the process. The red circle pulses to show that recording is on.Tip:
You can pause the capture using the pause button on the recording widget. Then use the resume button to continue with the capture.
You can move the recording widget if it is displaying over an area of the screen you need to see for your process steps. Click above the widget on the six dots and drag and drop the widget to a different location.
- Click the Stop button to end the capture.
- A new tab opens and Process Capture shows that it is processing the recording - this could take a while.
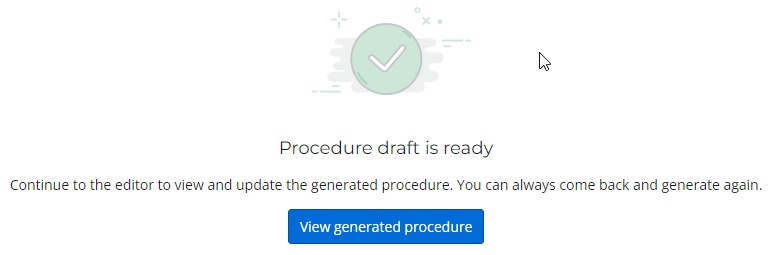
- Once the processing is complete you see the Procedure draft is ready message. Click the View generated procedure button to load the draft for review.
- An overview of the steps in your process is returned, showing what applications were used, the number of potential steps, the roles of the user who recorded, and the time duration. You can now review the overview, removing steps if they are not needed. Go through each step in the process. Click Expand to show an image in full view. Click Delete to remove the step from the draft.
- Each step shows the application used and the name of the user.
- You can delete this capture and then create a new one. To delete this capture, click the Delete Capture button.
- Once you are happy with the draft steps shown in the capture, click Generate Procedure to accept the draft.
- You will see the Generating the procedure message, and then the Procedure draft is ready message. Click View generated procedure to complete the capture. Click the image to view it:
- The process now shows in the Procedure tab, and you can assign the tasks to users or roles, add notes, documents, etc.
Important:
Handling confidential content: If you recorded confidential content, you MUST delete the entire capture and start a new one. Removing a step from the process draft does NOT remove it from the recording. The recording retains all captured data until the entire capture is deleted. To completely remove confidential information, click the Delete Capture button above and create a new recording.
Considerations
-
If you recorded confidential content you must delete that capture and start a new one. Removing a step from a process draft does not remove it from the recording, it only removes it from the draft process.
-
The Process Capture widget is currently only supported on windows.
-
Process Capture:
-
Only supports generating procedures in English.
-
Only supports one capture per process.
Generating procedures from multiple captures
Currently Process Manager only supports a single capture per process at any one time. If a process has multiple variants, generating a procedure will append the generated activities and tasks to which ever variant is currently selected.
Workaround
You can use this workaround to "pass the baton" with Process Capture:
-
Your first user creates a capture and generates the procedure.
-
That first user then deletes the capture.
-
In the same process, your second user creates a new capture and then generates a procedure.
Since generating a procedure from Process Capture does not override existing content but only appends content, the process will now contain all the activities and tasks from your first user's capture followed by all the activities and tasks from your second user's capture.
-
-
Does not currently support an allowlist or denylist of approved or restricted applications.
-
Does not currently support manual or automatic masking of screen-shots.
-
-
For troubleshooting, the Process Capture widget error log can be found at %AppData%\Roaming\ProcessCapture.
-
You can pause the capture using the pause button on the recording widget. Then use the resume button to continue with the capture.
-
You can move the recording widget if it is displaying over an area of the screen you need to see for your steps.
-
After capturing a process, a new tab will open in your default browser. If you initiated the capture in a different browser you may need to log in to Process Manager.
-
For each user step (mouse event or keyboard action), the following information is collected:
- Screen shot>
- Meta data:
- Mouse location
- Keyboard commands (shortcuts)
- URL / Process Name
- Window Size / Location
- Screen DPI
- Additional OS properties
Note: Process Capture does not collect back-end information from log files or databases. The Process Capture widget does not capture text strings typed by users such as passwords (though textual information is extracted from screen shots when generating a procedure).