Process Discovery GUI Installation
Currently, you can not uninstall the Process Discovery Server through the System Manager's GUI installer. However, uninstallation can be completed using the Silent Installation (CLI).
The System Manager GUI makes it easy to install Process Discovery. To customize and configure Process Discovery, you can use either the CLI installation or the CLI TLS installation, which includes extra settings for security.
Jump to:
Prerequisites
To install Process Discovery with the System Manager, you must have the following prerequisites in place:
- The application server where the installation will take place, configured with the prerequisites for Nintex Process Discovery.
- The Seq server.
- MariaDB and MongoDB installed.
-
Ensure that you have access to the server hosting MariaDB and MongoDB databases and that you have full credentials, including usernames and passwords, for these databases.
To ensure proper functionality, you must establish an open connection between all of the servers. - The Nintex System Manager executable file:
NintexSystemManagerSetup.exe. - The zip file of the product you want to install, upgrade, or patch (for example,
nintex-pd-23.8.0-full). - The license file for the Process Discovery Console:
License.llk. - (Optional) You can use SSL/TLS for secure connections, and we support different certificate file options: PFX (PKCS#12), CERT, KEY, and PEM files. Make sure to have the necessary files for your chosen option, and ensure that each server in a multi-server installation has a certificate installed.
Installation flow
-
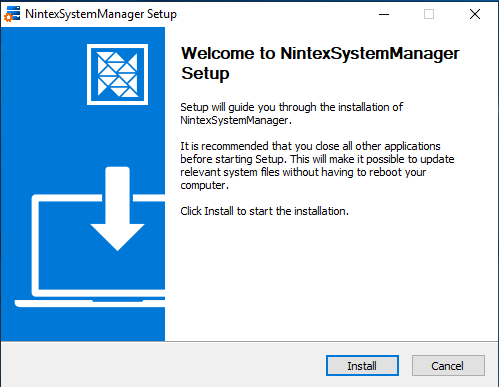
Open the System Manager installer executable file,
NintexSystemManagerSetup.exe. -
Click Install to initiate the installation process.
-
If you want to launch the application immediately, select the Run NintexSystemManager checkbox.
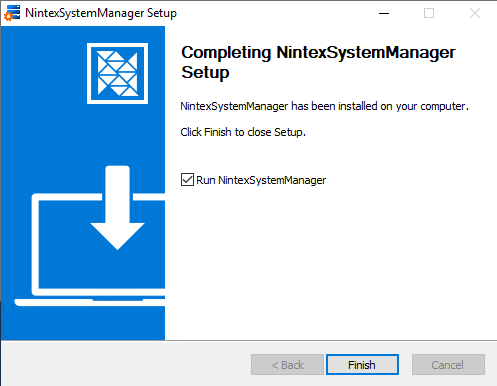
-
Click Finish to close the setup process.
-
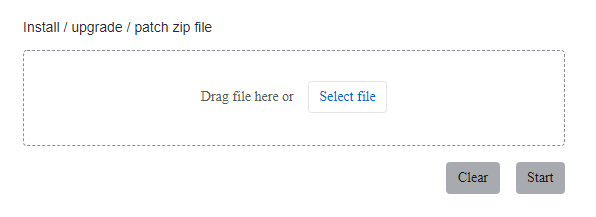
Double-click the System Manager icon or run it as an administrator.
-
Drag a ZIP (.zip) file into the designated box or select the ZIP file by clicking Select file. Note that only the selection of ZIP (.zip) files is allowed.
-
Select the installation type from the drop-down menu, which varies depending on the contents of your selected zip file.
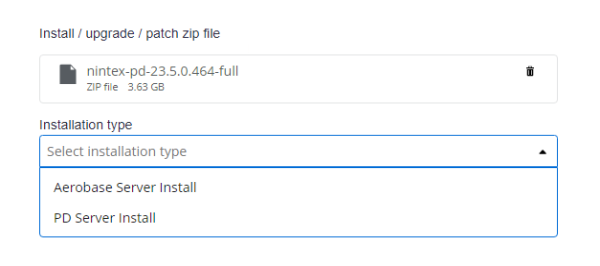
-
Click Start to begin the installation process.
If you need to start over or change the selected file, click Clear to remove the current selection and start again. -
Follow the installation setup steps using the System Manager, providing the necessary details as prompted on each screen. During the installation, you may be prompted to select installation options such as the installation directory, components to be installed, and any additional configurations required.
To ensure a smooth installation process while using the System Manager setup wizard, it is highly recommended that you review the Input Field Requirements table before completing the input fields.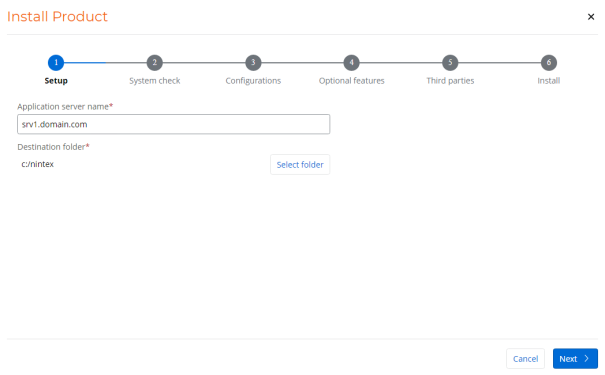
-
Proceed with the installation after all necessary options and configurations are specified. The installer will copy the required files, configure the system settings, and set up the necessary components for Process Discovery.
If you cancel the installation process and decide to resume it within the next 7 days, it will start from the same point where you left off.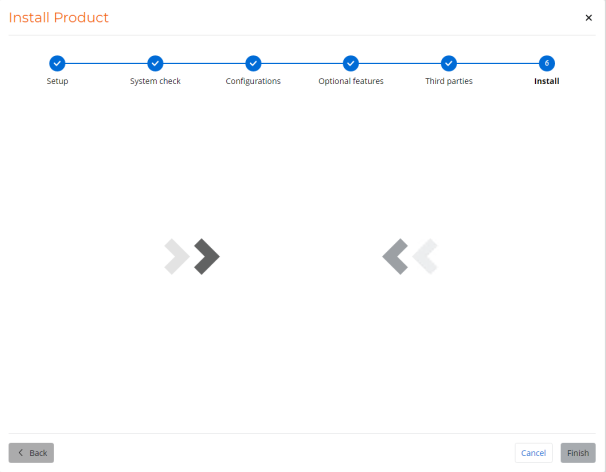
Post-installation steps
-
Proceed with the installation of the Discovery Robots.
-
Ensure the products' functionality by launching and interacting with the Process Discovery Console.
-
(Optional) Change configuration parameters: If you need to make changes like enabling TLS or configuring masking, you can do it by using the Silent installation instructions (CLI). There is no need to uninstall the previous version. Simply rerun the System Manager installation and adjust the
config.jsonandsecrets.zipfiles as required. You can use the original template and make changes there.