Database Triggers
Create a database trigger in the RPA Console Plus to initiate a new task whenever database records are inserted, updated, or deleted.

Create a database trigger
-
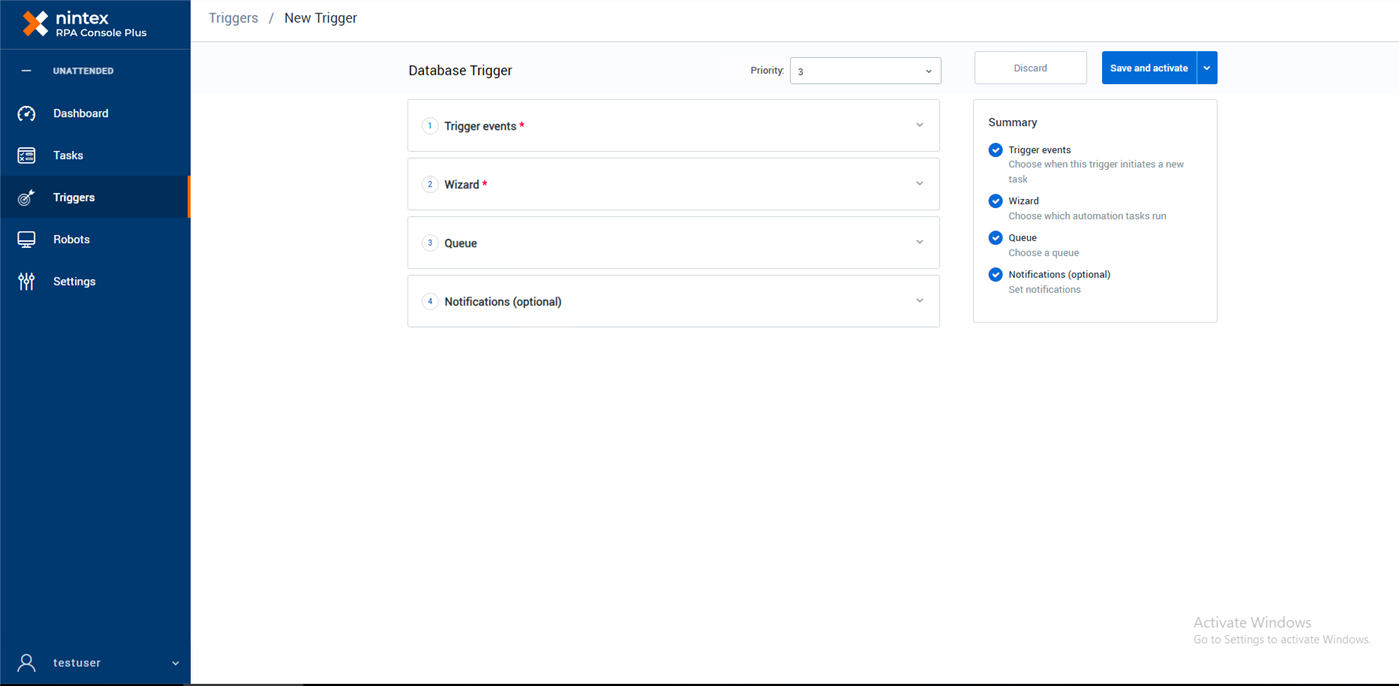
Add a new trigger in the Console Plus.
-
Enter a name for the trigger. The trigger is identified by its name in the Console Plus, so it's important to give it a name that you can easily recognize.
-
Choose a Priority. Task priority indicates the order in which robots in the assigned queue will execute tasks, ranging from lowest (1) to highest (9).
-
Configure the following sections:
-
 Trigger events

-
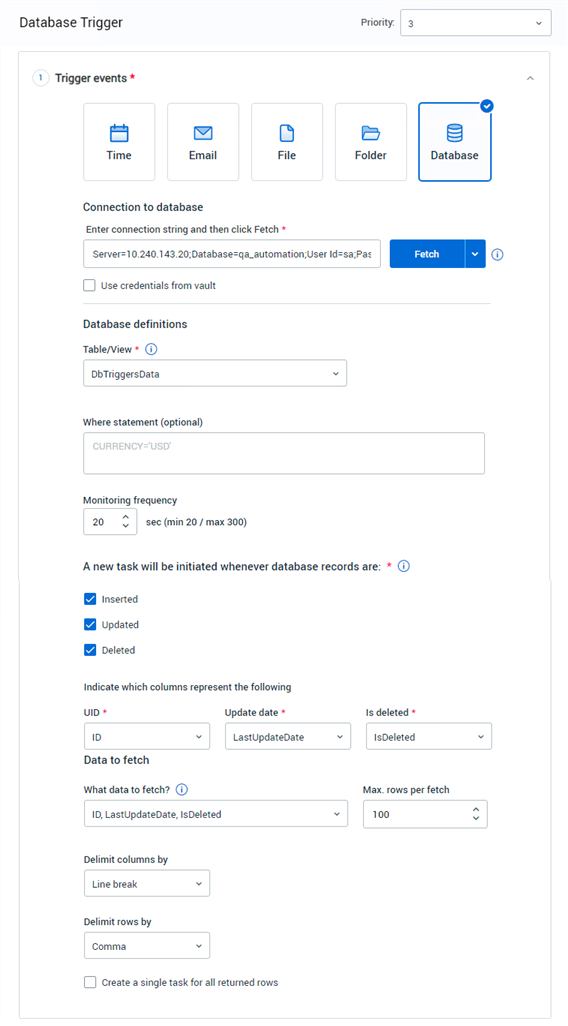
Select Database from Trigger events.
-
Enter the connection string for the data source. This includes details such as the database server's name, the database name, and login credentials. For example: Server=12.345.678.90;Database=qa_automation;User Id=sa;Password=NintexRPA!;.
-
Click Fetch to test the connectivity to the data source.
-
(Optional) Select Use credentials from vault to retrieve database login credentials from the Credentials Vault.
If the credential vault is not selected, include the credentials in the connection string. If selected, credentials are not required in the connection string. -
Select the Table/View that the trigger should monitor from this list. The dropdown list populates after a successful connection and displays only the available options in the connected database.
-
(Optional) Enter any applicable WHERE statements to refine the events to monitor. A WHERE statement is a clause used in SQL to filter records in a database table based on specified conditions. It allows you to retrieve, update, or delete specific rows from a table that meet the criteria defined in the statement. This helps in performing targeted and efficient database operations.
-
Set the Monitoring frequency to specify how often the trigger should fetch data to check for specified events.
-
Select the events that the trigger should monitor for database records, defining the activities on the database side that will trigger a task, such as when a new table record is Inserted, Updated, or Deleted. These checkboxes are accessible only when connected to a database.
-
Choose from the available options that appear based on your selection of Inserted, Updated, and Deleted.
-
UID: Unique Identifier, serves as a unique identifier for each database record. Choose a column in the table that functions as the UID of the database record.
-
Update date: Tracks whether the record has been updated by using the date type to identify database columns. Choose a column in the table that contains the dates when each database record was updated. This field is visible only when selecting Updated or Deleted.
-
Is deleted: Indicates whether rows are marked as deleted but not physically removed from the table, using the boolean type to identify the database column. Choose a column in the table that contains the deleted status, indicating true or false, for each database record if it was marked as deleted. This field is visible only when selecting Deleted.
To use the Deleted monitor, make sure your table supports logical deletion. It needs a column indicating whether a row has been deleted (false/0 for not deleted, true/non-zero for deleted). This lets you mark a record as "true" to indicate it's deleted. The monitor works by detecting changes in the IsDeleted field to a value other than 0.
-
-
Select the database records you want to fetch from the available options under What data to fetch?. You can select one or multiple options and these selections are returned each time the trigger checks for specified events.
-
Specify the maximum number of rows to be returned each time the trigger checks for specified events.
-
Select the delimiters to separate rows and columns in the returned data. The trigger's wizard uses these delimiters to loop through the retrieved data.
-
(Optional) Click Create a single task for all returned rows if you want to create a single task for all returned rows. By default, this box is not selected, indicating that an individual task is initiated for each record returned.
-
-
 Wizard

-
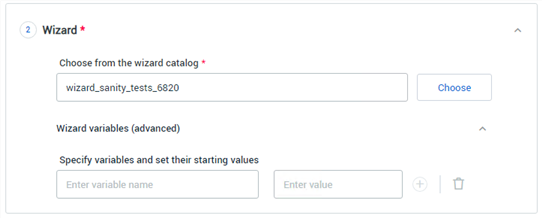
Click Choose to select the relevant wizard from the wizard catalog. These wizards are created and published in the Studio.
-
(Optional) Specify Wizard variables.
-
Click Wizard variables (advanced) to expand the section.
-
Enter the name of the variable for which you would like to set a starting value.
The name entered here must exactly match the name of a variable in the selected wizard (not case-sensitive). -
Enter the starting value for the variable.
-
-
-
 Notifications (optional)

Set the Notifications (optional) if you want the system to send out email notifications when task-related events occur. Notifications are sent from the email configured in the Notification section on the Settings tab of the Console Plus. Make sure to specify the email addresses to which you'd like notifications to be sent. You can add as many notifications as needed.
-
Task created
-
Task ended
-
Task started
-
Task stopped, paused, or resumed
-
Wizard error
-
-
-
Click Save or Save and activate.
