Manually Integrating Forms with Workflows Using Rule Actions
When you select a form in the workflow designer for starting a workflow or actioning a task, rules are automatically inserted into your form. This is the recommended approach for most applications, and you can find more information about doing this at Workflow Designer Form Tab. You can, however, manually integrate your form with a workflow by configuring the following rule actions:
- start a workflow
- open the workflow task
- complete the workflow task
Workflow Export rights are required when interacting with any workflow rule conditions or actions. See Server Rights for more information about assigning export rights.
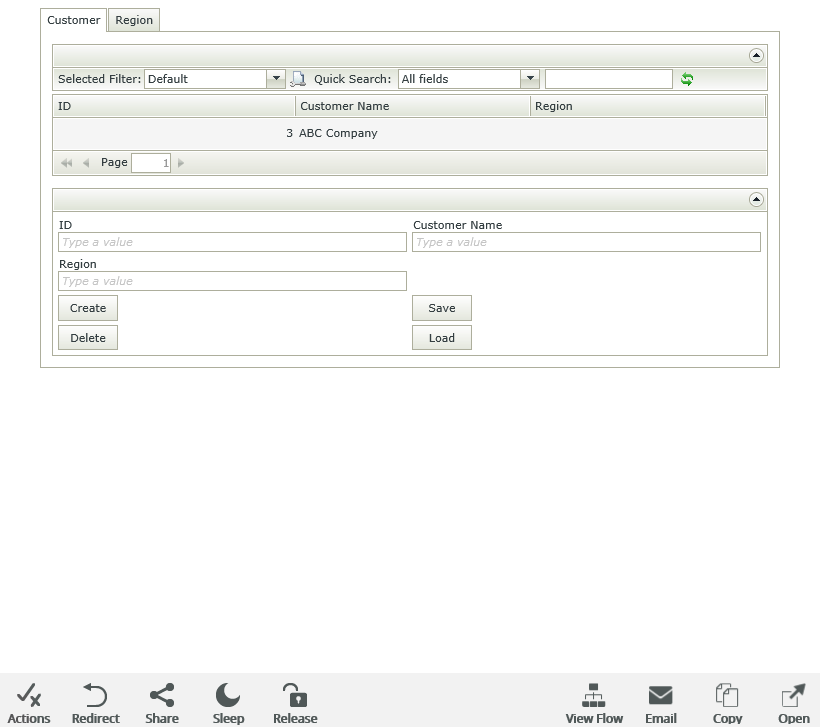
In this example there is a Customer form containing a Customer Item view. The following rules integrate the form with the New Customer workflow:
- Start a workflow - On Customer Item, when Save Button is Clicked
- Open the workflow task - When the Form is Initializing
- Complete the workflow task - When the Workflow View is being submitted
Integrate the Customer form with the New Customer workflow by following these steps:
- Create a new workflow called New Customer, double click the Start event to edit the event, and select Start with a Form.

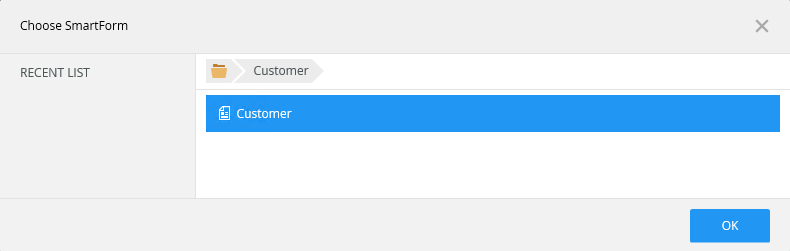
- Select the Customer form and click OK.
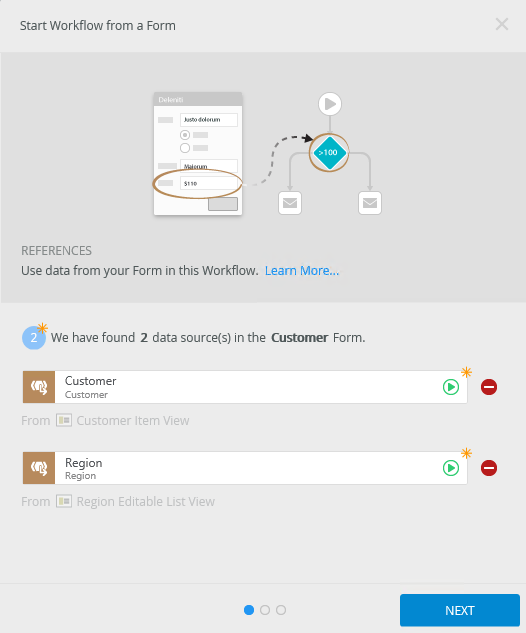
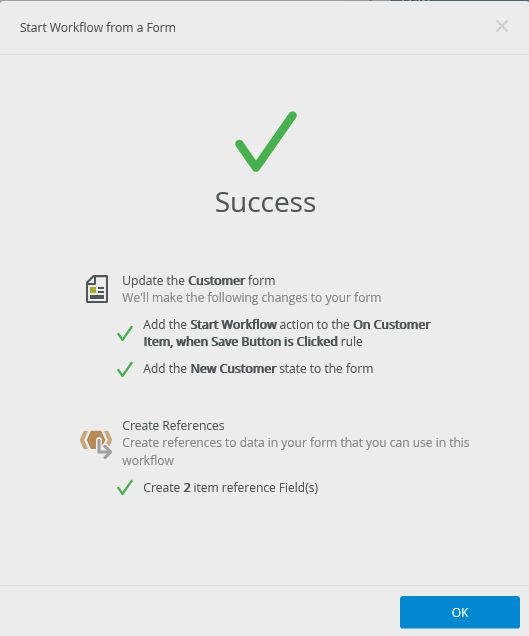
- The Start Workflow from a Form page displays the References as shown below. See the Workflow Form Tab topic for more information. Click Next.
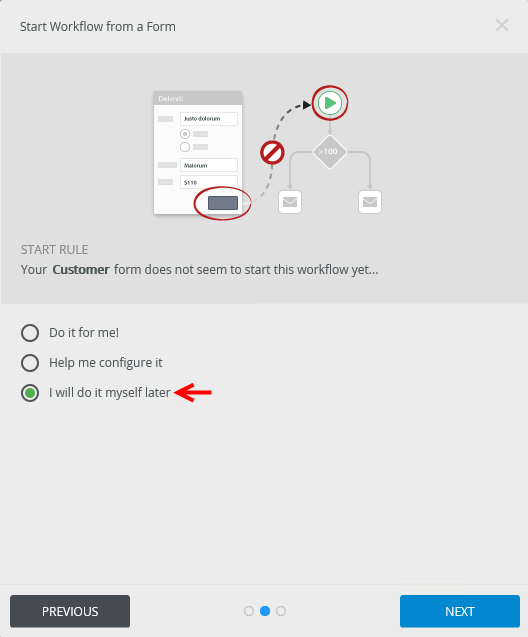
- Select the option I will do it myself later and click Next, and then click Save and Finish.
- Click OK on the Success page.
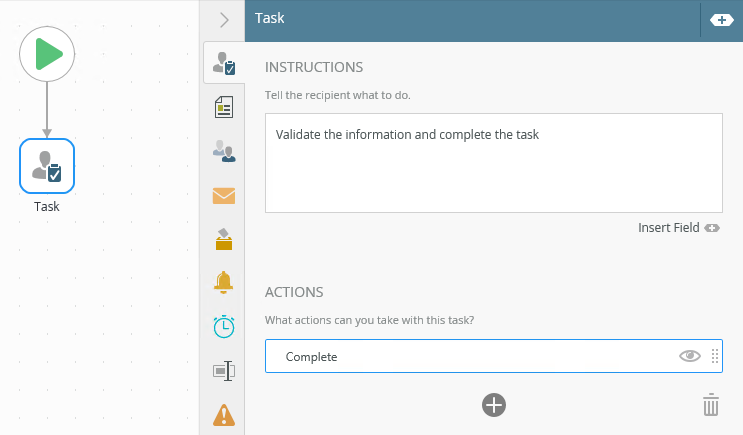
- Add a task to the workflow.
- Configure the task instructions and actions.
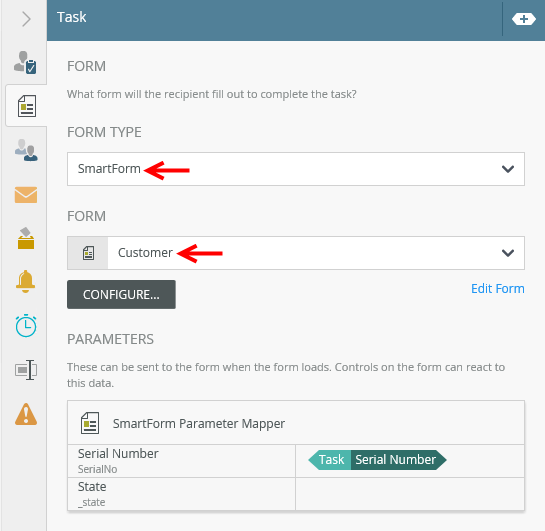
- On the Form tab, select SmartForm as the Form Type and select the Customer form.
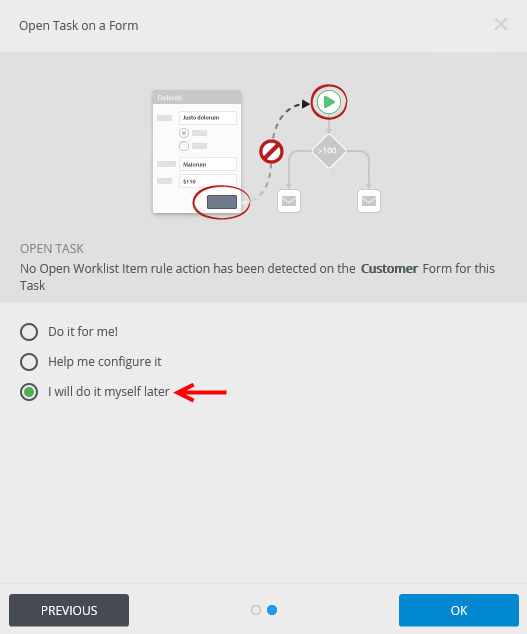
- The Open Task on a Form page opens. Click Next.
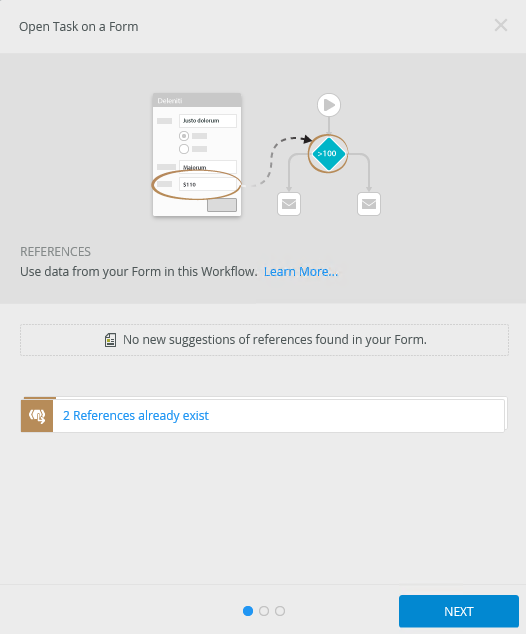
- Select the option I will do it myself later and click OK.
- Deploy the workflow.
- Edit the Customer form and go to the Rules tab.
- Edit the On Customer Item, when Create Button is Clicked rule. This is the rule that starts the workflow.
- Add the Start a Workflow action and select the New Customer workflow.
This action starts the workflow when the Create button is clicked on the Customer Item view.

- Click configure next to Start a Workflow to map an item reference, and drag the Customer SmartObject to the item reference as shown below.
This links the Customer SmartObject as a reference to the New Customer workflow.

- Click Finish to save the configuration and then OK to save the rule.
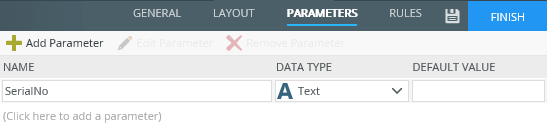
- Next, add a form parameter to use with the workflow activity and worklist item rules. Navigate to the Parameters tab and create a parameter called SerialNo of type Text.
- Go back to the Rules page and add a state called Workflow Task which helps to separate the rules of different workflow tasks.
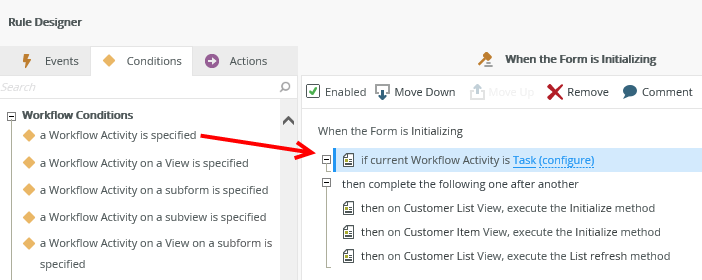
- Edit the When the Form is Initializing action of the Workflow Task state.
- Add the a Workflow Activity is specified condition and select Task. Move the definition to the top as shown in the image because the workflow condition and action must execute before the rest of the actions.
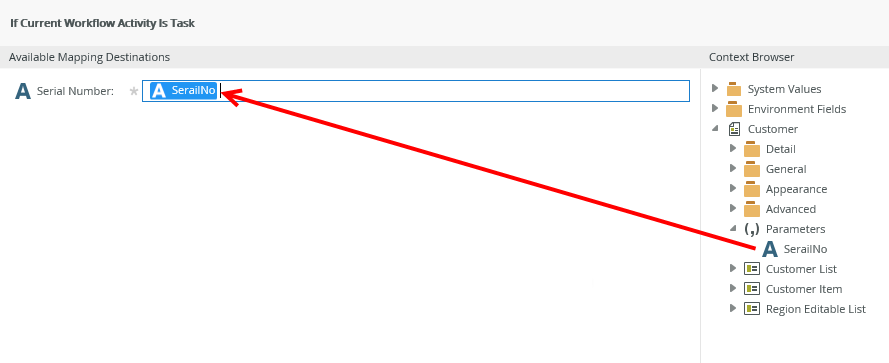
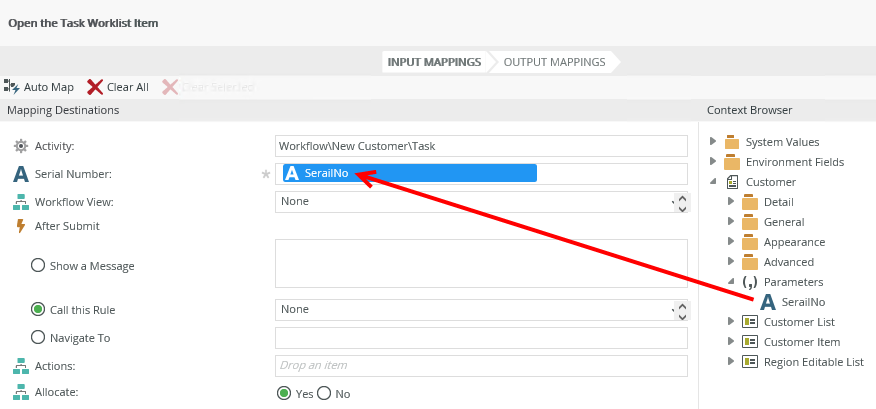
- Click configure next to Task and map the SerialNo parameter to the Serial Number destination. This binds the SerialNo to the task of the workflow. Click OK.
- Add the Open a worklist item action and select Task, then move the definition to the top:
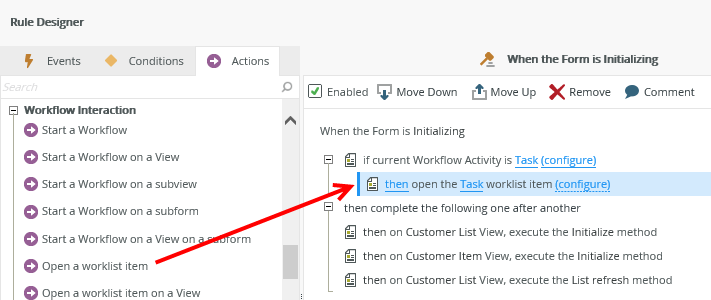
- Click configure next to the Open a worklist item action.
- Map the SerialNo parameter to the Serial Number destination. This binds the SerialNo to the worklist item. When you open the form, it checks if it is the correct workflow activity and then opens the worklist item linked to the activity.
- Click Finish to save the configuration and then OK to save the rule.
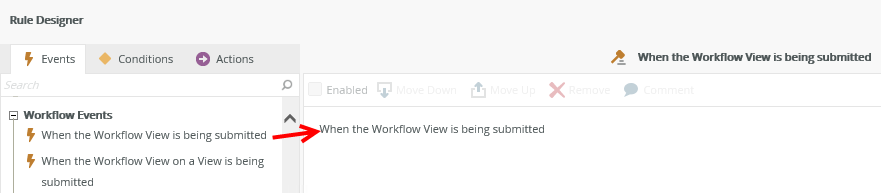
- Click Add Rule and add the When the Workflow View is being submitted event.
- Add the Action a worklist item action and select Task.
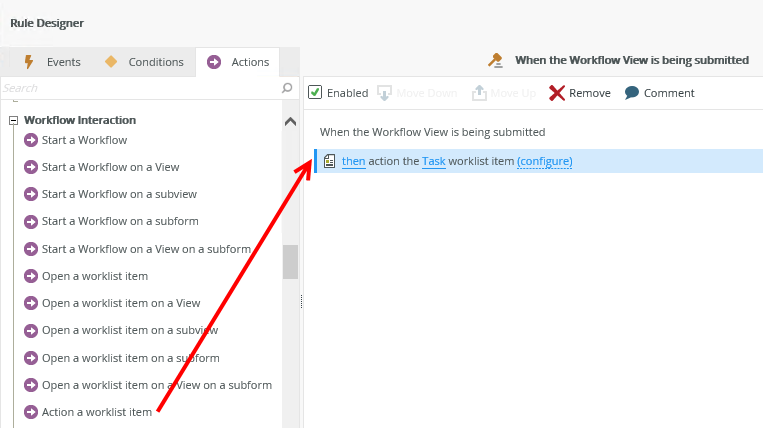
- Click configure next to Task.
- Map the SerialNo parameter to the Serial Number destination and map the Action to the Action Name destination.
When you action the worklist item, it uses the SerialNo to action the task.
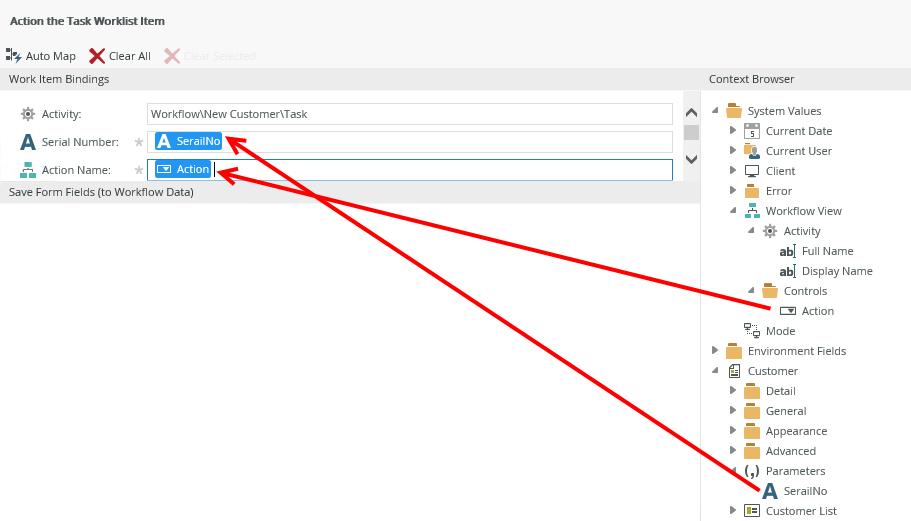
- Click OK to save the configuration and then OK to save the rule.
- Finish the form. You have now manually integrated the form with the workflow.
- To test the integration, run the form, type some information, and then click the Create button. Open the task in K2 Workspace (Desktop) to see your form.