How To: Create a Workflow with a Single Sub Workflow
This article illustrates how to build a workflow that calls a single sub workflow. In this demonstration, the sub workflow sends you an email and completes. You receive a final email from the parent workflow completing the parent - sub workflow process.
For a demonstration on starting multiple instances of a sub workflow, see How To: Create a Workflow with Multiple Instances of a Sub Workflow.
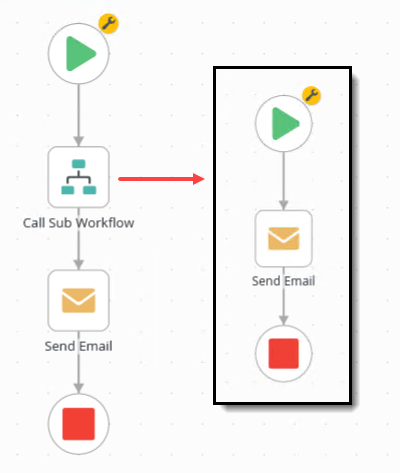
A parent workflow with a single sub workflow
Steps
You begin by building the sub workflow. The parent workflow references the sub workflow, so it must exist first. The sub workflow performs one action, sending an email, but you can add other events to the sub workflow. With the sub workflow deployed, you build the parent workflow. This workflow calls the sub workflow and sends a final email after the sub workflow completes.
Setup Steps
The following steps walk you through the parent - sub workflow build from start to finish.
- Create a workflow called Single Sub Workflow. (Optional) Add categories first to keep your work organized. Add a Send Email step. Keep the default To value, Originator. Add your own subject line and message body. Add an End step. Deploy the workflow.
- Launch the Designer.If you do not know how to access the Designer, see Accessing Sites.
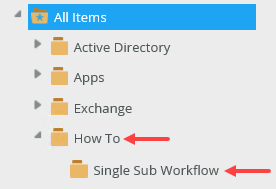
- Create categories to keep your work organized. Right-click All Items and select New Category. Use the image below as a guide.
- Right-click the Single Sub Workflow category and select New Workflow.
- Name the workflow
Single Sub Workflow
and click Create.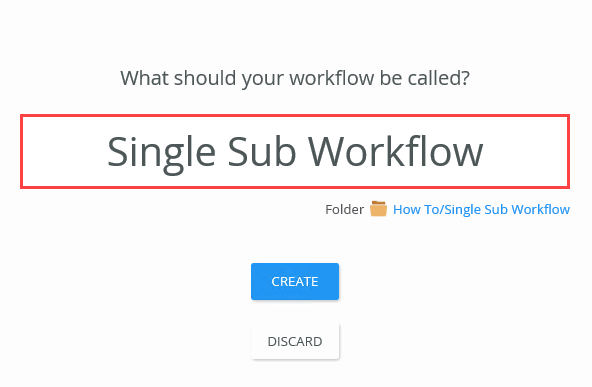
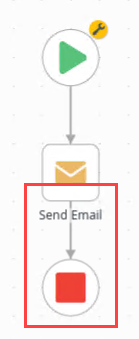
- From the Toolbox - Basic node, add a Send Email step to the placeholder below the Start step.

- Select the Send Email step and expand the Configuration Panel.
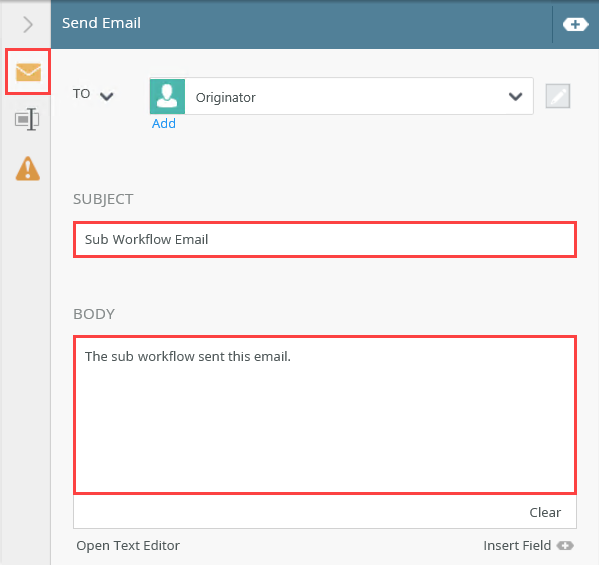
- Select the Send Email tab if it is not already active. Keep the default To value, Originator. Enter your own content for the subject line and message body. Use the image below as a guide if necessary. Collapse the Configuration Panel.
- From the Toolbox > Logic node, add an End step and connect it to the Send Email step.Use End steps to complete workflow paths. You can configure End steps to terminate the workflow or use them as visual indicators that there are no more steps to follow. In this demonstration, the End step provides a clean end to the workflow path.
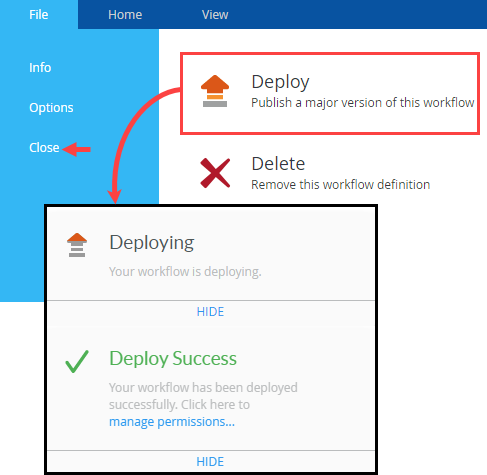
- Deploy the workflow. Deploying a workflow publishes it to the server and makes it available for use. If you make changes to the workflow, you must deploy it again so that the server can register the changes. Click File > Deploy. When you see the success dialog, click File > Close to return to the Designer.
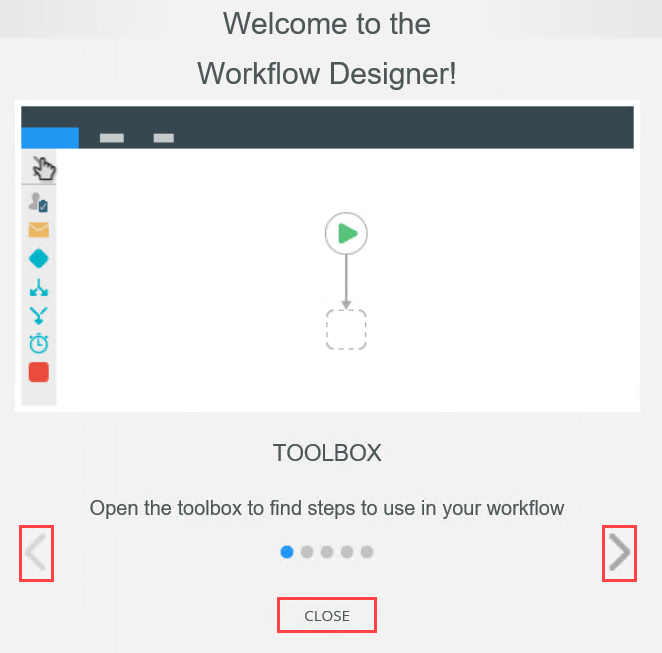
You see a Welcome screen with an interactive panel. You can click the right and left arrows to learn more about the workflow designer. Click Close to proceed to the design canvas.
- Launch the Designer.
- Create the parent workflow and name it Single Parent Workflow. Add a Call sub workflow step. Configure the step to call the Single Sub Workflow, with the Single option for how many workflows. Set the finish option to Wait for the sub workflow. Add a Send Email step to send yourself a message from the parent workflow. Add an End step and deploy.
- Add a New Workflow and name it
Single Parent Workflow
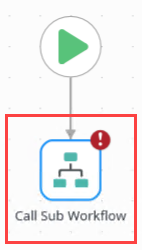
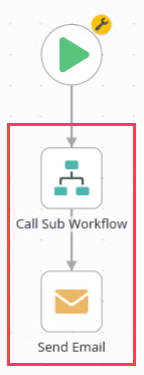
and click Create. - From the Toolbox - Basic node, drag a Call Sub Workflow step into the empty placeholder below the Start step.
- Select the Call Sub Workflow step and expand the Configuration Panel.
- Select the Call Sub Workflow tab if it is not already active. For the Which Workflow value, navigate to and select Single Sub Workflow. Keep the Single default for the How many workflows value.

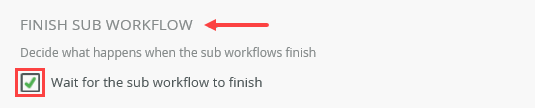
- Under the Finish Sub Workflow heading, check the box to Wait for the sub workflow to finish. If you do not check this box, the sub workflow is started and continues to the next step in the parent workflow. This option pauses the parent workflow until the sub workflow completes, then continues to the next step. Collapse the Configuration Panel.
- Next, you send an email that confirms the sub workflow completed and now the parent workflow completes. From the Toolbox - Basic node, add a Send Email step and connect it to the Call Sub Workflow step.
- Select the Send Email step and expand the Configuration Panel.
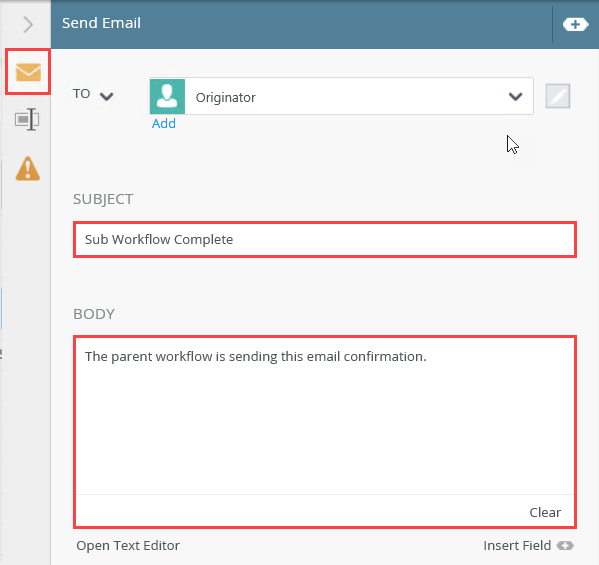
- Select the Send Email tab if it is not already active. Keep the default To value, Originator. Enter your own content for the subject line and message body. Use the image below as a guide if necessary. Collapse the Configuration Panel.
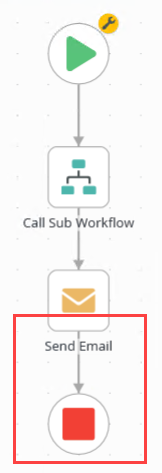
- Add an End step and connect it to the Send Email step.
- Deploy the parent workflow.
- Add a New Workflow and name it
- Test the parent and sub workflows. From the Management site, start a new instance of the Single Parent Workflow.
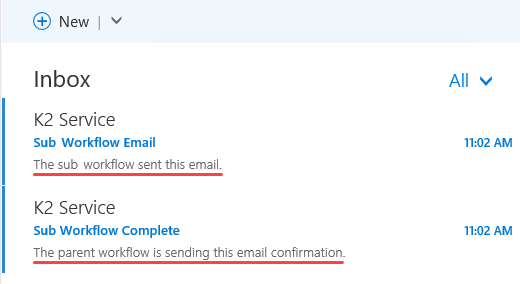
Open your email client and confirm you receive two emails: the first from the sub workflow and the second from the parent workflow.
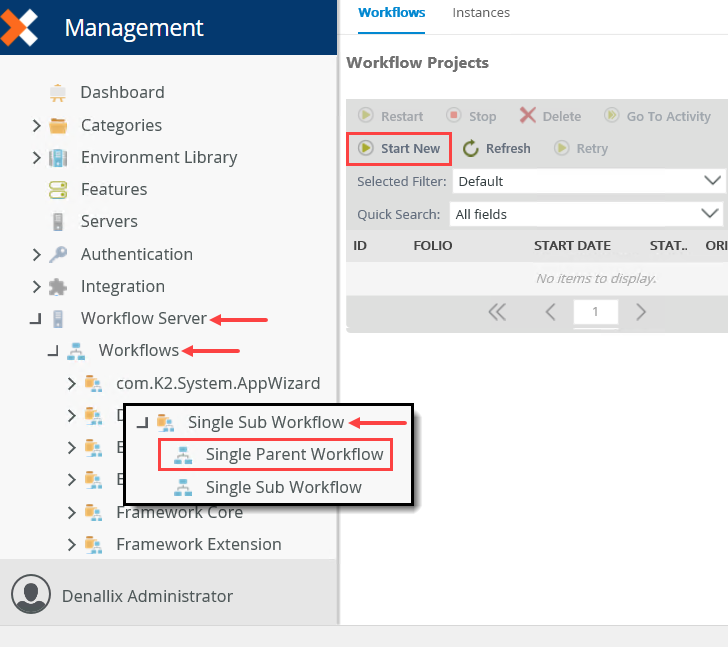
- Launch the Management site in a new browser tab.
- Expand the Workflow Server > Workflows node. Navigate to and select the Single Parent Workflow. In the central pane, click the Start New button.
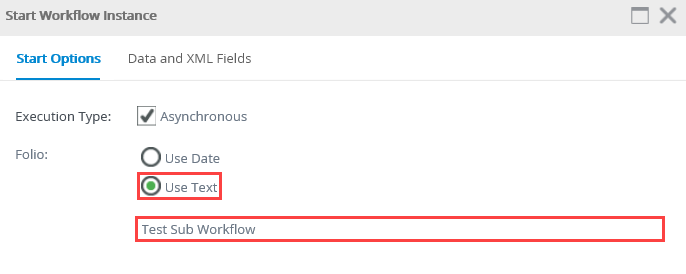
- Change the Folio option to Use Text. Enter a value in the text box below the radio buttons. Click Start. Click OK for the confirmation dialog.
- Launch your email client. You should see two emails: the first sent by the sub workflow and the second by the parent workflow.
- Launch the Management site in a new browser tab.
Review
Use a sub workflow when you want to perform multiple tasks that are not dependent on each other, you want to break a single workflow into multiple, smaller workflows, or you want to reuse a portion of your workflow logic across multiple workflows. For example, you might need a sub workflow called from other workflows that generates a PDF file and updates a SharePoint list. You can configure the parent workflow to wait until the sub workflow completes or you can move the parent along immediately after starting the sub workflow.
For a demonstration on starting multiple instances of a sub workflow, see How To: Create a Workflow with Multiple Instances of a Sub Workflow.