How To: Create a Workflow with Multiple Instances of a Sub Workflow
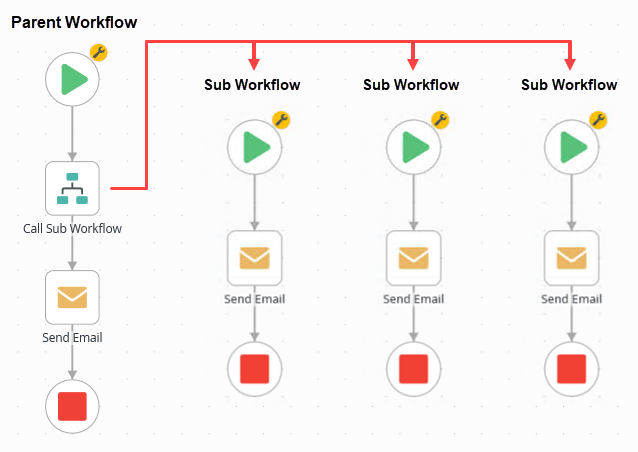
This article illustrates how to build a workflow that calls multiple instances of a sub workflow. In this demonstration, the parent workflow starts an instance of the sub workflow for each item found in a SmartObject. The parent workflow waits until each sub workflow completes before continuing to its next step. The parent workflow sends a final email indicating the end of the parent - sub workflow process.
For a demonstration on starting a single instance of a sub workflow, see How To: Create a Workflow with a Single Sub Workflow.
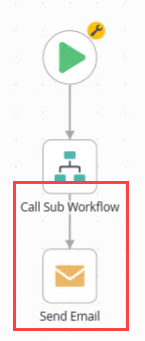
A parent workflow with multiple instances of a sub workflow
Scenario
You work in Sales where you maintain a list of customers. Each month, you send an email to your customers inviting them to view the latest deals. You have a workflow that starts an instance of a sub workflow for each customer in your list. The sub workflow sends the customer an email. The parent workflow waits until all of the sub workflows complete and then sends you a final confirmation email.
Steps
You begin by building a SmartObject that contains a list of customers. Next, you build the sub workflow. The parent workflow references the sub workflow, so it must exist first. With the sub workflow deployed, you build the parent workflow.
Setup Steps
The following steps walk you through the parent - sub workflow build from start to finish.
- In the Designer, create a SmartBox SmartObject called Customers. In the Management site, add at least three customers to the SmartObject. Use the table below as a guide for adding the SmartObject properties and list items. (Optional) Create categories first to keep your work organized.
Property Type Name Text Email Text Customers Name Email Notes Bob Maggio Administrator@denallix.com Use the same email for each of the customers. This makes testing easier. Make sure to use an email in your environment that you can use for testing.
Codi Kaji Administrator@denallix.com
Holly Anderson Administrator@denallix.com
- Launch the Designer.If you do not know how to access the Designer, see Accessing Sites.
- Create categories to keep your work organized. Right-click All Items and select New Category. Use the image below as a guide to naming your categories.
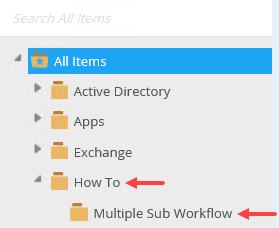
- Right-click the Multiple Sub Workflow category and select New SmartObject. Name the SmartObject
Customers
and confirm you have the SmartBox option selected. Click Create.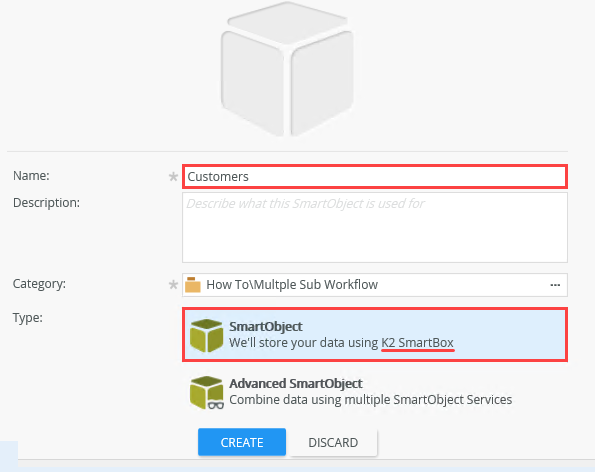
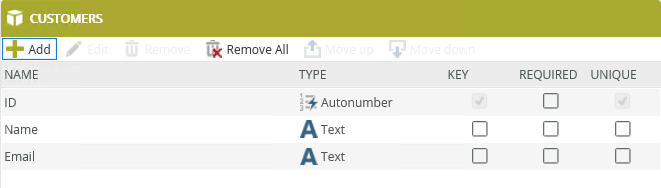
- Add the following properties: Name (Text) and Email (Text). Click OK. Click Finish (in the upper right corner of your screen) to save and exit the SmartObject.
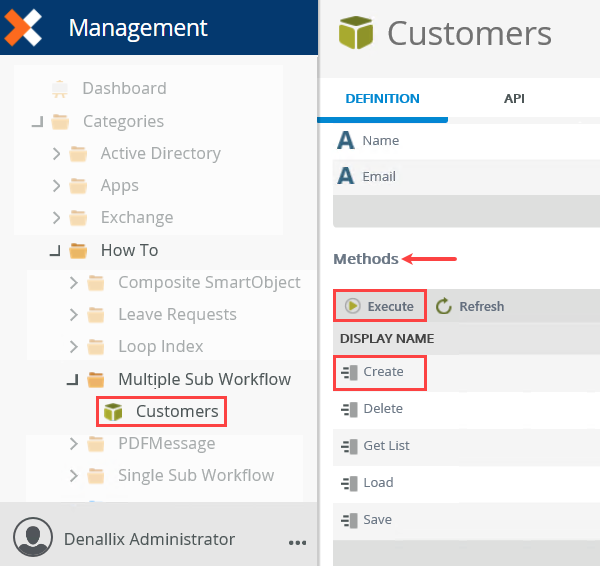
- Next, add several items to your SmartObject. Launch the Management site in a new browser tab. Expand the Categories > How To > Multiple Sub Workflow nodes. Select Customers. You see the SmartObject details in the central pane. Locate the Methods section. Click Create and then Execute.
- Add at least three items to your SmartObject. For the first Name, enter
Bob Maggio.
For the Email, enter
Administrator@denallix.com
and click Execute. Click Done to close the results screen and return to the details.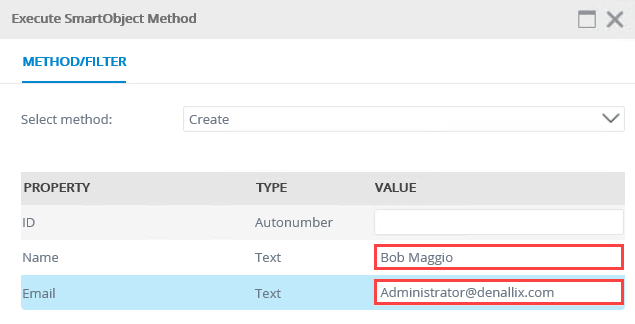
- Add at least two more items. Use the table below as a guide if necessary. Note that you can only add one item at a time; from the details screen, click Create > Execute. Click Done to return to the details screen.
Name Email Notes Codi Kaji Administrator@denallix.com
Use the same email for each of the customers. This makes testing easier. Make sure to use an email in your environment that you can use for testing. Holly Anderson Administrator@denallix.com
- Before you continue, execute the SmartObject and confirm you see your data. From the details screen, click the Get List method, then Execute. Click Execute once again (you want to return all records, so you don't need a filter). You see the list items you just entered. Click Done to close the results screen.

Next, you build a SmartBox SmartObject to store your customer contacts. The parent workflow starts an instance of the sub workflow for each customer in your list.
- Launch the Designer.
- Create the sub workflow. The parent workflow references the sub workflow, so the sub workflow that sends a customer an email must exist first. From the Designer, create a New Workflow called Sub Workflow. Add a Send Email step. Before configuring the email settings, add a Variable called List Item ID. The parent workflow passes the ID of the current list item to the variable, resulting in one instance of the sub workflow executing for each customer in the list. Use the Customers (SmartObject ) > Get List (method) > Email property for the email To value. Use the List Item ID variable for the ID condition. Use the Name property in the message body (again, with the List Item ID for the condition).
- Return to the Designer. Right-click the Multiple Sub Workflow category and select New Workflow. Name the workflow
Sub Workflow
and click Create.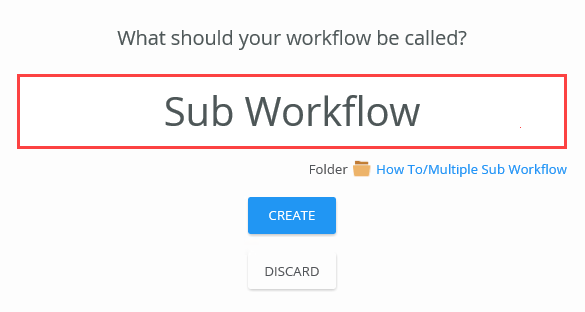
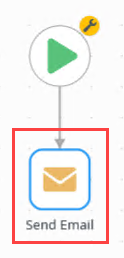
- The sub workflow sends an email to the current customer in the SmartObject. From the Toolbox > Basic node, drag a Send Email step into the empty placeholder below the Start step.
- Select the Send Email step and expand the Configuration Panel.
- Expand the Context Browser. Under the Variables heading, click Add. Name the variable
List Item ID
and keep the Context Browser open as you use it in the next step.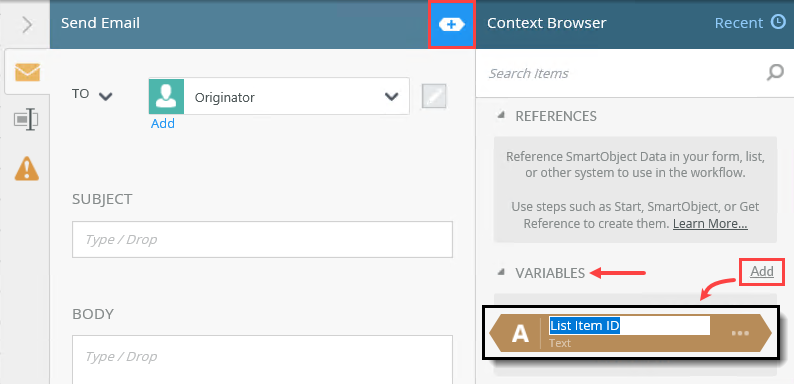
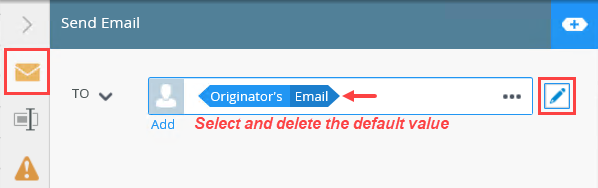
- Select the Send Email tab if it is not already active. You replace the recipient default value (Originator) with the email property from the Customers SmartObject. Map the property to the List Item ID variable. Click the edit icon and select Originator's Email. Delete the property.
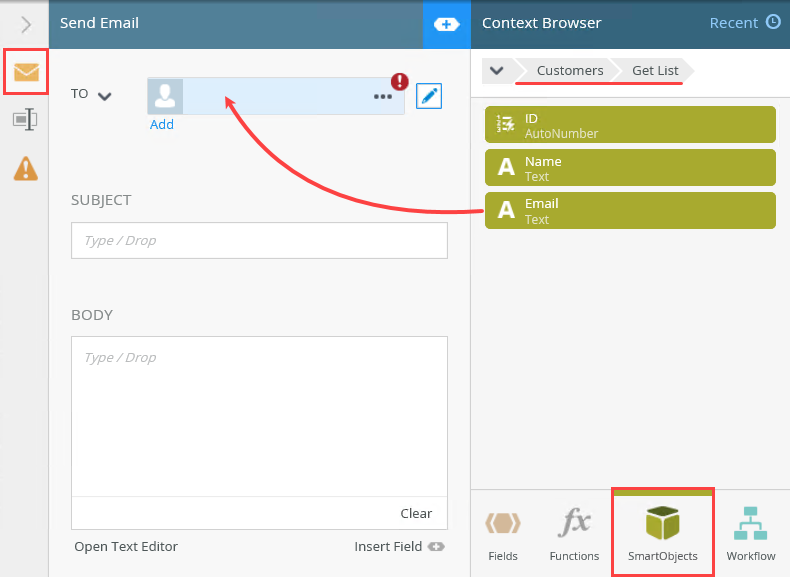
- In the Context Browser, click the SmartObjects tab (near the lower right corner of your screen). Navigate to and select the Customers SmartObject. Expand the SmartObject > Get List nodes. Drag the Email property into the To text box. As soon as you drop the property into the text box, the SmartField Composer opens.
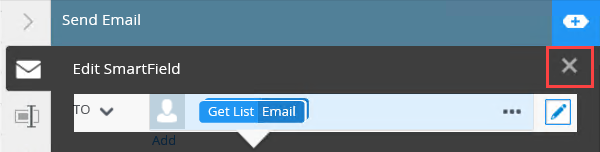
- The workflow needs to know which record you are referencing for the email property. Notice the ID condition in the first text box. Select the Fields tab and drag the List Item ID variable into the second text box. The List Item ID references the current record, therefore, the email address is the current record's email address. (You set the List Item ID's value to reference the current record during the parent workflow build.)
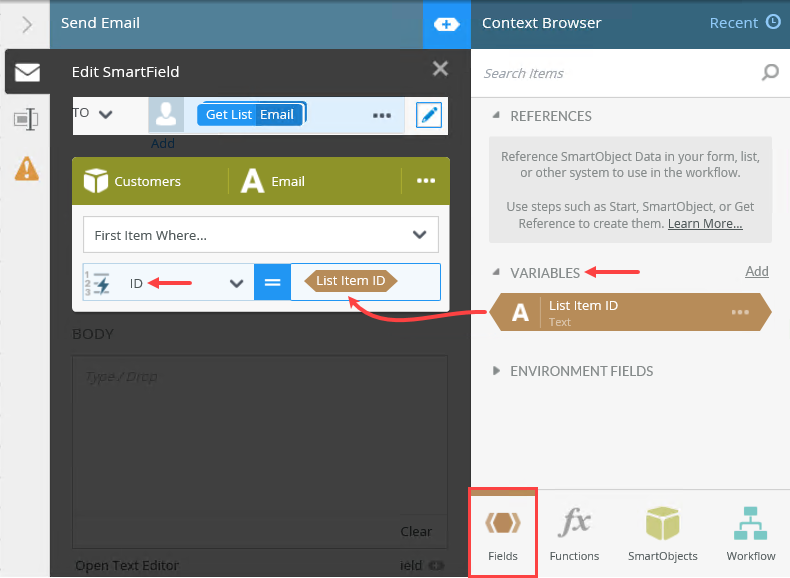
- Close the SmartField Composer by clicking the exit icon.
- Now that you have the recipient variable set, you can enter your own content for the subject line. Use the Name property from the Customers SmartObject to personalize the message body. Use the same steps as you did for the recipient, adding the List Item ID variable for the condition statement.
- SmartObjects tab: Drag the Name property into the message body
- Fields tab: Drag the List Item ID into the text box for the condition
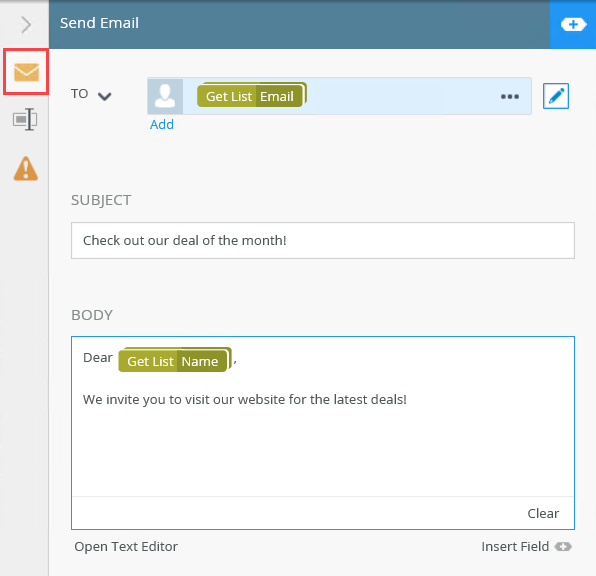
- Add any additional content for the message body. Collapse the Configuration Panel.
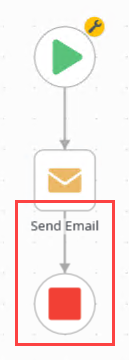
- From the Toolbox > Logic node, add an End step and connect it to the Send Email step.Use End steps to complete workflow paths. You can configure End steps to terminate the workflow or use them as visual indicators that there are no more steps to follow. In this demonstration, the End step provides a clean end to the workflow path.
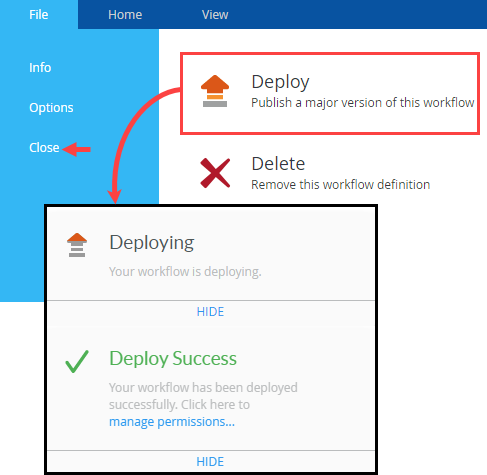
- Deploy the workflow. Deploying a workflow publishes it to the server and makes it available for use. If you make changes to the workflow, you must deploy it again so that the server can register the changes. Click File > Deploy. When you see the success dialog, click File > Close to return to the Designer.
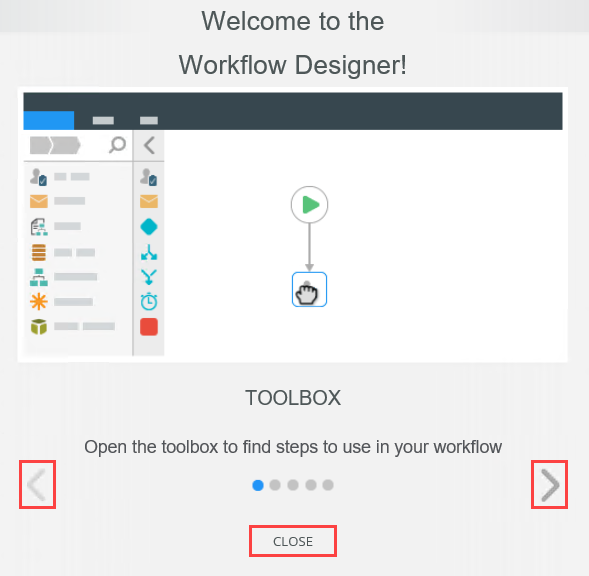
You see a Welcome screen with an interactive panel. You can click the right and left arrows to learn more about the workflow designer. Click Close to proceed to the design canvas.
Before configuring the email properties, you must add a variable that stores the list item ID for each customer. You reference this ID when configuring the email recipient.
- Return to the Designer. Right-click the Multiple Sub Workflow category and select New Workflow. Name the workflow
- From the Designer, create the parent workflow and name it Parent Workflow. Add a Call Sub Workflow step. Configure the step as follows:
- Which workflow: Sub Workflow
- Start a workflow for each item found in this list: Context Browser > How To > Multiple Sub Workflow > Customers (SmartObject) > Get List (method) > ID
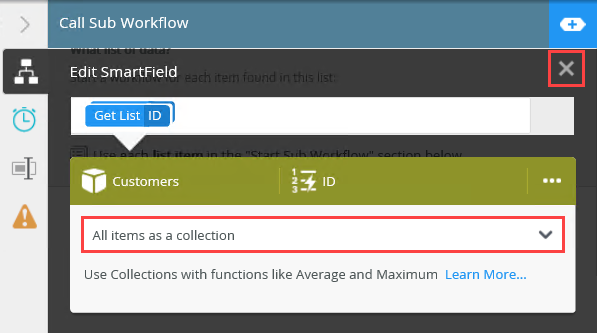
- SmartField Composer: All items as a collection
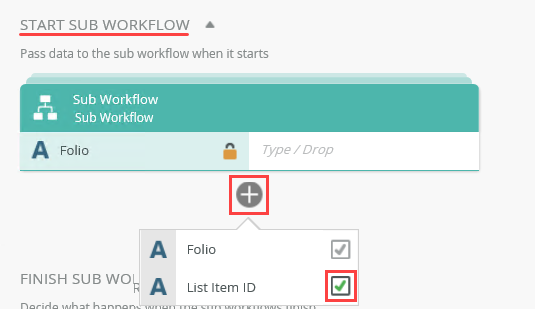
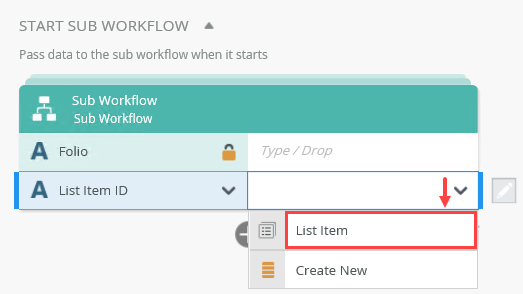
- Start Sub Workflow: Select List Item ID as the data to pass from the parent to the sub; select List Item for the value.
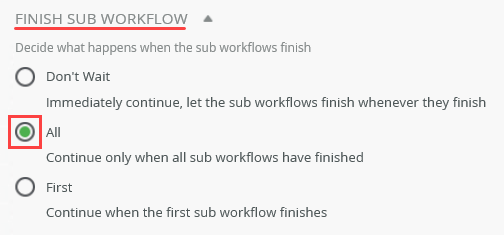
- Finish Sub Workflow: All
Add a Send Email step. Add your own content that sends you a final confirmation email. Add an End step. Deploy the workflow.
- From the Designer, right-click the Multiple Sub Workflow category and select New Workflow.
- Name the workflow
Parent Workflow
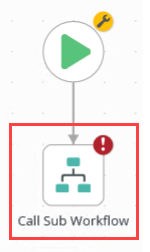
and click Create. - From the Toolbox > Basic node, drag a Call Sub Workflow step into the empty placeholder below the Start step.
- Select the Call Sub Workflow step and expand the Configuration Panel.
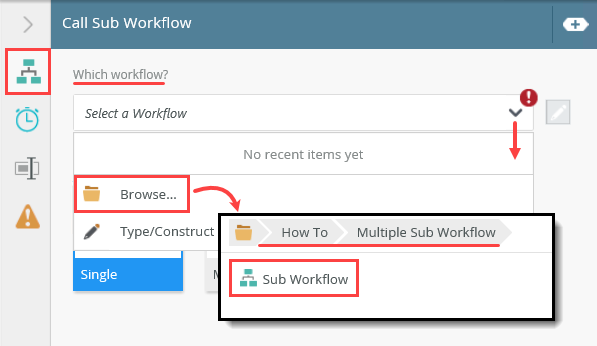
- Select the Call Sub Workflow tab if it is not already active. For the Which Workflow value, browse to and select Sub Workflow. Click OK.
- For the How many workflows value, select Multiple. Now you need to specify from which list you want to use to start the sub workflow instances. Expand the Context Browser. Click the SmartObjects tab. Navigate to the Customers (SmartObject) > Get List (method) > ID property. Drag the property into the Start a workflow for each item found in this list text box.
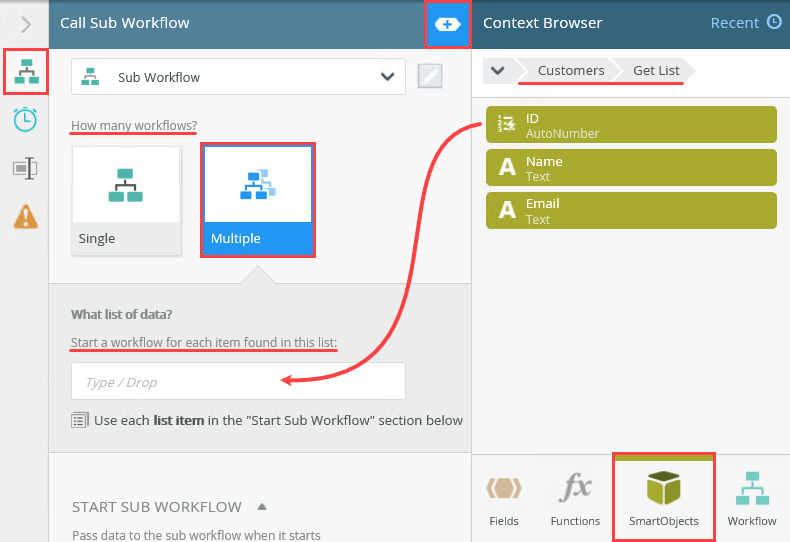
- The SmartField Composer opens. Change the drop-down value to All items as a collection. You are telling the workflow to start a sub workflow for each list item found in the SmartObject. Close the editor by clicking the exit icon.Using the ID from the SmartObject allows you to identify each record in the list uniquely (since the ID is a primary key). You assign this value to the List Item ID variable which makes it possible to retrieve the Name and Email values from the current record (and use them to personalize each sub workflow).
- Locate the Start Sub Workflow heading. Click the Add (+) icon. Select List Item ID. You are assigning a value to the List Item ID variable.
- Click the second drop-down and select List Item. Here, you are linking the List Item ID (value) to the current list item. Collapse the Context Browser.
- Finally, you need to specify what must happen when the sub workflows finish. Under the Finish Sub Workflow heading, select All. The parent workflow pauses until all sub workflows finish. Then, the parent workflow moves to its next step. Collapse the Configuration Panel.
- The final task in the parent workflow sends you an email letting you know the parent - sub workflow process is complete. From the Toolbox > Basic node, drag a Send Email step below the Call Sub Workflow step. Connect the two steps.
- Select the Send Email step and expand the Configuration Panel.
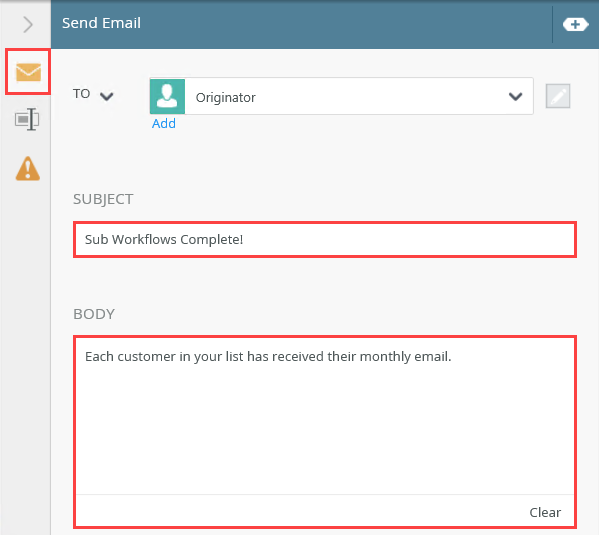
- Select the Send Email tab if it is not already active. Keep the To default value, Originator. Add your own content for the subject line and message body. Use the image below as a guide if necessary. Collapse the Configuration Panel.
- Add an End step and connect it to the Send Email step.
- Deploy the parent workflow.
Next, you pass the list item ID from the parent workflow to the sub workflows. Use the List Item ID variable as the vehicle for passing the ID. (Recall in the sub workflows, you used the variable in two condition statements, where sub workflow ID = List Item ID.)
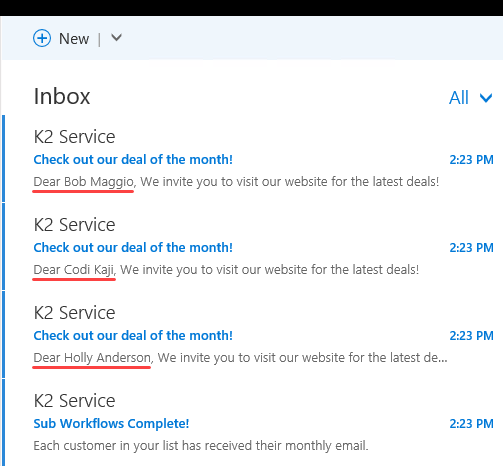
- Test the parent and sub workflows. From the Management site, start a new instance of the Parent Workflow. Open your email client and confirm you receive three emails (one email for each customer in your list). Confirm you receive the final email from the parent workflow.
- Launch the Management site in a new browser tab (if it is not already open).
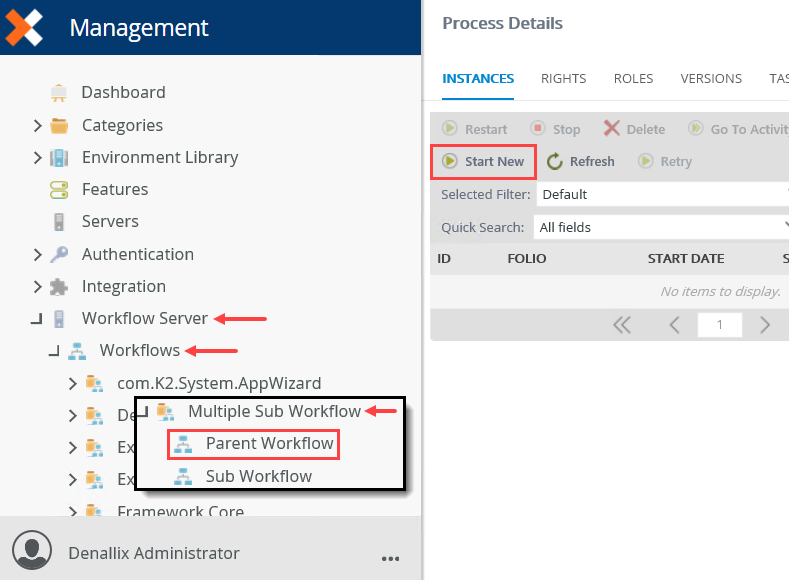
- Expand the Workflow Server > Workflows node. Navigate to and select Parent Workflow. In the central pane, click the Start New button.
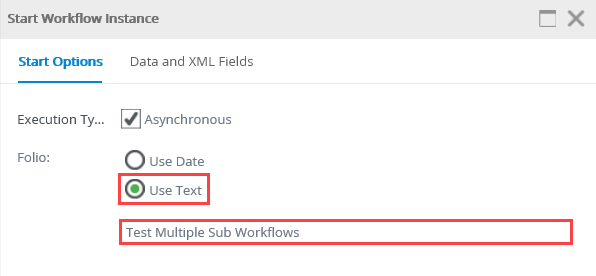
- Change the Folio option to Use Text. Enter a value in the text box below the radio buttons. Click Start. Click OK for the confirmation dialog.
- Launch your email client. You should see an email for each customer in your list, with a final email sent by the parent workflow.
Review
Use a sub workflow when you want to perform multiple tasks that are not dependent on each other, you want to break a single workflow into multiple, smaller workflows, or you want to reuse a portion of your workflow logic across multiple workflows. In this demonstration, your parent workflow started multiple instances of your sub workflow to send an email to each customer in your list. You can configure the parent workflow to wait until the sub workflows complete or you can move the parent along immediately after starting the sub workflows.
For a demonstration on starting a single instance of a sub workflow, see How To: Create a Workflow with a Single Sub Workflow.