How To: Create an Item View and a List View
This article illustrates how to create an item view and a list view using the Leave Request SmartObject. Views contain labels and controls, such as text boxes and buttons, and are often bound to a SmartObject. Views allow you to interact with data on a form, such as creating, editing, and viewing records. Use an item view to interact with a single record that contains, for example, the name, address, and email of an employee. Use a list view to interact with one or more records, for example, a list of all employees.
The Leave Request Item View you create 
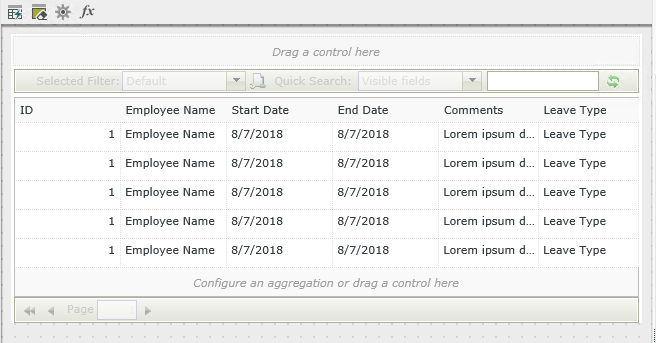
The Leave Request List View you create
Scenario
Continuing with the Leave Request application, you need two views for your form (you cannot open views directly and they must be contained within a form). The first view is an item view and is the primary point for entering leave details. The second view, a list view, displays the saved records from the Leave Request SmartObject. You cannot edit records in the list view. It provides information on submitted leave requests (such as leave date and the requester).
Steps
For this scenario, you design an item view using the Leave Request SmartObject. This creates an association between the SmartObject and the view, allowing you to use the properties as view controls. You then generate a list view from the Leave Request SmartObject, which creates an association with the SmartObject.
- Design a view from the Leave Request SmartObject. Name the view Leave Request Item View. Create a layout table with controls, then select all the controls except the ID. Left-align the labels with the Colon suffix. Add the Create button only. Change the Leave Type control to a drop-down list. Add the following static values:
Paid Time Off
Family Leave
Study LeaveThere are two methods for creating a new view from a SmartObject. Designing the view allows you to select which properties you want as view controls along with which buttons you want (such as Create, Save, or Delete). Generating the view creates a view from all SmartObject properties and methods. This option allows you to generate multiple views and a form all at once, but does not allow you to change configuration settings up front.
- First you create the item view. Right-click the Leave Request SmartObject and select Design View.
- Name the view
Leave Request Item View.
Leave the default View Type as Item View, then click Create.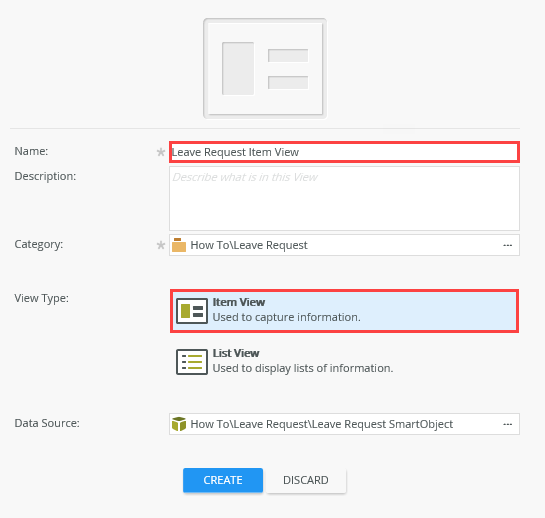
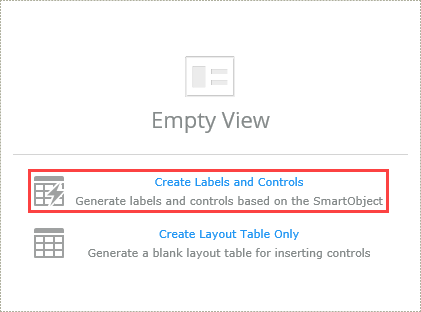
- Click the Create Labels and Controls link.
- On the Create Labels and Controls screen, check the boxes for all the fields except the ID in the Layout section. In the Labels section, change the Label Position to Left. Check the option for the Colon suffix. In the Buttons section, Check the box to add the Create button. Click OK.

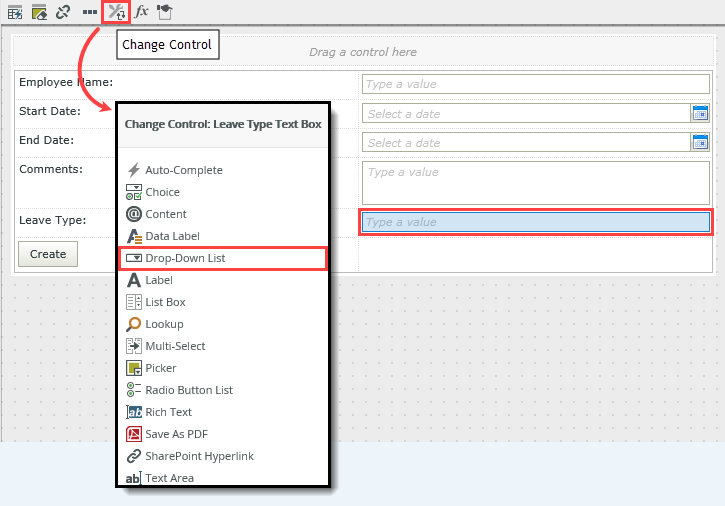
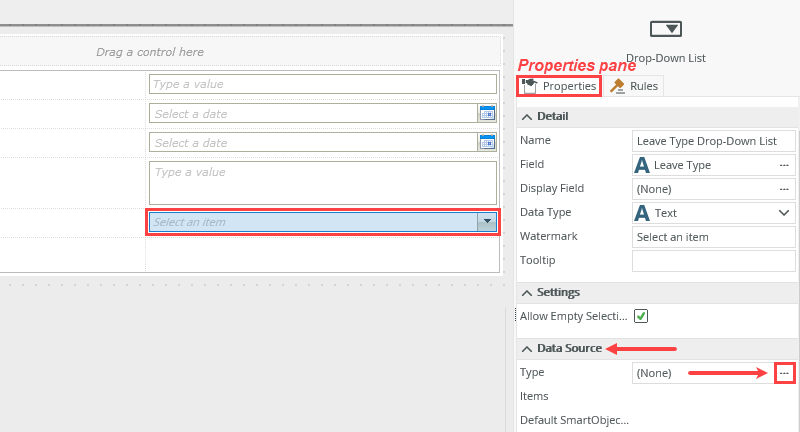
- Select the Leave Type text box. From the design canvas menu, click the Change Control icon. Change the control to a Drop-Down List. Click OK.
- Specify static values for drop-down list. With the Leave Type drop-down control still selected, locate the Type property under the Data Source heading in the Properties pane. Click the ellipses to open the editor.
- Enter the following leave types under both the Value and Display columns:
Paid Time Off
Family Leave
Study Leave
Click OK to continue. Click OK to save the Configure Data Source settings.
- Your view should look like the image below. Click Finish to save and exit the view.
You now need to choose between creating a layout table only or creating a layout table with labels and controls. The layout table only option allows you to manually add the controls you want and where you want. The labels and controls option creates a basic layout table for you and adds the controls you select. This is the quicker option and you can always move labels and controls around later.
The next step is to adjust the behavior of the Leave Type control. If you leave it as a text box, people would be able to type anything they wanted. To maintain consistency you change the control to a drop-down list and add a few static values for different types of leave for everyone to choose from. This also helps you later when analyzing leave requests.
- Generate a list view from the Leave Request SmartObject. Name it Leave Request List View.
Now, you generate a list view. This option does not allow you to choose specific controls and is ideal for lists needing to return all properties of a SmartObject.
- Right-click the Leave Request SmartObject and select Generate Views.
- On the Generate Options screen, check the box for List, then name the view
Leave Request List View.
Click OK. Notice you have the option of generating the form as well, which you didn't have in the previous Design View settings. (Creating the form is covered in the next How-To article.)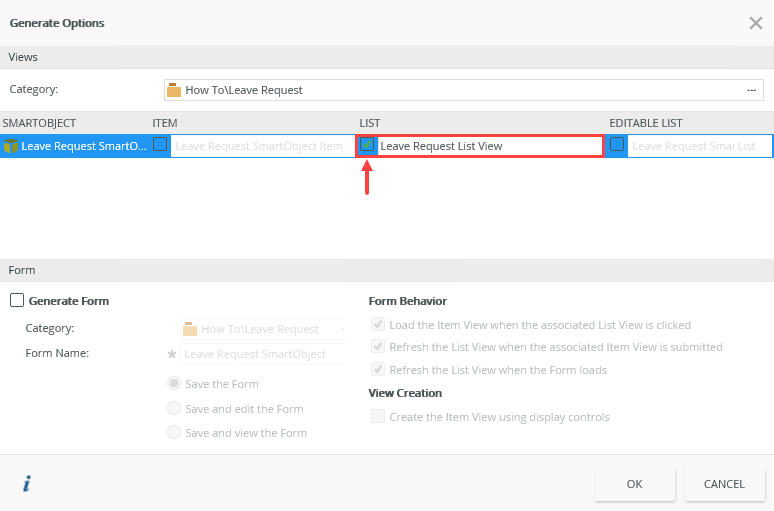
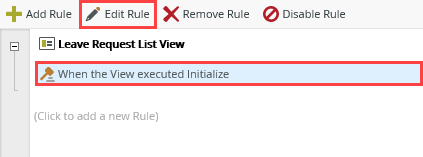
- The view is created and added to your category. Right-click the Leave Request List View and select Edit.
- Before we leave this view, let's take a quick look at the rules. Rules control the format and behavior of controls and views. In some cases, the rules are created for you while, in other cases, you create your own rules. Click the Rules tab.

- Notice there is already a rule called When the View executed Initialize. This rule controls the view format and behavior as it opens. Select the rule and click Edit Rule.
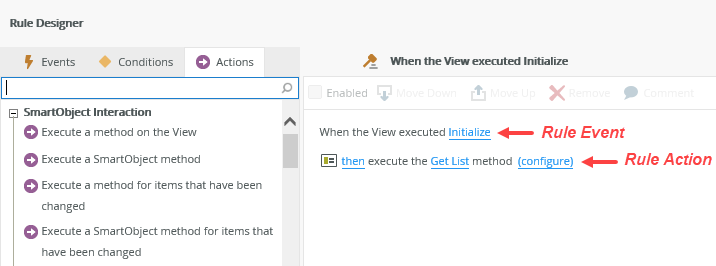
- In the rule definition pane, you see the rule event which translates to 'when the view is opened'. Then, you see a rule action that states 'execute the Get List method'. This is the action that retrieves data from the Leave Request SmartObject. Because you created the list view from the SmartObject itself, this rule is automatically added. Click OK to close the Rule Designer. Click Finish to save and exit the view.
Your view should look like the image below. Notice that all SmartObject properties appear as part of the list format. You do not have the option of selecting which properties you want when generating views, although you can manually edit them from the design canvas. To delete a control click the column and click Delete on your keyboard.
Review
Views contain labels, controls, and rules for user interaction with data of some kind. There are two types of views: item views and list views. Item views generally contain one record, for example, an employee's name, address, and phone. List views display a list of one or more records, like a spreadsheet. Views are contained within forms. Forms can have more than one view, including both item and list views.
Next: How To: Create a Form