How To: Create A SmartBox SmartObject
This article illustrates how to create a SmartBox SmartObject. SmartObjects are essentially connectors to data sources that allow you to interact with data from line-of-business systems. For example, you might have a SmartObject that connects to a SharePoint list or perhaps a SQL Server table. SmartBox SmartObjects are data sources you can create yourself in the Designer. SmartBox SmartObjects are stored in the K2 database located on your SQL Server.
The Leave Request SmartBox SmartObject you create
Scenario
You want a simple way for employees to submit leave requests. After submitting the request, a workflow starts which sends an approval task to the employee's manager. The manager can approve or reject the leave request. After the manager makes their decision, the workflow sends the requester an email with the decision and any comments the manager may have made.
Steps
For this scenario, you create a basic leave request application. The application consists of a form to enter the leave request, a SmartObject to store submitted requests, and a workflow to process the requests. The form has two views, an item view and a list view. The item view is editable and you use it to specify your leave request details. The list view displays saved leave requests and is there to assist the manager in making their decision. You begin your application by building your data source, a SmartBox SmartObject.
- From the Designer, create a SmartBox SmartObject called Leave Request SmartObject with the following properties: (We recommend you create categories for your sample projects first.)
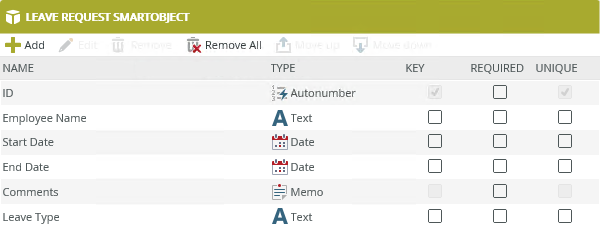
Property Name Data Type Employee Name Text Start Date Date End Date Date Comments Memo Leave Type Text 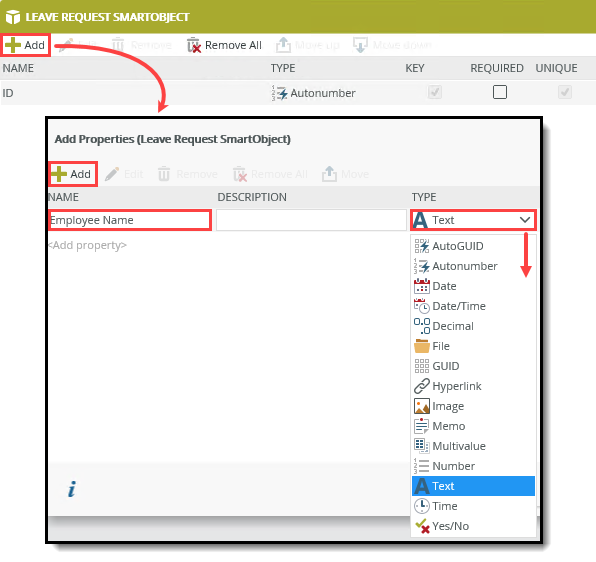
- Launch the Designer. If you do not know how to open the Designer from your environment, see the article, Accessing Sites.
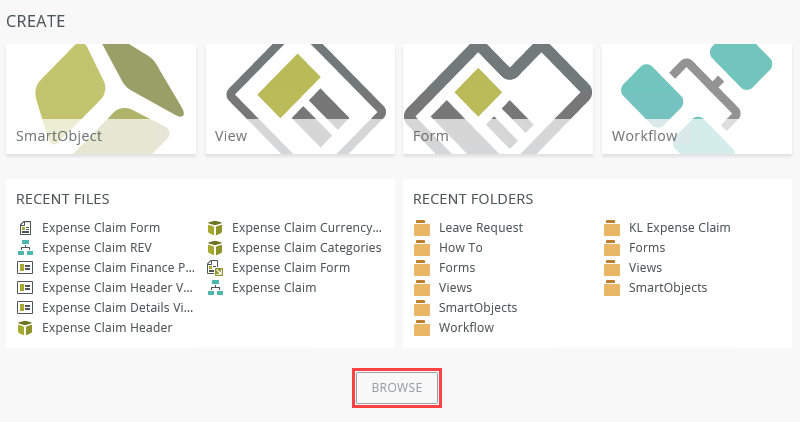
- From the Designer landing page, click the Browse button.
- The category explorer is on the left-side of your screen. Categories are folders where you can store your application elements to keep things neat and tidy. Right-click the All Items title and select New Category. Name the new category
How To.
Right-click the How To title and create a new category called
Leave Request.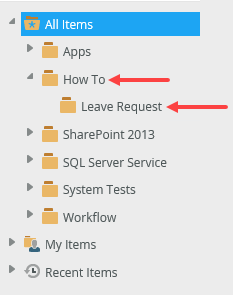
- You are now ready to start your new SmartObject. Right-click the Leave Request category and select New SmartObject.
- Name the SmartObject
Leave Request SmartObject.
Select the SmartBox option. This option creates a table in the K2 database for your data source. Click Create.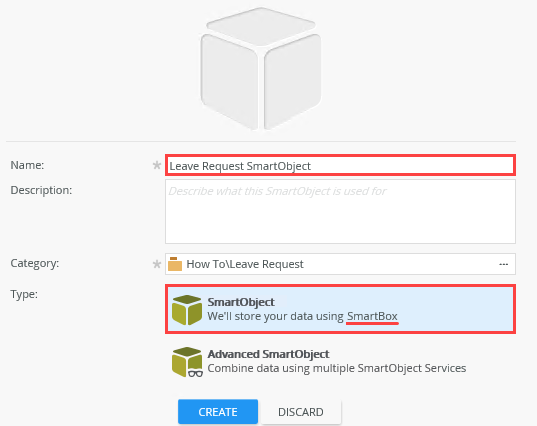
- Next, you add properties. Properties are like the columns in a table. You can add as many properties as you need and assign data types (such as text, date, number, memo). Click Add, then add the following properties and their data types:
Property Name Data Type Employee Name Text Start Date Date End Date Date Comments Memo Leave Type Text - Click OK to save your properties. Your Leave Request SmartObject should look like the image below. For this sample, you use the default methods provided (such as Create, Save, Delete).
- Click Finish (the blue button near the upper right corner of your screen) to save and exit the SmartObject designer.
Review
SmartObjects are connectors to data sources that allow you to interact with data. SmartObjects consist of properties (think of the columns in a table - Name, Address, Email) and methods (used to interact with data - Create, Update, Delete). You can create SmartObjects to interact with many types of data sources such as SharePoint lists and SQL Server tables.
SmartBox SmartObjects are data sources you can create yourself in the Designer. A table is created for you in the K2 database on SQL Server. You add properties and specify their data types. The ID property is automatically added so that you have a unique key for each record.