K2 Designer for SharePoint - Check-in Document
The Check-in Document wizard will check a specified document into a specified SharePoint Document Library. This changes the status of the document to checked in and enables other users to work on the document. Click and drag this wizard onto the designated area on the design canvas to start the wizard.
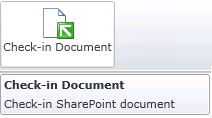
Fig. 1. Check-in Document
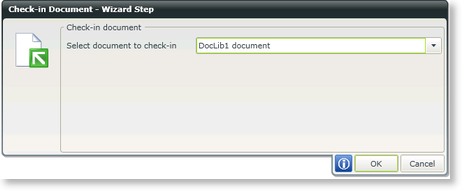
Fig. 2. Check-in Document
| Feature | What it is | How to use it |
|---|---|---|
| Select document to check-in | The document linked to the specific Document Library | Select the document to be checked-in |
Editing the Check-in Document event
To edit the Check-in Document event, right click the event and select Configure Workflow Step. The Name and Description of the event can be edited and Workflow Step Outcomes can be added or changed.
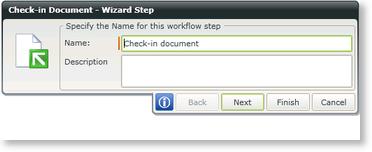
Fig. 3. Check-in Document - Specify the Name
| Feature | What it is | How to use it |
|---|---|---|
| Name | The name represents a specific step in a Workflow. For example, the Manager Approval Step or Approved | Type text for the Name of the event |
| Description | Describes the functionality and purpose of the step | Type a brief description of the event |
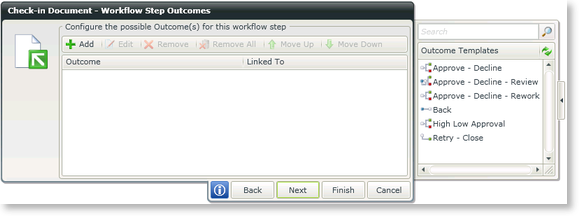
Fig. 4. Check In Document - Configure the possible Outcome
| Feature | What it is | How to use it |
|---|---|---|
| Add | Adds an Outcome to the event | Click Add |
| Edit | Opens the Edit Outcome Rules screen enabling the user to add Outcome Rules to the Outcome | Select an Outcome and click Edit |
| Remove | Removes an Outcome | Select an Outcome and click Remove |
| Remove All | Removes all Outcomes | Click Remove All |
| Move Up | Moves an Outcome one position up | Select an Outcome and click Move Up |
| Move Down | Moves an Outcome one position down | Select an Outcome and click Move Down |
See Also
