Succeeding Rule - Adding a Succeeding Rule
To Add a Succeeding Rule, open the Succeeding Rule dialog. Click Add and use the Add/Edit Rule dialog to add expressions. Multiple expressions can be added.
The Succeeding Rule will be reflected as shown below. Click OK. This activity will complete if All of Authorization = True.
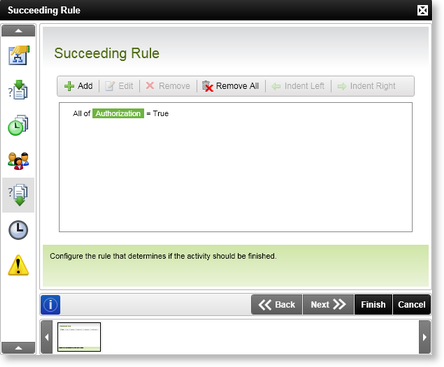
Fig. 1. Succeeding Rule
| Succeeding Rule | ||
|---|---|---|
| Feature | Description | How to use it |
| Add | Configures a new Succeeding Rule | Click the Add button to add a new Succeeding Rule |
| Edit | Edits an existing rule; make changes to the existing configuration. | Select the relevant Succeeding Rule and click Edit to edit the selected rule |
| Remove | Removes an existing Succeeding Rule | Select the relevant Succeeding Rule and click Remove to remove the selected rule |
| Remove All | Removes all of the existing Succeeding Rules | Click Remove All to remove all the Succeeding Rules |
| Indent Left | Changes the mathematical execution of the rules | Select the relevant Succeeding Rule and click Indent Left |
| Indent Right | Changes the mathematical execution of the rules | Select the relevant Succeeding Rule and click Indent Right |
Adding a Succeeding Rule - Client Event
If a Succeeding Rule is to be set up on a Client Event, open the Succeeding Rule dialog. The Outcomes are listed that was originally created from the Actions. Select an Outcome and click Edit.
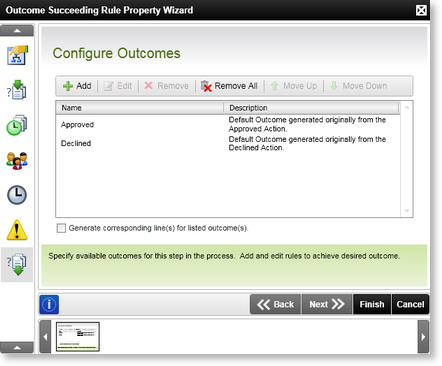
Fig. 2. Outcome Succeeding Rule Property Wizard
The Outcome dialog is displayed. Add Succeeding Rules by clicking Add, or edit the current Succeeding Rule by selecting the rule and clicking Edit. Add the rule by using the Add/Edit Rule Dialog and click OK. The Succeeding Rule will be reflected as shown below. Click OK. This activity will complete if the Approved Outcome has been selected and All Slots of Action Result = Approved.
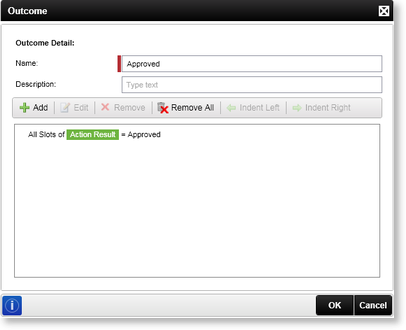
Fig. 3. Outcome Dialog
Indent
To provide more clarity on the Indent feature, the following Expressions have been configured on the Approved Outcome of a Client Event. In this instance, both expressions will evaluate separately and from top to bottom.
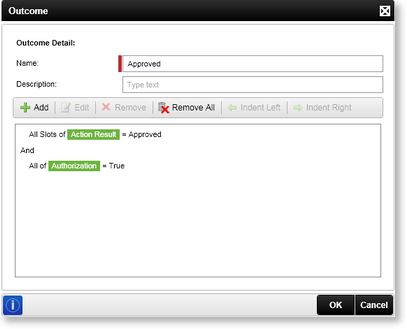
Fig. 4. Succeeding Rule - No indent
In the following instance, the user wants expression 1 to be evaluated separately and 2 and 3 to be evaluated together. Select the Or operator on the Outcome screen and click Indent Right. This will ensure that the 2nd and 3rd expressions are evaluated separately from the first expression. In mathematical terms this would relate to the following:
All Slots of Action Result = Approved AND (At Least 2 of Authorization = True OR At Least 2 of Manager Override = True)
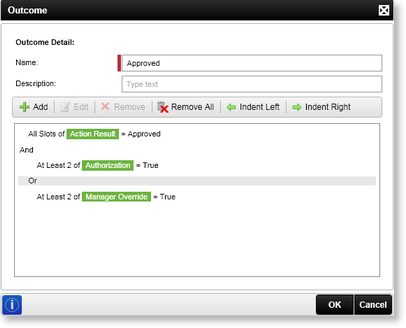
Fig. 5. Succeeding Rule - Right indent
