Import
Use the Import feature to import a Nintex RPA file or a botflow from the repository into an open botflow. The Import button is located at the bottom of the Add Items view.
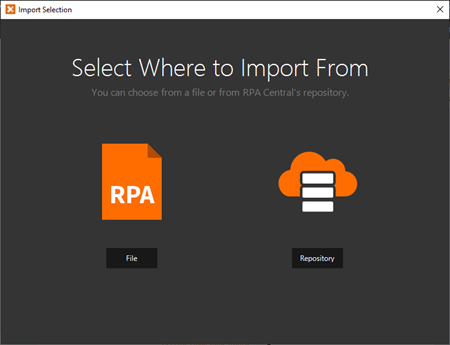
Items available for import are:
- File: Files having a
.rpaor.foxextension and are saved in a selected local or network directory location. - Repository: Botflows saved in the Nintex RPA Central database repository.
Import the botflow Botflow Pane items
To import the botflow Botflow Pane items:
- Click Add Item (
 ) on the Botflow Pane.
 - Click Import.
- Do one of the following to open a botflow:
- File: That has a
.rpaor.foxextension and is saved in a selected local or network directory location. Use the Import window to navigate to the required botflow and open it in the next Import window. - Repository: That is saved in the Nintex RPA Central database. Use the Open Botflow window to select the required botflow.
- Refresh: Refreshes the list of available botflows in the repository.
- Import: Imports a botflow that has a
.rpa,.fox, or.fspextension, and is saved in a selected local or network directory location. - Open: Opens the selected botflow from the list in the Import window.
- Cancel: Cancels the import and closes the window.
- In the Import window, click a botflow item in the Botflow list, such as Tasks, Variables, or Credentials.
- With the required botflow item selected, select the required check box or boxes. Click the check box in the menu bar to select all check boxes in a list.
- Click OK to complete the import.
The Import Selection window displays.
Note: Data, Data - SQL, SQL, and MySQL botflow items are not available for import.
Tip: Optionally, click Add Item ( ) to create a new botflow item of the selected type. You cannot create a new Email botflow item from the Import window.
The botflow items selected in the Import window display in the Botflow Pane for the open botflow.
Import field descriptions
| Field or button | Description |
|---|---|
| File | Select to open a botflow that has a .rpa or .fox extension and is saved in a selected local or network directory location. |
| Repository | Select to open a botflow that is saved in the Nintex RPA Central database repository. |
| Field or button | Description |
|---|---|
| Botflow | Lists the botflow name. |
| Published | Lists whether the botflow is Published or Unpublished. |
| Refresh | Refreshes the list of available botflows in the repository. |
| Import | Imports a botflow that has a .rpa, .fox, or .fsp extension, and is saved in a selected local or network directory location. |
| Open | Opens the selected botflow from the list in the Import window. |
| Cancel | Cancels the import and closes the window. |
| Botflow item | Available for import | |
|---|---|---|
| Credentials | Credential name and lock status. | |
| Connection letter and email address. | ||
| Emulators | Connection letter and emulator type. | |
| Excel | Connection letter and name. | |
| FTP | Connection letter, host, and folder. | |
| Lists | List name and number of items. | |
| Logs | Name and log file name and path. | |
| Connection letter and PDF name. | ||
| Slack | Connection letter and name. | |
| Tasks | Task name and number of task steps. | |
| Variables | Variable name and value. |