Move File
This article provides information on the following topics:
Note: The Actions Quick Reference provides a complete list of actions that you can print for easy reference.
What is the Move File Action?
The Move File Action moves one or more files to a new directory. While the location of the file will change, the name of the file remains the same. To rename the file, see Rename File.
Creating a Move File Action
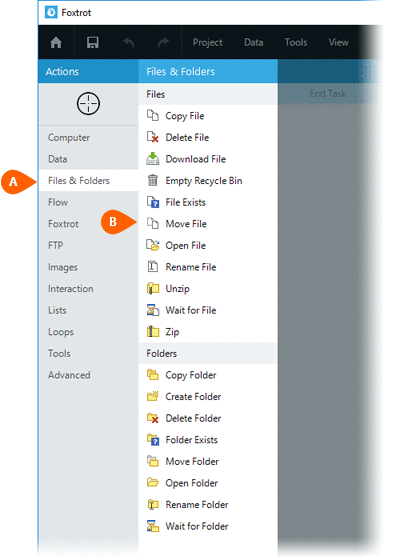
Select Files &
Folders Actions  to expand the Action
list. Select theMove File
to expand the Action
list. Select theMove File  Action from
the Actions list to display the Action
Builder.
Action from
the Actions list to display the Action
Builder.
Both the Timing
 and Error
 settings for this action may be configured to
fine tune the how the Action will run.
settings for this action may be configured to
fine tune the how the Action will run.
Note: For more information about the timing and error settings, go to Action Builder.
Enter the Name of the files(s) to move. Be sure to enter the full
file path.. Enter a Destination
of the files(s) to move. Be sure to enter the full
file path.. Enter a Destination folder name to move the file to. Be sure to enter
the full folder path, but do not include the file name. For example,
rather than entering "C:\NewDestinationName\FileName.txt",
you would enter the folder name only: "C:\NewDestinationName\".
folder name to move the file to. Be sure to enter
the full folder path, but do not include the file name. For example,
rather than entering "C:\NewDestinationName\FileName.txt",
you would enter the folder name only: "C:\NewDestinationName\".
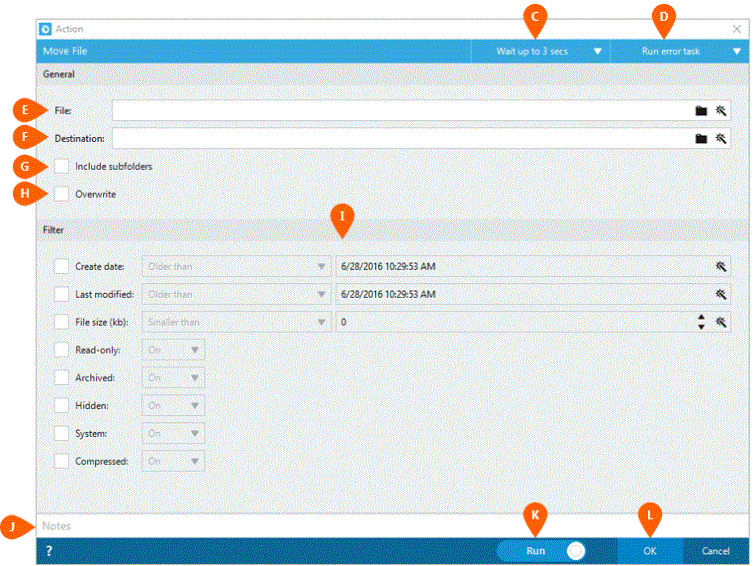
Check the Include
subfolders option  if you would also like to move files in subfolders.
If the name of the file being moved matches a file
that already exists in the destination folder, the Action will fail unless
you check the Overwrite option
 . This will instruct Nintex RPA LE
to replace the existing files with the file that is being moved.
. This will instruct Nintex RPA LE
to replace the existing files with the file that is being moved.
The Options
section  allows you to further refine which files
are considered. Enabling any of the these options will only include
files with specific attributes. You have the ability to filter
files by:
allows you to further refine which files
are considered. Enabling any of the these options will only include
files with specific attributes. You have the ability to filter
files by:
- Create date
- Equal to
- Newer than
- Newer than or equal to
- Older than
- Older than or equal to
- Last modified date
- Equal to
- Newer than
- Newer than or equal to
- Older than
- Older than or equal to
- File size
- Equal to
- Larger than
- Larger than or equal to
- Smaller than
- Smaller than or equal to
Additionally, you have the ability to filter by the Read-Only, Archive, Hidden, System, and Compressed attributes of the file.
Optionally add Notes
 to the Action to document any special instructions
or functionality. When the Run Switch
to the Action to document any special instructions
or functionality. When the Run Switch is set to Run, the action
will be executed after clicking OK.
is set to Run, the action
will be executed after clicking OK.
Note: The run switch is set to Run by default. To create or modify this action without executing it, click the slider to change the option to Don't Run. For more information, go to Action Builder.
Click the OK
button  to save the Action.