This help site is based on the available in-product assistance as of December 2016. Please note that this site is provided as a convenience and it does not go through rigorous layout testing.


Back Forward Home Print
Nintex Workflow 2010 > Workflow Actions
Start workflow

This workflow action will initiate a site workflow or a different workflow in the current list or library.  When designing a site workflow, you can only nominate another site workflow in the same site to use.

To use the workflow action:

  • Locate the action in Workflow Actions Toolbox (located on the left hand-side);
    • Click on the Category listings to reveal the actions; OR
    • Search for the action using a keyword.
  • Select the action, drag it onto the design canvas and drop it onto a design pearl.

Alternatively

  • Left-clicking the pearl, mouse-over Insert Action and then the Categories to reveal the actions, click the required action from the list.

To change the settings used by the action:

  • On the action’s title click the down arrow to activate a drop-down
  • Select Configure; OR
  • Double-click the action's icon.

For more information on the other options in the drop-down, please refer to the Getting started with the Nintex Workflow designer.

Options within the action

Workflow to Start

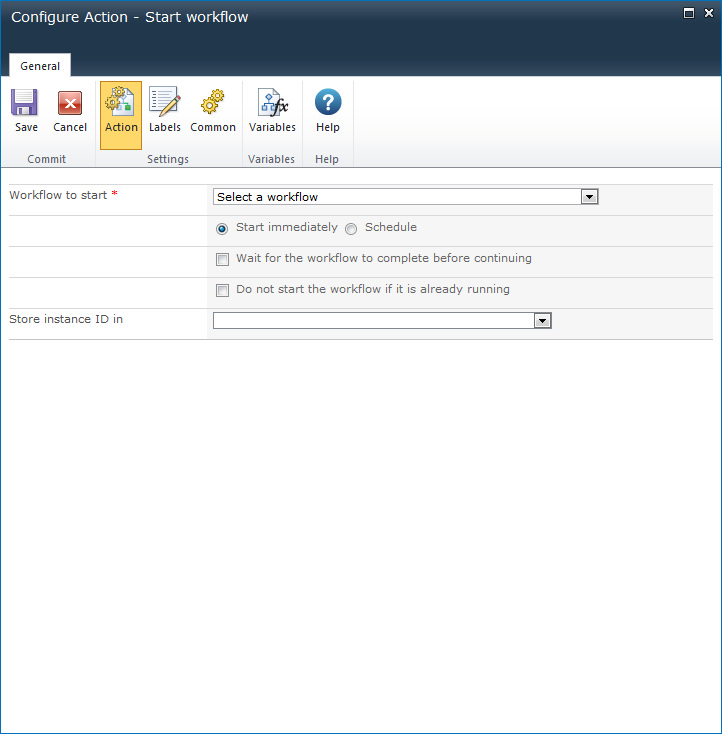
From the drop-down that is presented, choose the title of a workflow to start. In lists or libraries, only published site workflows in the same site or published workflows in the list or library in which the current workflow is operating will be available.  When designing a site workflow, only other published site workflows will be available.

If the workflow was created with Nintex Workflow and has start data specified, a form will be displayed to provide values. For a workflow that is provided out of the box, or installed as a Feature, a panel will be provided to edit the association xml.

Set the Start mode with one of the following:

  • Start immediately: Specifies that the target workflow will start when this executes.
    • Wait for the workflow to complete before continuing: When this option is checked, the current workflow will only run when the specified workflow has completed.
    • Do not start this workflow if it is already running: When this option is checked, the current workflow will not run the specified workflow if it is in progress.
    • Store Instance ID in: Select a workflow variable in which to store the workflow instance ID. The value in the workflow variable can then be used elsewhere in the workflow.
  • Schedule: Creates a new workflow schedule for the target workflow. The target workflow will then execute based on the schedule. For more information on workflow schedules see the Scheduling a workflow help page.

Schedule Editor mode

When using the Schedule start mode, select one of the following schedule editor modes:

  • Schedule Builder: Set the schedule settings for the workflow.
  • Schedule XML: This is the format in which the schedule is stored and can be edited directly.

Note: When a date is typed in, it must be in the ISO8601 format.

Sharing data between workflows

The Store data and Retrieve data workflow actions can be used to transfer values between workflow instances. A workflow that is started by the Start workflow action can store a value with the Store data action, and the parent workflow can later retrieve that value with the Retrieve data action and the value stored from the Store Instance ID in option.

Troubleshooting

Action not executing

The work load for this action is added to a job queue. The workflow executes jobs in the queue as a batch when it reaches a "commit" point. For more information, see the Nintex article "Designing your Workflow - Commit Pending Changes Action NW2010 & NW2013."