Nintex RPA Server Installation
RPA Server Installation Steps Overview
-
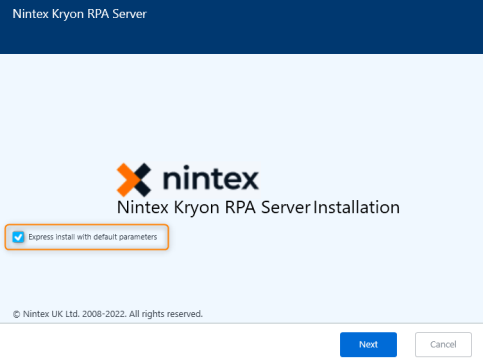
If you want an Express Install to install with the default parameters, select it here. Otherwise, continue to the next step.
This will automatically bring you to Step 17: Components to Install.
-
Selecting the deployment and automation type
RPA 21.4 supports Single Machine only.
High-Availability will be supported in an Active-Active mode starting from 21.4.1 onwards.
-
Selecting installation type (single-machine or high-avaiability)
-
Providing servers FDQNs for high-availability
-
-
Configuring connection security (SSL/TLS)
-
Generating or providing CA and certificates
-
-
Configuring Centralized Log Repository (SEQ)
-
Installing SEQ locally or connecting to remote SEQ
-
-
Selecting user authentication (Single Sign-on [Kerberos] or Username&Password)
-
Configuring the service credentials of the user who runs the RPA
-
Selecting a user to run authentication services on the RPA server
-
Configuring communication and authentication with Active Directories, Active Directory Groups, and Platform Security (these steps are relevant only to Single-Sign-on user authentication type).
-
Configuring database (install SQL locally or configure the connection to a remote database)
-
Review the authentication platform (Keycloak) users credentials created by the installer
-
Executing installation, server reboot, and completing installation