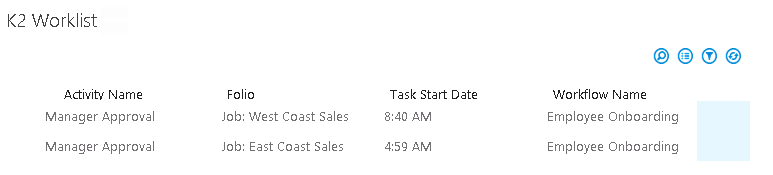
Using the K2 Worklist
The K2 Worklist is accessed in one of two ways:
- The Portal page displays your K2 Worklist after you add a K2 Worklist App Part to a Portal page.
- In the K2 ribbon of a SharePoint app

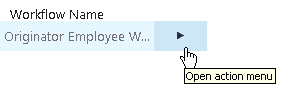
You can open the form associated with a K2 Worklist task for viewing, editing, or completing an action.
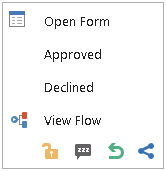
- From the Portal page, open the action menu next to a K2 Worklist task.
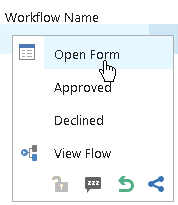
- From the action item menu, click the Open Form icon.
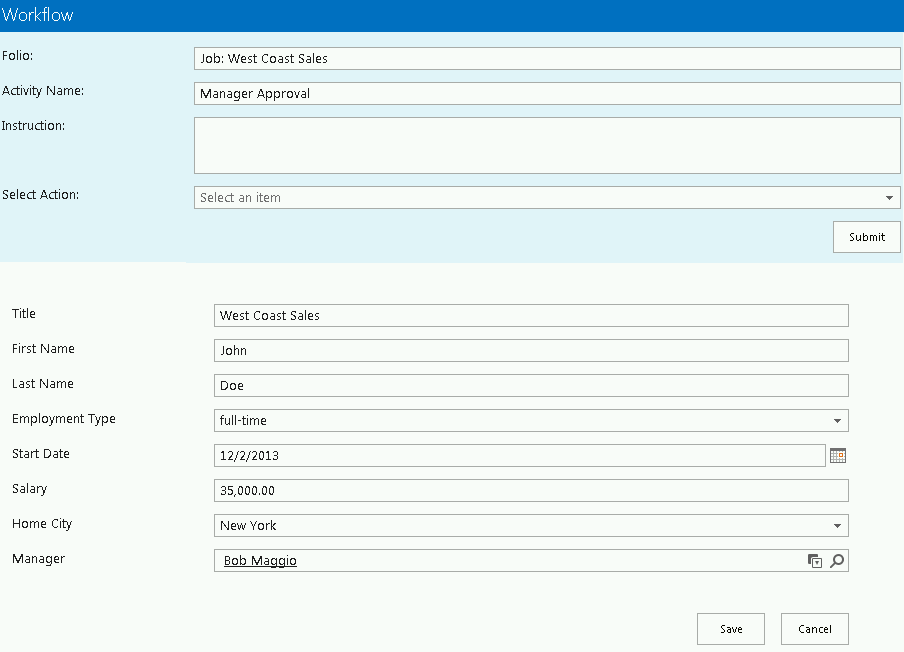
- View or edit the form as required. (The Form shown below utilizes the Workflow panel to complete the workflow task. Your Form may look different, depending on how the Form was designed by the Application creator)
- Click Save to save any changes made to the form.
- In the workflow panel on the form, select an action from the Select Action drop-down menu and click Submit, otherwise click Cancel to close the form without completing the task.
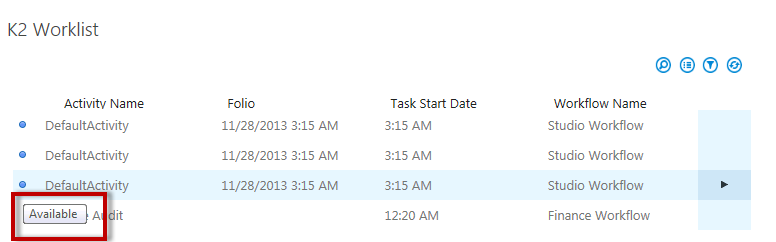
A blue circular icon indicates that a task item's status is Available. When in Available state, a work item can be opened and processed by all users who have that item in their worklists. Hover your mouse over the blue icon to display the status.
- In the K2 Worklist App Part, open the action menu next to a task.
- Click an appropriate action to complete the task. In the example below, the available completion actions for this task are Approved or Declined. (The Actions shown will depend on the workflow design and whether the Actions were configured to be available without having to open the associated task form for the task).
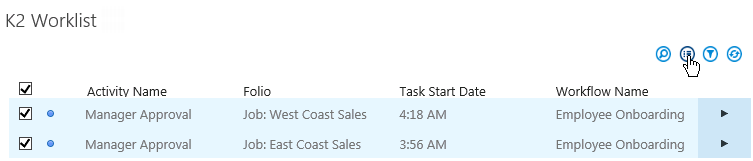
You can complete multiple tasks at the same time using the batch action feature.
- On the top right-hand side of the worklist, click the multi-select icon to display selection boxes next to each work item in your K2 Worklist.
- Use the check boxes to select the work items that you want to select, or check the very top box to automatically select all tasks in your K2 Worklist.
- Open the Action menu for a selected Item and select the common Action you wish to perform on all the checked items.
When selecting work items from different workflows, the action menu only displays those Actions that are common to the Tasks. For example, the action to Approve appears only if that action is available in all of the selected items based on the Actions defined in the workflow. If the workflows have no common actions, then the action menu only allows you to Redirect, Sleep, or Share the selected work items as a batch.
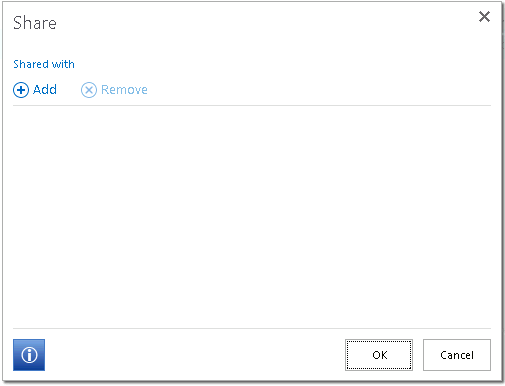
You can share a task from your K2 Worklist with other users. For example, if Department A has a backlog of work to process and Department B is assisting to reduce the backlog; then Department A shares their K2 Worklist items with members of Department B. The original user continues to own the shared item and can still complete the task.
A shared work item appears in both users' K2 Worklist. When any one of the users completes the Task, the Task will automatically be removed from the second user's Worklist.
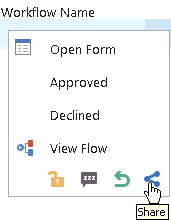
- In the K2 Worklist App Part, open the action menu next to a Task.
- On the action item menu, click the Share icon.
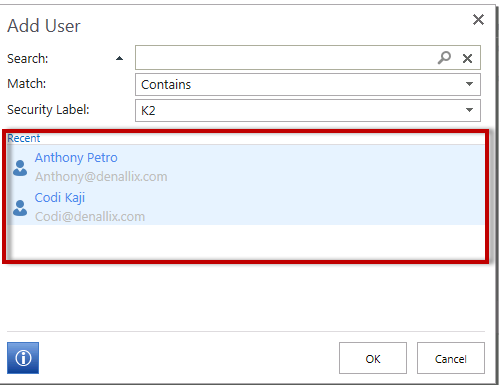
- Click the Add link to add one or more users to share the task with (After you add a user, you can remove that user using the Remove link).
- Enter the name of the person that you want to share your task with in the Search box and click the magnifying glass icon.
- Click to select one or more users that will share your task, making sure that the selected names are highlighted.
- Click OK. The task is shared with the person or persons that you selected.

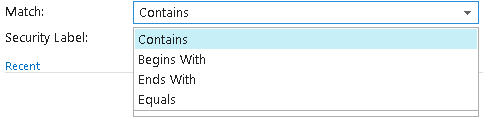
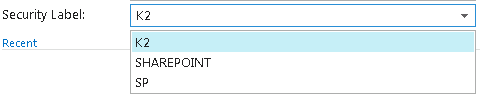
To refine your search, click the downward triangle preceding the Search box and select to limit your search by match option or security label. When searching for a user with a security label other than Azure Active Directory (AAD), all the Match filters will be available for use. If the security label is AAD, only the Begins With filter will be available.
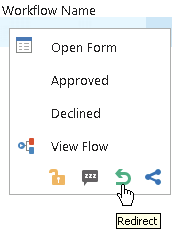
You can redirect a task to another person, which will remove the Task from your K2 Worklist. For example, if you are responsible for Department A tasks and accidentally receive a task for Department B; you can redirect that task to the correct person in Department B.
- In the K2 Worklist App Part, open the action menu next to a K2 Worklist task.
- On the action item menu, click the Redirect icon.
- Type the full or partial name of the person that you want to redirect your task to in the Search box and click the magnifying glass icon.
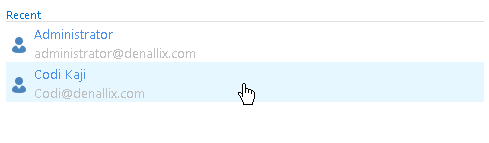
- Click to select the person that will receive your task.
- Click OK. The task is removed from your K2 Worklist and redirected to the person that you selected.
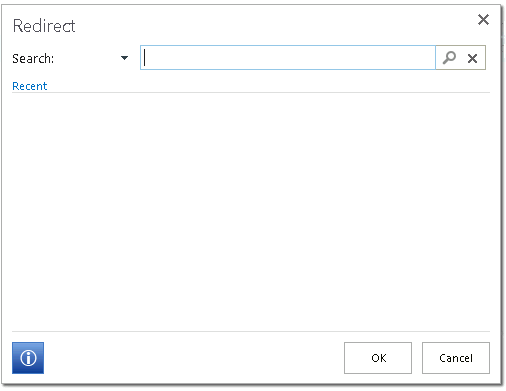
To refine your search, click the downward triangle preceding the Search box and select to limit your search by match option or security label. When searching for a user with a security label other than Azure Active Directory (AAD), all the Match filters will be available for use. If the security label is AAD, only the Begins With filter will be available.

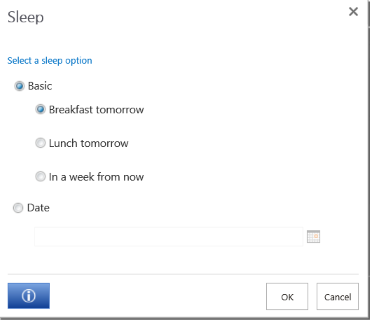
You can delay acting on a task in your Worklist until a later date. Choose to delay acting on a task until a preselected time (Basic) or a date that you specify (Date) occurs. For example, if your schedule prevents you from completing tasks until the next day, you can choose to delay your action until the following morning or afternoon.
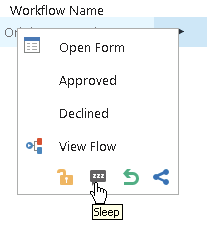
- In the K2 Worklist App Part, open the action menu next to a K2 Worklist task.
- On the action menu, click the Sleep icon.
- To set up a Basic sleep option, click the Basic radio button followed by the radio button for your selected basic option.
- Breakfast tomorrow – The item is paused until 8 AM the following day.
- Lunch tomorrow – The item is paused until 1 PM the following day.
- In a week from now – The item is paused until 8 AM the following week.
- To set up a custom Date sleep option, click the Date radio button and enter a date in the "Start Date" box or click the calendar icon to select a date.
- Click OK. The task is removed from your K2 Worklist and delayed until the selected Sleep interval has passed.
Where:

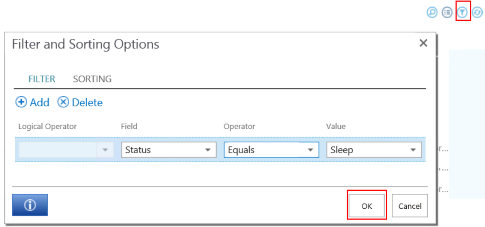
If you accidentally sleep a Task or need to access a sleeping Task before the sleep interval has passed, you can use the Filter icon to edit the default filter to show sleeping tasks, as shown below. Once you have completed the task, remember to revert the filter back to the previous value so that the Worklist will not show sleeping tasks.
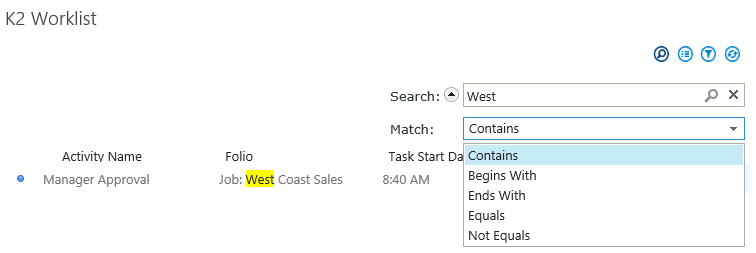
You can refine a K2 Worklist to only display the workflow items that you need to see by using the search and filter functions. For example you might only want to see all the expense claims needing approval at the end of a month. By selecting the search icon, you can display only the workflow items that match your search request.
For example, the following figure shows a quick search for visible fields that contain the word "West." Clicking the arrow next to "Search" enables or disables a "Match" search refinement option to further limit your results. For example, selecting "Begins With" instead of "Contains" limits the results to only workflow items that begin with "West".
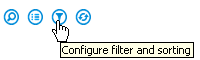
By selecting the filter icon, you can modify the default filter and sorting parameters for your worklist.
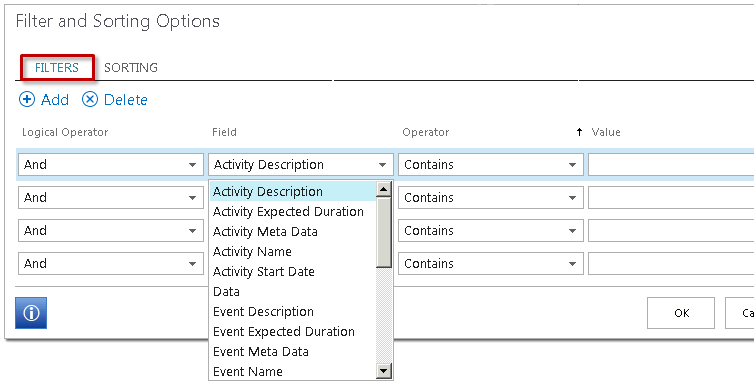
Selecting the Filters tab allows you to customize the information that displays in your worklist .You can configure multiple filters by using the Add button. When changing the filter, the filter is only valid for the duration of your current browser session. For example, if you open another browser session you will need to configure the filter again.
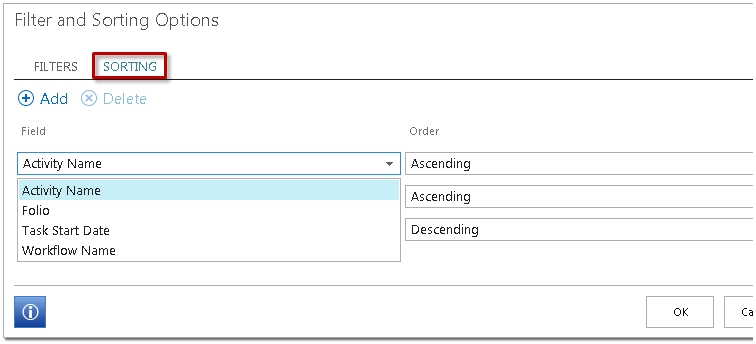
Selecting the Sorting tab allows you to customize the order that items display in your worklist. You can configure multiple sorting options by using the Add button.
Although the default filter and sorting options work well for most applications, you have the ability to customize those options to best fit your specific business application.
Use the View Flow page to view where your task is in the workflow and the various routes it can go before the workflow completes.
- In the K2 Worklist App Part, open the action menu next to a K2 Worklist task.
- Click View Flow from the action menu.
- From the View Flow page, click a tab to display different workflow views:
- Workflow tab - displays the workflow steps. You can click on completed areas for details about the workflow including participants, steps in the process, and other data.
- Comments tab - a list of the comments associated with this process instance.
- Attachments tab - displays a list of the attachments associated with this process instance.
- Charts tab - displays a bar graph or a pie chart of the workflow activities. You can click the colored areas of the chart for more details about the workflow.
- To interpret a View Flow diagram, remember:
- Line Rules that evaluated true and were successful are colored green
- Line Rules that evaluated false and were not successful are colored red
- Skipped lines or not yet evaluated lines are gray
- Green workflow steps indicate that the step was successful
- Blue workflow steps indicate that the activity has started, and is in an Active or Running state
- White workflow steps indicate that the step has not yet been executed
- Blue events with red exclamation marks indicate that the event is currently in an error state

- Click the workflow Start step to view the Process Summary dialog for the entire workflow.
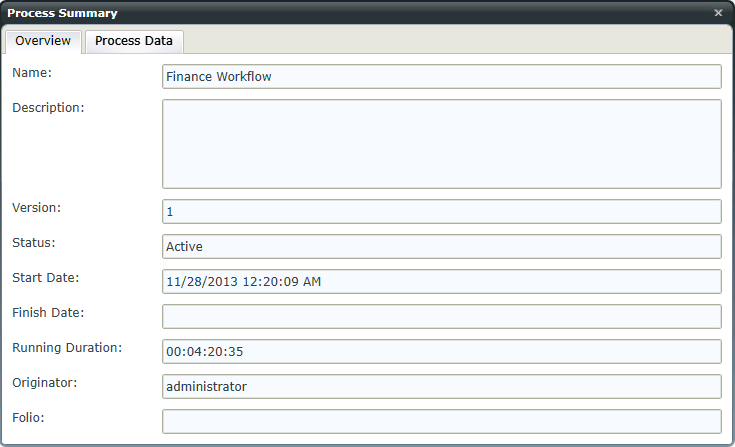
The Process Summary dialog contains the following tabs:
- Overview displays high level workflow information.
- Process Data displays workflow Data Field details. Columns can be re-sized by dragging the column lines. A View link displays if the value of a Data Field or XML Field has changed. Clicking the link or hovering over the item displays the changes.
- Click a workflow step to view the Activity Summary dialog for that step.
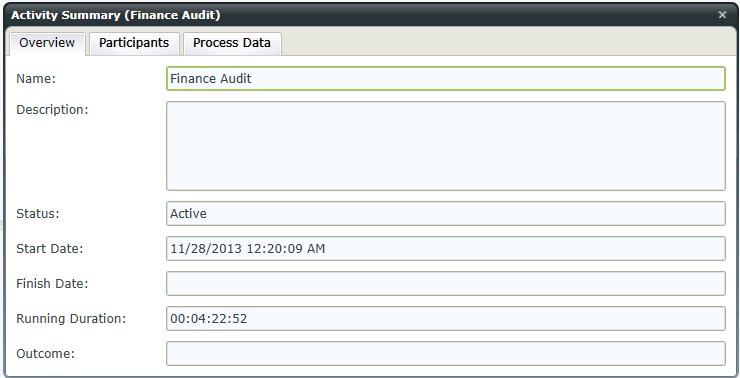
The Activity Summary dialog contains the following tabs:
- Overview displays high level step activity information.
- Participants displays details about the participants involved with that step activity. Columns can be re-sized by dragging the column lines.
- Process Data displays workflow Data Field information. Columns can be re-sized by dragging the column lines.