Managing the K2 for SharePoint settings for a specific site
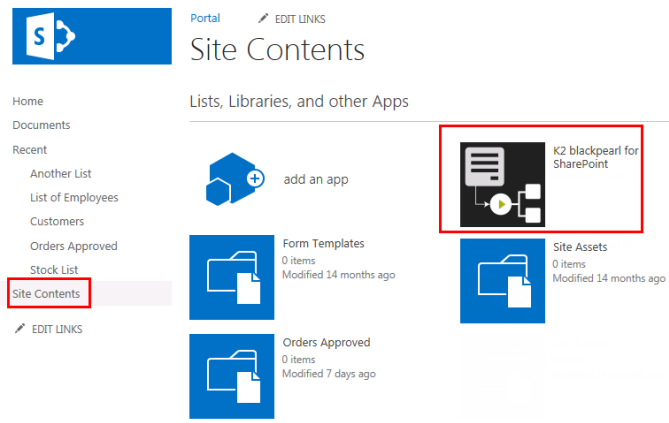
The K2 for SharePoint App Settings page can be accessed by clicking on the K2 App in the SharePoint Site Contents page.
Use the options below to access and manage K2 for SharePoint features and settings.
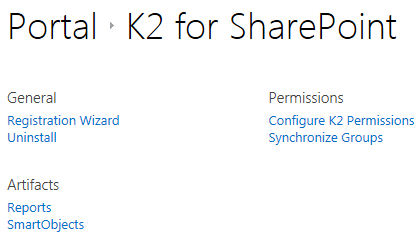
General
Use this option to rerun the Registration Wizard. For more information go to the Registration Wizard topic.
Use this option to remove the K2 for SharePoint App from the SharePoint Site. For more information go to the Uninstall topic.
Artifacts
Use this option to view reports based on the Site Collection workflows. For more information go to the Using Reports topic.
The SmartObjects artifact is used for generating and managing SmartObjects.
Generate SmartObjects
Follow these steps to generate single or multiple SharePoint List or Library SmartObjects for a Site:
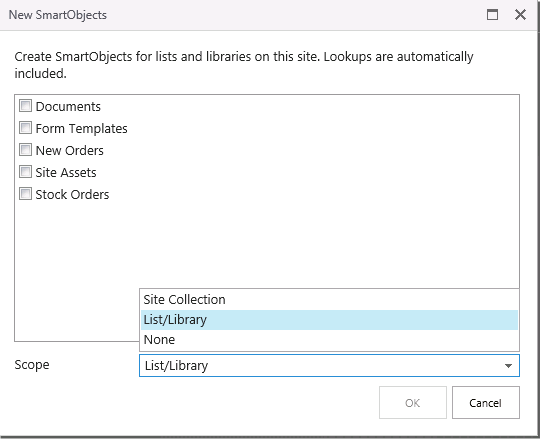
- click on New from either the Libraries or Lists section.
- A list of SharePoint Lists or Libraries will display depending on which section you are working from. Select the items for which the SmartObjects will be created by clicking the check-box in front of each item. Select the Scope of these items. The Scope can be changed per item at a later stage. The Scope options are:
- This Site and all of its subsites - This option enables the use of the SmartObjects in a K2 workflow designed in the K2 for SharePoint application from any List or Library in the Site Collection including all of the sites subsites.
- List/Library - This option enables the use of the SmartObjects in a K2 workflow designed in the K2 for SharePoint application only for the specific List or Library.
- None - Selecting this option will prevent the use of the SmartObjects in a K2 workflow designed in the K2 for SharePoint application.
- Click OK to generate the selected items as SmartObjects.
- The items selected will now be listed under the relevant sections indicating the scope per item.
- If you click on New again, only the items for which SmartObjects do not exist will now be displayed. These can be selected to generate SmartObjects.

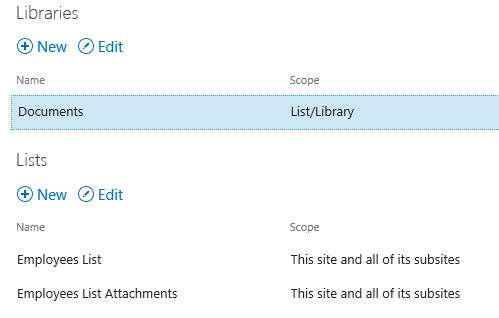
When generating SmartObjects based on SharePoint Lists, the associated Attachments SmartObject will also be generated and displayed in the list of SmartObjects as per the image above.
Clicking OK or Cancel on the Manage SmartObjects Landing page after generating SmartObjects, will not influence the SmartObjects generated. It will only save or cancel changes made to the Scope of these SmartObjects.
Manage SmartObjects
To manage SmartObjects, click on the SmartObjects artifact from the K2 for SharePoint App Settings page.
The Scope of SmartObjects can be changed from this page. The scope determines where the SmartObject will be visible for workflows. The Scope options are:
- This Site and all of its subsites - This option enables the use of SmartObjects in workflows designed any SharePoint List, Document Library or related subsites in the Site Collection.
- List/Library - This option enables the use of the SmartObjects in a workflow only for the specific SharePoint List or Document Library.
- None - Selecting this option will prevent the use of the SmartObject in a workflow designed in the K2 Application.
To change the scope per SmartObject, select a SmartObject and click Edit or double click the SmartObject. Click on the drop-down under Scope and select the new scope for the SmartObject.

Click OK at the bottom of the page to finish editing the SmartObject's visibility settings.
Changes to the SmartObjects are saved at the time of making the change. Clicking Cancel on this page will not undo your changes.
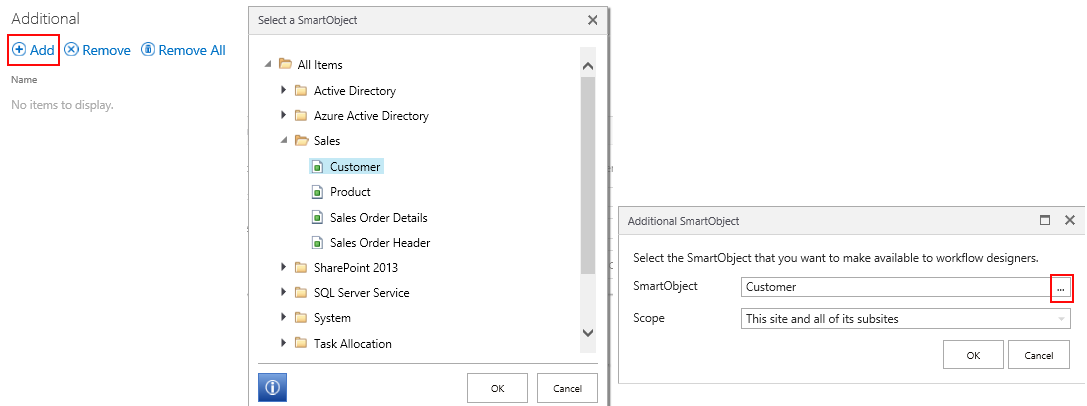
Additional SmartObjects
The Additional SmartObjects section allows you to add or remove other SmartObjects so that they are visible when designing a workflow. For example, if you had a SmartObject that exposes a SQL database, you must add the SmartObject to the Additional SmartObjects section before it will be available in the workflow design tool. Note that any SmartObjects you add in the Additional section will appear in the SmartObjects tab of the workflow designer for all workflows designed within this Site.
To add SmartObjects, click on the Add button and then use the ellipsis button to browse for and select the SmartObject you wish to expose in the workflow designer.
Additional SmartObjects can be removed either by selecting a SmartObject and clicking Remove option, or click Remove All to remove all the SmartObjects listed.

Use this link to open the K2 Designer. You can use the K2 Designer to manually create SmartObjects and work with SmartForms.
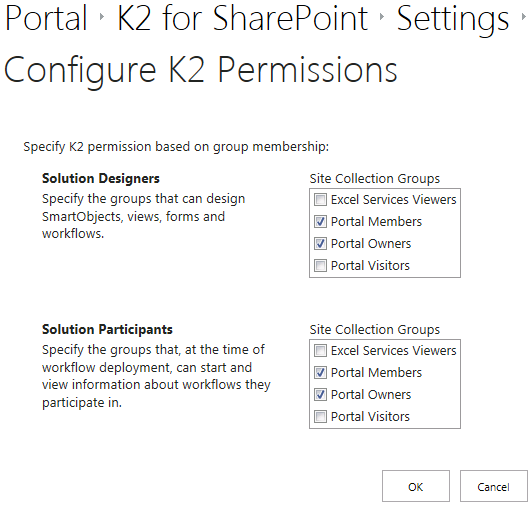
Permissions
Use this option to specify K2 permissions based on Site Collection Group membership. The available options are:
- Solution Designers: Assign permissions to members in the Site Collection Group/s to design SmartObjects, views, forms and workflows.
- Solution Participants: Assign permissions to members in the Site Collection Group/s to start and view information about workflows they participate in.
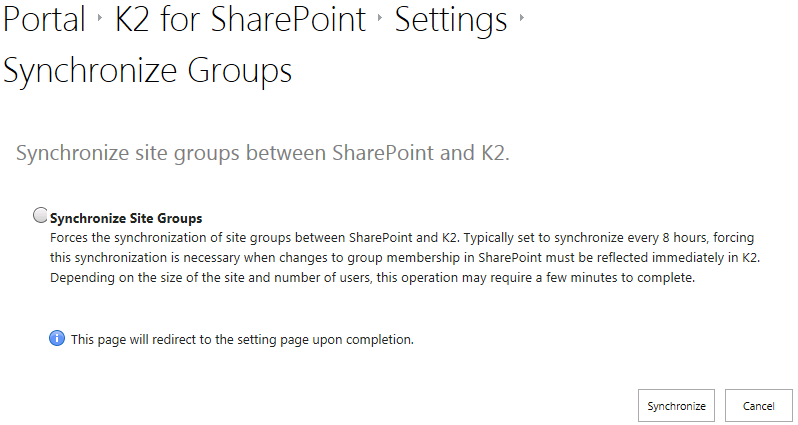
The synchronization of Site Collection Groups between SharePoint and K2 occurs every 8 hours by default. This option can however be used to force the synchronization after changes were made to a group/s and these changes need to reflect in K2 immediately.
This operation may require a few minutes to complete dependent on the size of the site as well as the number of users in the Site Collection Group.