How to use the Workflow Comment and Workflow Attachment SmartObjects
The Workflow Comment and Workflow Attachment System SmartObjects added can be used in the context of a workflow to add or view comments or attachments associated with a workflow instance. As an example, an employee submits a leave Form for approval and the HR manager might want to add a comment about the leave Form, such as “This leave is considered leave without pay” so that the next approver (Manager) can see the comment and act accordingly.
The following Process Rights are required to use the Workflow Attachment and Workflow Comment SmartObjects. Because Comments and Attachments are added on a process instance level and not on a worklist item level, a user has to have process rights in order to use these SmartObjects; a user with just an active worklist item without any process rights cannot add or view Comments and Attachments. Process Rights can be managed in the K2 Workspace, K2 Process Portals, the K2 Management site in K2 for SharePoint, and when workflows are designed in the web-based workflow design tools.
| Start | View | View Participate | Admin | Server | All | |
|---|---|---|---|---|---|---|
| Workflow Attachment | ||||||
| GetList |
Deny |
Allow | Conditional Allow |
Allow |
Deny | Allow |
| AddAttachment | Allow | Allow | Conditional Allow |
Allow |
Deny | Allow |
| GetAttachment |
Deny |
Allow | Conditional Allow |
Allow |
Deny | Allow |
| Workflow Comments | ||||||
| Add Comment |
Allow |
Allow | Conditional Allow |
Allow |
Deny | Allow |
| GetList |
Deny |
Allow | Conditional Allow |
Allow |
Deny | Allow |
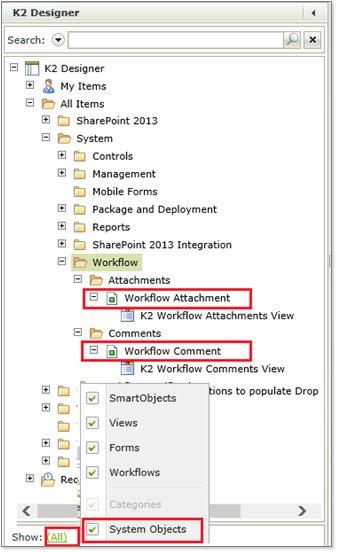
The Workflow Attachment and Workflow Comment SmartObjects are located in the System > Workflow folder in the K2 Designer. You may need to select the show System Objects option to see the SmartObjects in the Designer.
The process instance ID of the workflow is required to work with the Workflow Attachment and Workflow Comment SmartObjects, because this is the value that ties a Comment or Attachment to a workflow instance. If you wish to use these SmartObjects in your workflow forms, the Process Instance ID needs to be mapped in the methods used to add or retrieve Comments and Attachments. If you are using K2 SmartForms, you will need to add the integration with the Comments and Attachments SmartObjects as described below. Comments and attachments SmartObjects can be used in multiple ways to ADD or DISPLAY comments and attachments, the key to the successful use is configuring the Process Instance ID that is always required
The following is an example of configuring the SmartForms and Workflow in a K2 for SharePoint Application to support adding and viewing comments in Forms associated with a workflow.
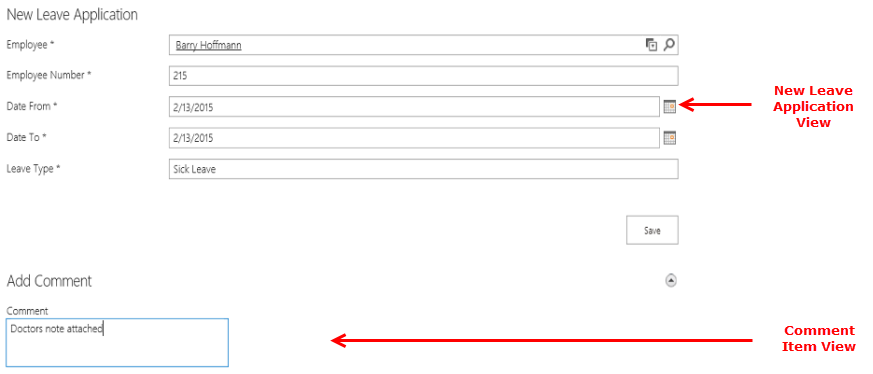
The example used is an employee that submits a Leave Form and wants to add a comment on the Form describing the type of leave they want to take such as vacation leave. For a subsequent approval task, we will display the comments added to the workflow on the approval Form and allow the approver to add additional comments. To achieve this, the Start Form contains two Views: The New Leave Application View, created in the K2 Application, contains leave information which is linked to the Leave SmartObject in the K2 Application, and the Comment Item View is an Item View of the Workflow Comment SmartObject, created in the K2 Designer. The user is able to capture comments while completing the leave information.
Adding comments when the leave request workflow is started:
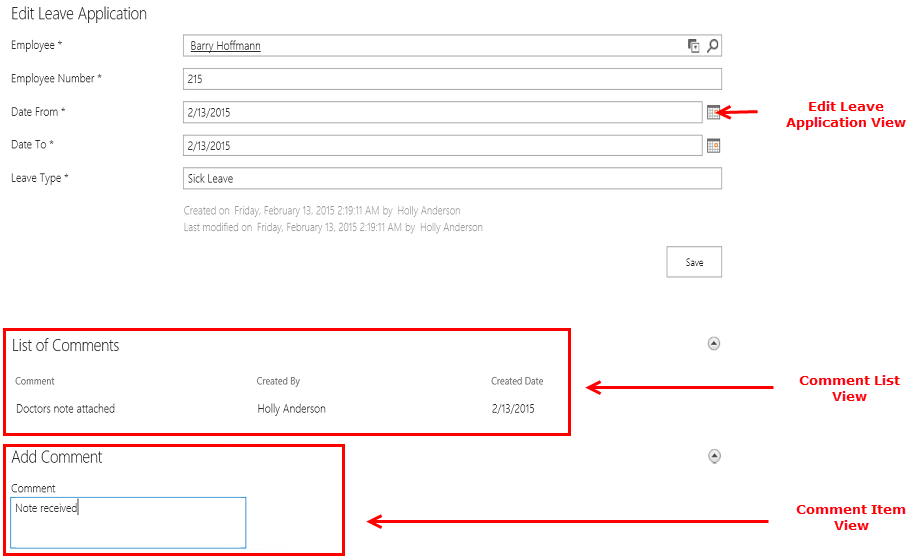
The Approval Form contains three Views: The Edit Leave Application View contains leave information which is linked to a Leave SmartObject, the Comments List View is used to show a list of the previous comments for this workflow, and the Comment Item View is an Item View of the Workflow Comment SmartObject. The approver is able to add comments when submitting their decision on the leave request.
Displaying and saving comments when the leave request is approved:
Here are the high level steps to configure the Form and Workflow from the K2 Application, to save and load Comments. You can follow a similar procedure to add the Attachments integration if you wish; for this scenario we will only use the Comments SmartObject.
The first step is to create a SharePoint custom list called Leave Application and create the K2 Application from this custom list. Ensure to include all the elements in the K2 Application; Data, Forms, Workflow and Reports.
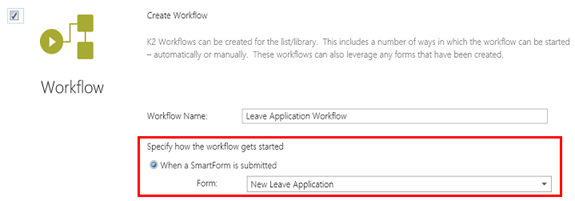
For the Workflow Start Option, select the When a SmartForm is submitted option and ensure the New Leave Application form is selected from the drop down.
Click OK to create the K2 Application elements. Drag a Placeholder onto the canvas and save the workflow. We will return later to design the workflow. Click on Close & Exit to go back to the K2 Application.
The second step is to create Views that will be used to Add and Display (List) comments. You may create the Views once and re-use them across multiple Forms and Applications, or create separate Views for each Application. You may also use the built-in Views called K2 Workflow Attachments View and K2 Workflow Comments View to display a list of Comments, if you prefer, but for this sample we will create Views to both Add and Display (List) Comments.
- Create the Item View used to capture new comments. From the K2 Application, click on New and select View. The View Designer is opened
- Click Next.
- Configure the General settings of the View.
- Change the Data Source to the Workflow Comment SmartObject. Locate the Workflow Comments SmartObject in the System Folder. The general properties of the View will look similar to the image below:
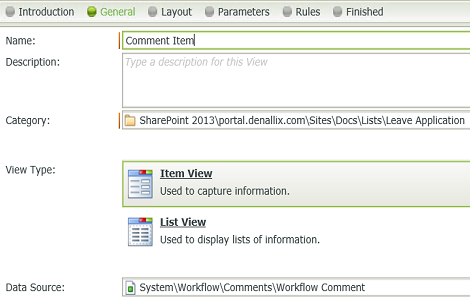
- Click Next.
- Add the Comment field to the View and configure the styling to your choice.
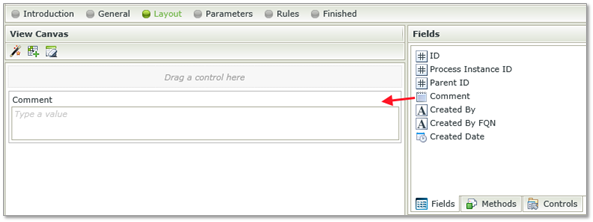
- Click Finish.
- This takes you back to the K2 Application.
- Create the Comments List View used to display comments. From the K2 Application click on New and select View. The View Designer is opened.
- Click Next.
- Configure the General settings of the View and select List View as the View Type.
- Change the Data Source to the Workflow Comment SmartObject located in the System Folder.
- Disable the option Call this method when the form loads.
- The general properties of the View will look similar to the image below:
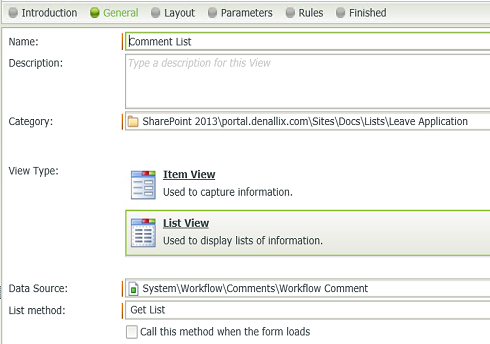
- Click Next.
- Click Create Labels and Controls.
- Select the Fields to display on the List View (we recommend Comment, Created By and Created Date).

- Configure the layout and styling of the new List View to your liking.
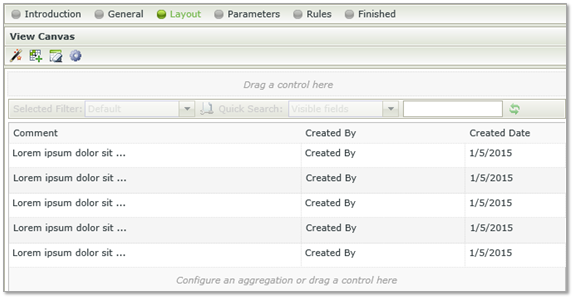
- Click on Finish. This takes you back to your K2 Application.
- Now that the Views are ready, we can use them on the New Leave Application and Edit Leave Application Forms, used to Start workflows and complete workflow items.
The New Leave Application Form will be used to start the workflow. Add the Workflow Comments Item View that you created in the previous step to the Form. We will configure this View in a later step.
- From the K2 Application, right click on the New Leave Application Form and select Check Out.
- Right click the Form again and select Edit.
- The Form Designer is opened.
- Drag the Comment Item View from your Leave Application Category to the Form. Change the View Title to Add Comment.
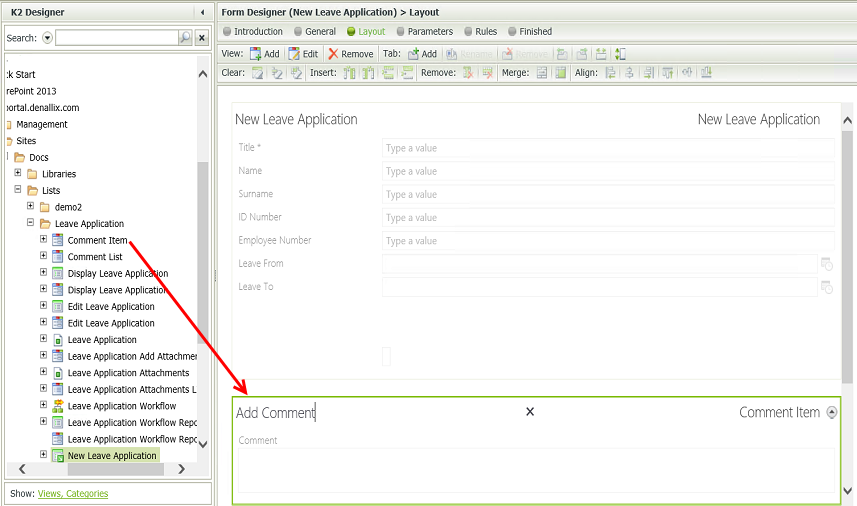
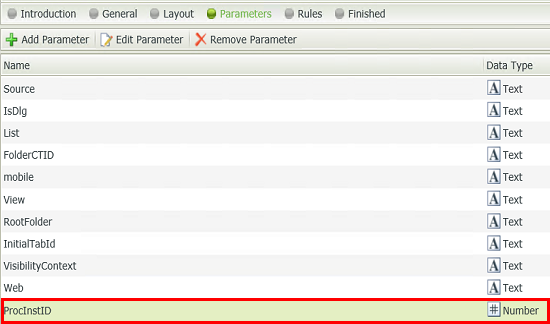
- Click Next and add a Form Parameter of type Number called ProcInstID. This parameter will be used to save the comment associated with the Process.
- Finish the Form. This takes you back to the K2 Application.
Now we need to edit the Edit Leave Application Form that will be used for the approval step of the workflow.
- From the K2 Application, right click on the Edit Leave Application Form and select Check Out.
- Right click the Form again and select Edit.
- The Form Designer is opened.
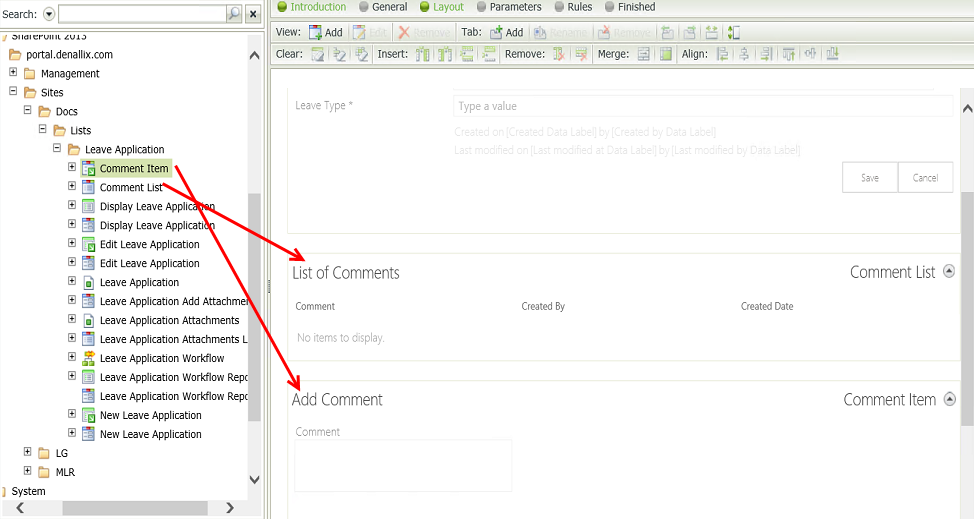
- Drag the Comment List as well as the Comment Item Views from your Leave Application Category to the Form.
- Change the title of the Comments List View to List of Comments and the title of the Comment Item View to Add Comment.
- Click Next and add a Form Parameter of type Number called ProcInstID. This parameter will be used to load the comments associated with the Process Instance as well as saving the new comment entered by the approver.
- Finish the Form. This takes you back to the K2 Application.
The process instance ID of the workflow is required to work with the Workflow Attachment and Workflow Comment SmartObjects, because this is the value that “ties” a Comment or Attachment to a workflow instance. If you wish to use these SmartObjects in your workflow forms, the Process Instance ID needs to be mapped in the methods used to add or retrieve Comments and Attachments. If you are using K2 Application forms, you will need to add the integration with the Comments and Attachments SmartObjects as described below. Comments and attachments SmartObjects can be used in multiple ways to ADD or DISPLAY comments and attachments, the key to the successful use is configuring the Process Instance ID that is always required.
Follow the steps below to design the workflow:
- Click on the workflow created earlier and select Edit.
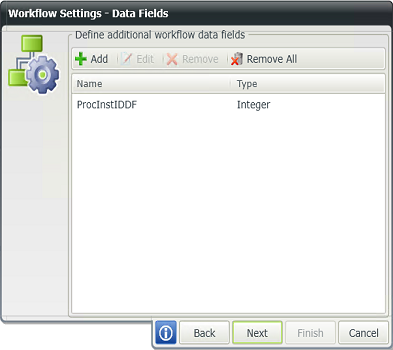
- In the Workflow Start wizard, add an integer type Data Field called ProcInstIDDF to the workflow. This data field will store the Process Instance ID of the new workflow so that it can be used later to load the Comments associated with a workflow for the Approval Forms.
- Finish the wizard.
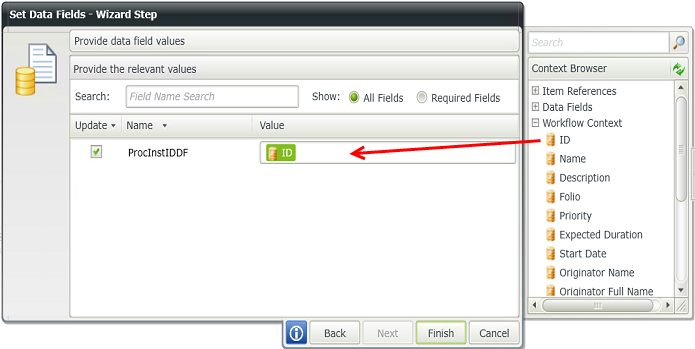
- Replace the Placeholder with a Set Data Fields event to copy the Workflow ID to the ProcInstIDDF data field, as shown below. This is necessary so that we can pass the Process Instance ID into the Form used to approve the leave request.
- Add an Outcome to the Set Data Fields event, then add a User Task to the outcome.
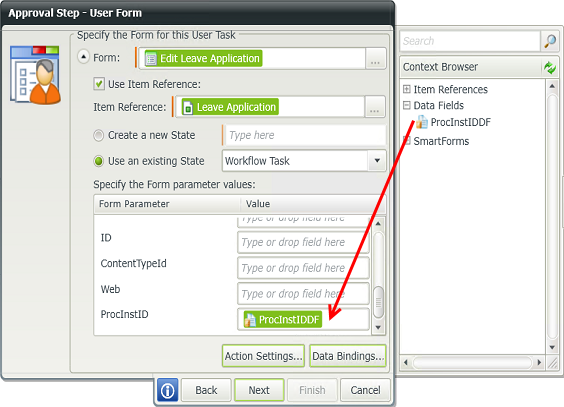
- Provide a name and action then point it to the Edit Leave Application Form that was created with the K2 Application.
- On the Form settings section, drag the ProcInstIDDF workflow data field into the ProcInstID Form parameter, as shown below:
- Finish the wizard.
- Deploy the Workflow so that the workflow integration Actions are added to the Start and Approval Forms.
- Click on Close & Exit to go back to the K2 Application.
Edit the New Leave Application Form. Configure the Start Workflow action, and set up the Output Mappings so that the Workflow ID is passed into the ProcInstId Form Parameter, as shown below.
- Right click the New Leave Application Form and select Edit.
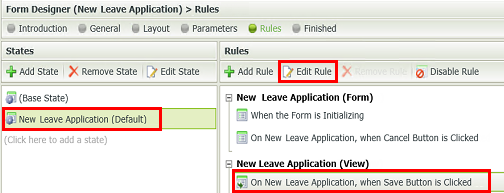
- From the Rules tab, select the New Leave Application state.
- Select the On New Leave Application, When Save Button is Clicked rule and click Edit.
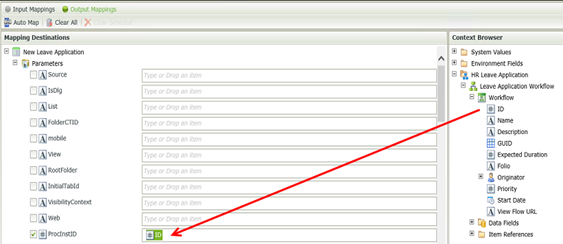
- Click Configure on the Start the workflow action.

- From the Output mappings, drag the workflow ID to the ProcInstID Form Parameter as shown in the image below:
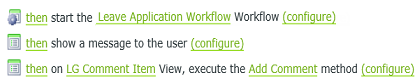
- Add an Action to show a message after the workflow was started. Move the action below the Start a workflow action.

- Click on Configure. Type Workflow Started as the title and New Workflow Instance started as the body. This is just an example, you can use other text.
- Add an Action to execute the Add Comment method for the Workflow Comment Item View. Move the Action below the Show message Action. You may want to include a condition so that the Comment is only saved if the user actually entered a comment.
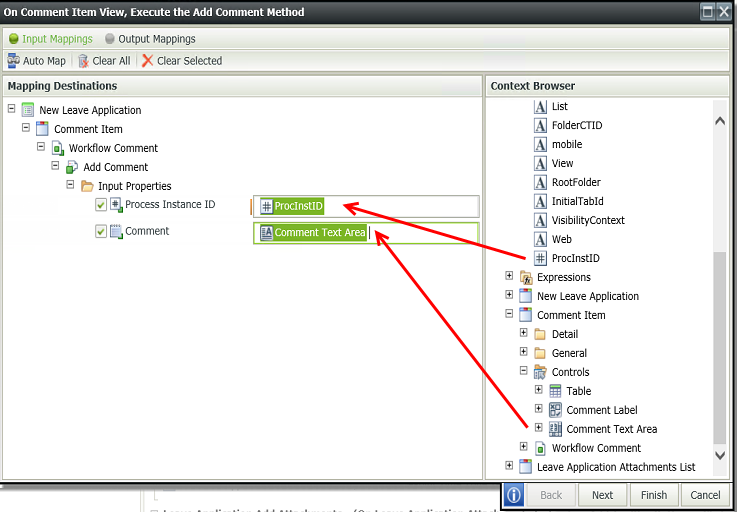
- Configure the Add Comment method so that the ProcInstID Form Parameter is passed into the Process Instance ID Input property, and the Comment Text Area is passed into the Comment input property.
- Finish the New Leave Application Form. You have now added the necessary integration to capture a comment entered by the User when the workflow is started. Next we will add the integration into the Edit Leave Application Form to load the previous comments for the workflow.
- From the K2 Application, right click the Edit Leave Application Form and select Edit
- Navigate to the rules and select the Base state.
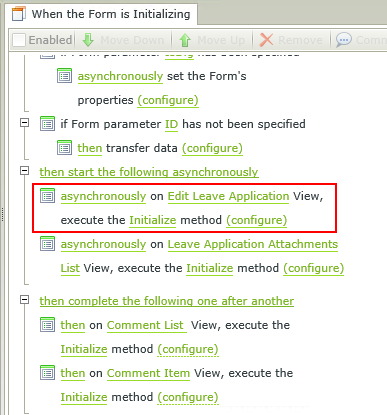
- Edit the When the Form is initializing rule.
- Configure the Edit Leave Application View Initialize method.
- Map the Form parameter as shown below:
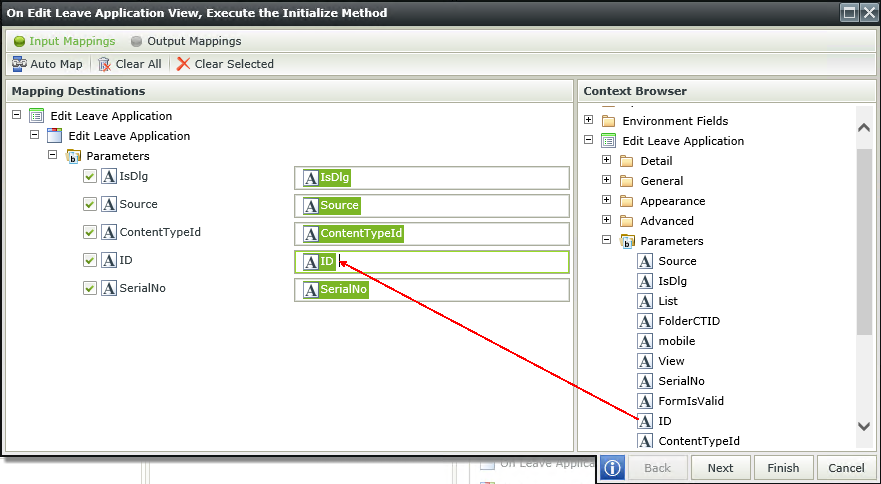
- Finish the rule.
- Select the Workflow Task state.
- Edit the When the Form is initializing rule.
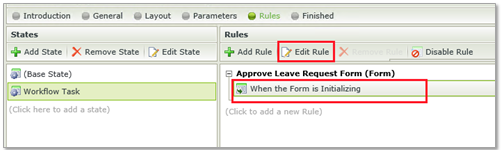
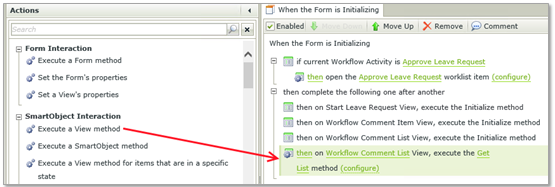
- Add a rule Action to execute the Get List method of the Workflow Comment List View.
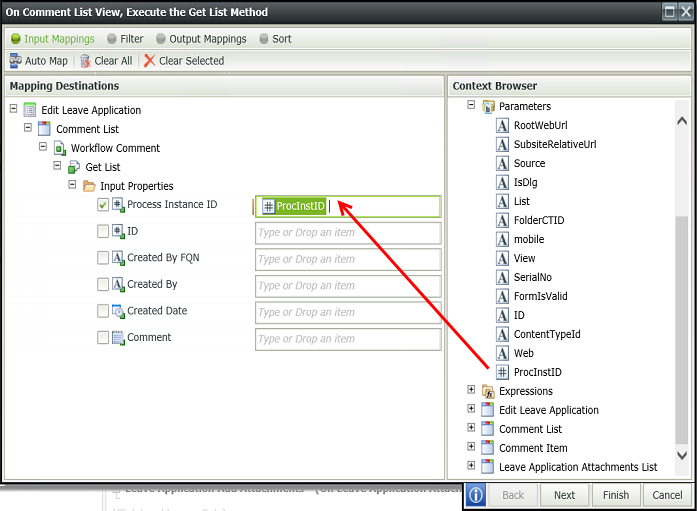
- Configure the Rule so that the ProcInstID Form parameter is passed into the Process Instance ID Input property, as shown below:
- Finish the rule. You have set up the rules that will populate the Edit Leave Application Form with previous comments for the workflow. Next we will set up the rule to save the Comment entered by the approver.
- Add a rule that executes the Add Comment method of the Comment Item View after the Workflow action was submitted. You may want to add a condition so that the comment is only captured if the approver actually added a comment.
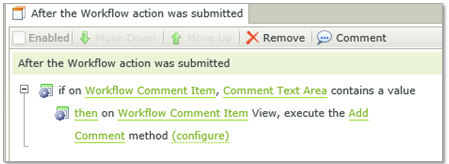
- Configure the Add Comment method so that the ProcInstID Form Parameter is passed into the Process Instance ID Input property, and the Comment Text Area is passed into the Comment input property, as shown below:
- Finish the rule then finish the Form.
- Check in all the Forms and Views from the K2 Application.
- You have now added all the necessary integration to display and capture comments for the Workflow New Leave Application and Edit Leave Application Forms.
You can now test your scenario by running the New Leave Application Form to start a new workflow instance and adding comments. You can also then open the User Task to retrieve comments and add new comments. Follow these steps:
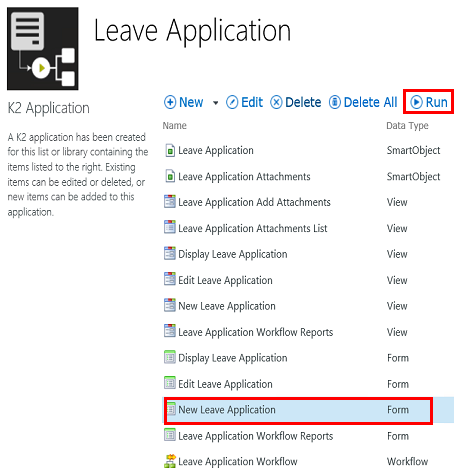
- Click on the New Leave Application Form from the K2 Application and click Run.
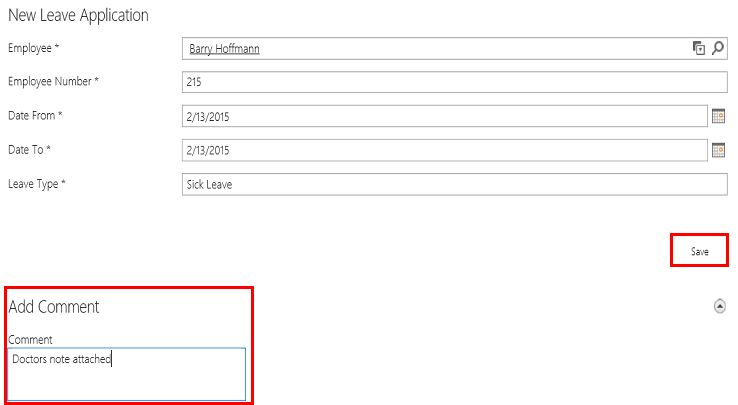
- Add the nessecary information, including a comment and click Save.
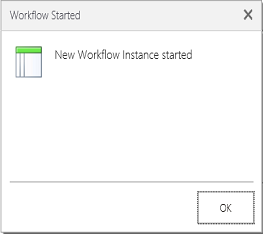
- Note the message showing as it was configured in the Save rule.
- The Form is now successfully submitted.
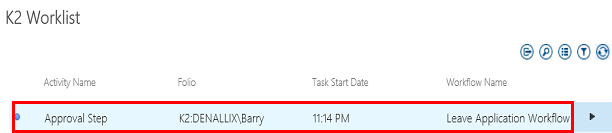
- Open the destination user's worklist from the K2 workflist.
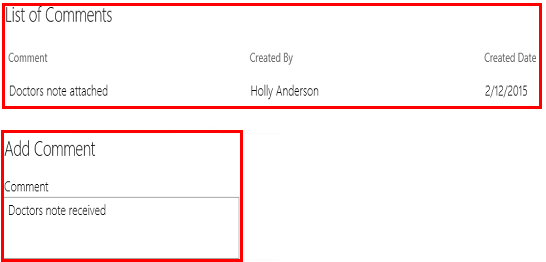
- Note the list of the comments added on the previous step. Add a new comment.
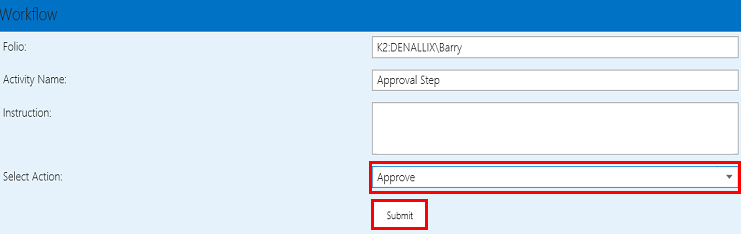
- Select a workflow action and click Submit.
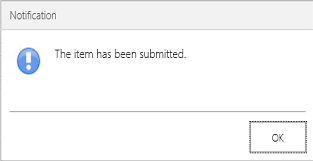
- You will see the following notification:
- These comments can now be viewed in reports. See the Using Reports topic on how to view Comments and Attachments.
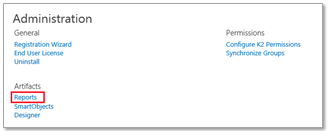
When using K2 for SharePoint you can view the Comments and Attachments linked to a K2 Application workflow using the Report button or Reports link in the K2 for SharePoint administration pages, as shown below.

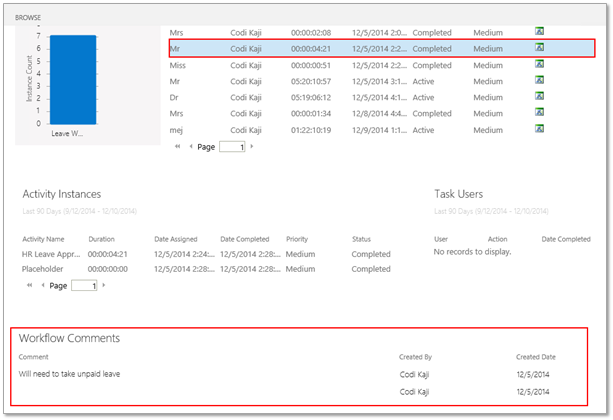
Click on an instance to view the details. Note: If no comment or attachment has been added, the section containing the Workflow comments will not be visible in the report.
For more information on viewing comments and attachments, see the Using Reports topic.