A simple "Hello World" SmartForm - Application Design
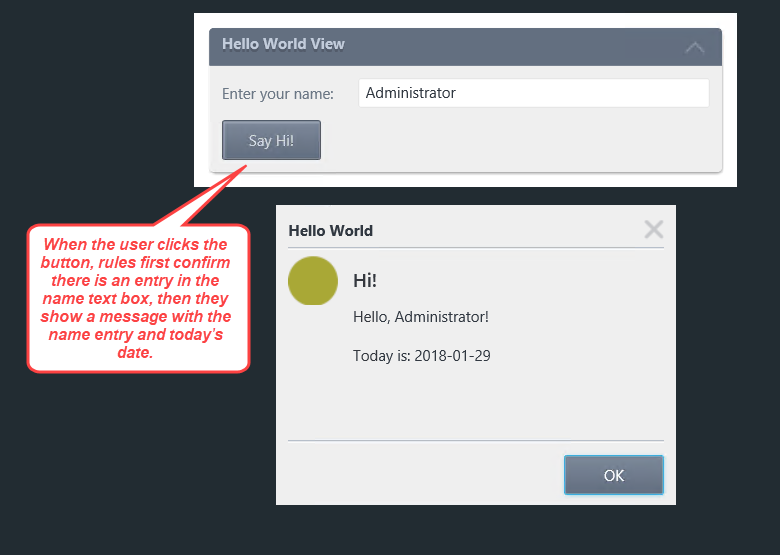
In this tutorial, you will build a simple web page that contains a label, text box and button. You will enter a name into the text box, then click the submit button. After you click the submit button, a conditional check will confirm that you entered a name, then an action will show you a message. The message contains the name you entered, along with the current date.
Behavior of the Hello World form
After building this application, you should understand:
- How to build a view and customize the formatting
- How to add controls to a view
- How to create a form and add a view to the form
- How to configure a rule
SmartForms Concepts: Forms, Views, Controls, Rules
What is the difference between a form and a view? What is a control? What is a rule?
Forms
A form is a web page that contains views and controls used to capture user input. You access the form via a URL, or web address. Often, forms have rules that control the interactivity of the user input. Rules control the functionality of the form as well. Rules often start a workflow after you submit the form.
Views
Views are re-usable collections of controls and rules. Views are often associated with a SmartObject as the data source for the view. For example, you may have a view that contains employee details(Name, Department, Email, etc.). The data for this view comes from a SmartObject which retrieves the content from an employee account system, for example, Activity Directory. After you create the employee details view, the view can be re-used in multiple forms. In this way, you have an employee details view that remains consistent across all forms. If you update the view, your changes reflect across all forms as well.
There are two types of views: item views and list views. Item views contain the content from a single record. List views contain the content from multiple records and are often displayed as rows of content.
Controls
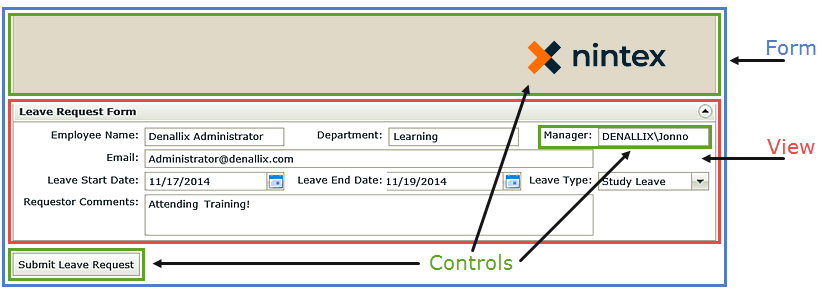
Controls are components like buttons, text boxes, drop-down lists and images. Controls provide the interactivity for the user experience. Both views and forms can contain controls. You can bind controls to SmartObjects. For example, a drop-down list control might be bound to a Regions SmartObject. When the form loads, the drop-down list retrieves the regions without user input. Another example is binding the control to a SmartObject to save the control content as a SmartObject record. In this example, when you submit the form, a SmartObject record is created using the control content. Controls can have rules applied to them to adjust their behavior and functionality based on the intended use.
(The image below is not the view and form you will build in this tutorial. It is for demonstration purposes only to point out the elements.)
Understanding forms, views and controls
Rules
Most user interfaces require some kind of programming or processing. For example, saving updates made to a record into a database when the user clicks the “Save” button, or starting a Workflow when the user “submits” a Form. SmartForms use Rules to perform these “programming” actions. (We use “programming” in quotes because there is actually no coding required when implementing the processing tasks. Instead, the Form designer will use graphical, wizard-based configuration tools to assemble the programming logic.)
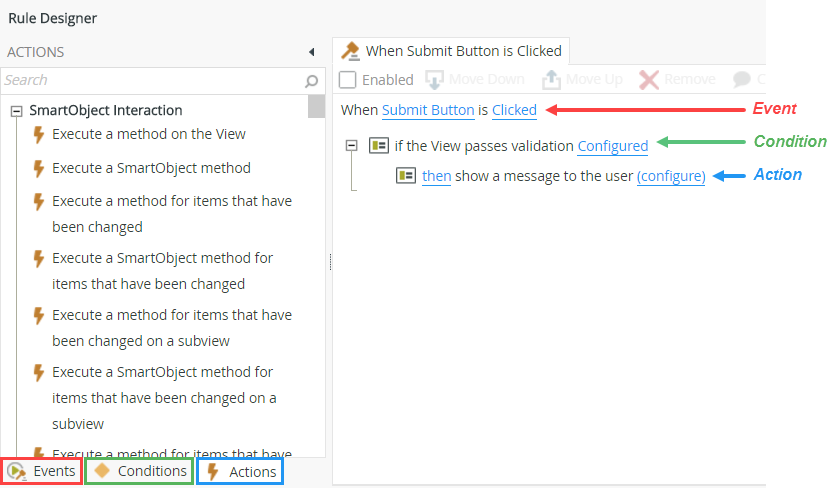
Rules consist of events, conditions and actions.
- Events define when the rule should run, such as when a button is clicked, or when the form loads. (Events are optional, you can define "event-less" rules that you can call from other rules.)
- Conditions define whether the rule should run. If the criteria are true, continue the rule, and if the criteria are not met, stop the rule. For example, a condition might evaluate a form to confirm that required fields have content. (Conditions are optional.)
- Actions define what the rule should do. For example, start a workflow, or enable a form field. Rules can contain multiple actions that are run in sequence or in parallel.