18. Add an End Step to Complete the Workflow
Now you will add an End step to the design canvas. End steps provide a visual indication of where the key outcomes end in the workflow structure. (You can also configure End steps to terminate all other active paths of the workflow when the end step is reached). In this case, you are using the End step as a visual indication of the workflow's structure and conclusion point. You do not have to have an end step in your workflow, but it does help to describe the flow of the workflow.
-
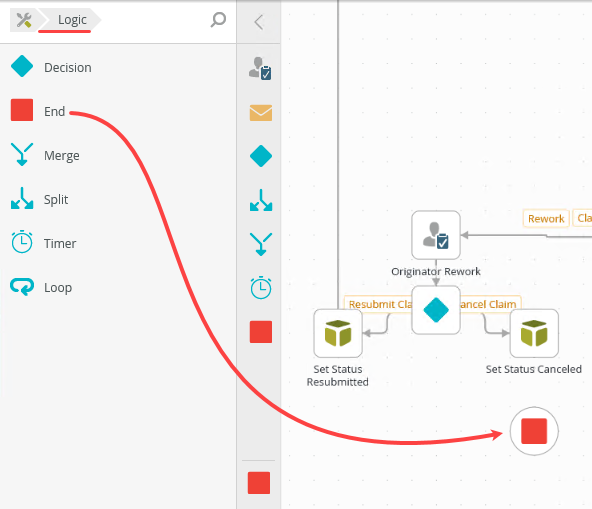
From the Toolbox > Logic menu, add an End step, then connect it to the Set Status Canceled, Set Status Rejected, and Set Status Finance Processed steps.
- Expand the Toolbox > Logic menu. Drag an End step onto the design canvas.

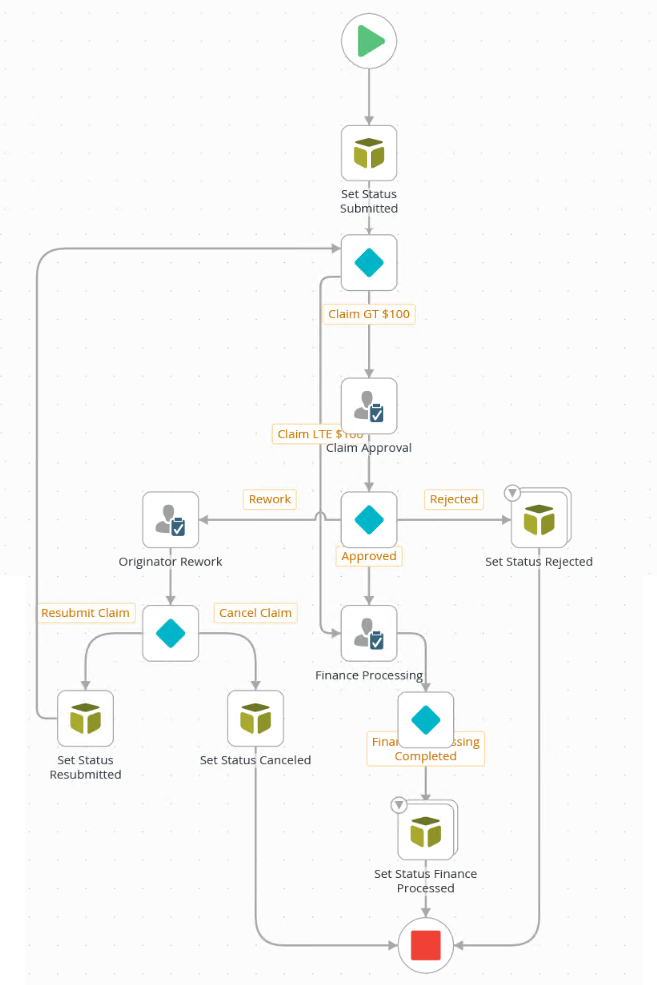
- Connect the Set Status Canceled, Set Status Rejected, and Set Status Finance Processed steps to the End step.
Your workflow should look similar to the image below at this point.

- Expand the Toolbox > Logic menu. Drag an End step onto the design canvas.
Review
In this step, you added End steps to complete the visual presentation of your workflow structure. End steps provide a clear ending to key outcomes. If time allows, expand the Configuration Panel for an End step. Review the options available for using them. In the next step, you will deploy your workflow to the K2 server, then assign workflow rights.