Outcomes
Workflow step outcomes allows for another step to be added to the workflow. Outcomes are automatically generated when Actions
This topic will explain how to:
Editing auto generated outcomes allows the option to add more outcomes, edit outcomes, remove or move outcomes up and down.
Add Outcomes
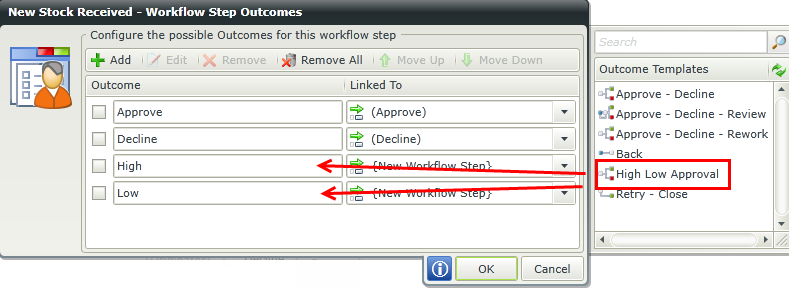
Use this option to add a new outcome either by clicking the Add button or dragging an Outcome Template from the available templates on the right. The outcome is by default linked to a new workflow step but can be changed to link to an existing workflow step using the drop down provided. Follow these steps to add outcomes:
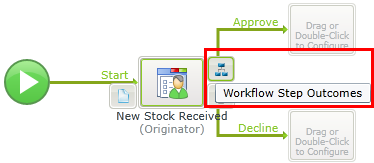
- Hover over the workflow step and click the Workflow Step Outcomes icon.
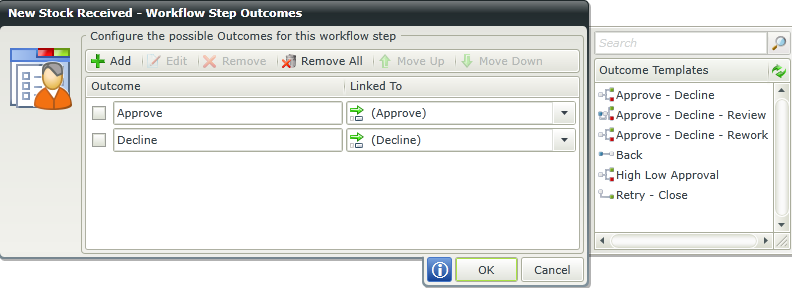
- The Workflow Step Outcomes window will open.
- Click the Add button to add a single outcome or drag a template from the Outcome Templates to the right.
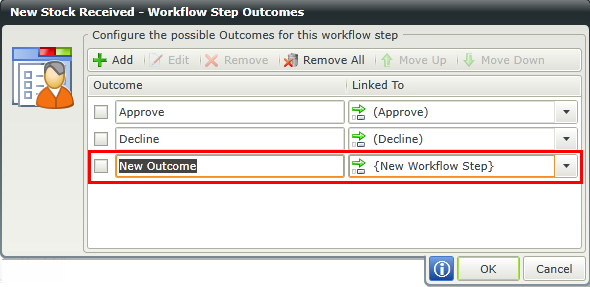
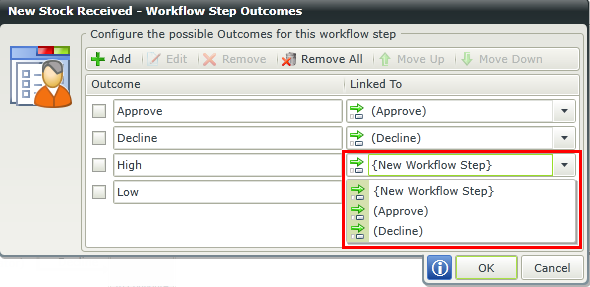
- New outcomes are linked to a new workflow step by default. Use the drop down provided if you want to link the outcome to an existing workflow step.
- Select an outcome using the check box and click Edit if you want to add Action Statements or Context Statements.
- Click OK if no further configuration is required.
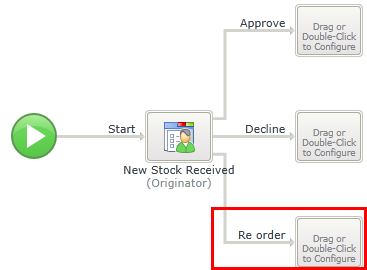
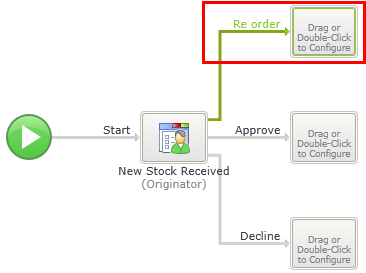
- The new outcome will now display on the design canvas.

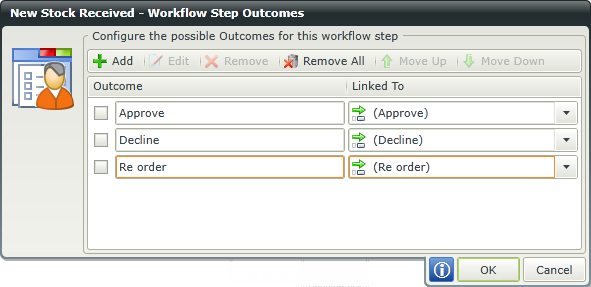
When using the Add button, a new outcome will be added below the auto generated outcomes for user tasks or just add a new outcome for server tasks. Type a name for the new outcome.
When using an Outcome Template, the outcomes that makes up the template will be added below the auto generated outcomes for user tasks or just add a new outcome for server tasks.
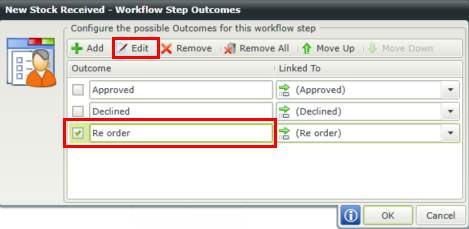
Edit Outcomes
Editing outcomes allows you to change outcome names, remove outcomes, change the outcome order, configure Action Statements and Context Statements or change the workflow step it is linked to. Follow these steps to edit outcomes:
- Hover over the workflow step you want to edit the outcomes for and click the Workflow Step Outcomes icon.
- The Workflow Step Outcomes window will open.
- To change an outcome name, simply type a new value for the names of the outcomes you want to change.
- To change the workflow step an outcome is linked to, use the drop downs provided next to each outcome and select the workflow step you want to link this outcome to.
- See the Remove section to remove outcomes.
- See the Move Outcomes Up and Down section for changing the outcome order.
- To configure Action or Context statements, select the outcome you want to configure these statements for using the check box and click Edit. See Configure Action and Context Statements for more information on how to configure them.
- Click OK after all changes are completed.
Remove Outcomes
You can either remove a single outcome, a selection of outcomes or all outcomes. Follow these steps to remove outcomes:
- Hover over the workflow step you want to remove the outcomes for and click the Workflow Step Outcomes icon.
- The Workflow Step Outcomes window will open.
- Select one or more than one outcomes using the check boxes and click the Remove button to remove a selection of outcomes.
- Click the Remove All button without making a selection if you want to remove all the outcomes.
- Click OK.
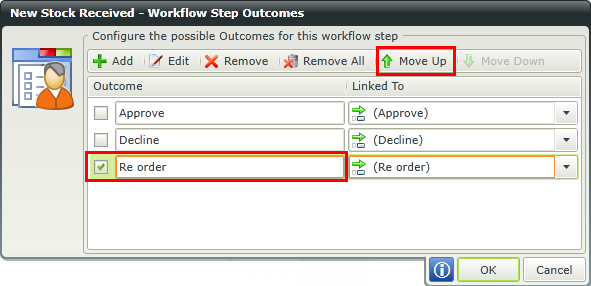
Move Outcomes up and down
Moving outcomes up and down only changes the display order on the design canvas. Follow these steps to change the order of outcomes:
- Hover over the workflow step you want to change the outcome order for and click the Workflow Step Outcomes icon.
- The Workflow Step Outcomes window will open.
- Select the outcome you want to move up or down using the check box in front of the outcome name and click either the Move Up or Move Down button. In this example the Move Up button will be used.
- Click OK.
- Note that the order of the outcomes has now changed on the design canvas.
Action statements are used to specify the number of participants that need to select an action before the workflow can continue to the next step. Context Statements are used to add additional business logic to an outcome rule. Follow these steps to configure Action or Context Statements:
- Hover over the workflow step and click the Workflow Step Outcomes icon.
- The Workflow Step Outcomes window will open.
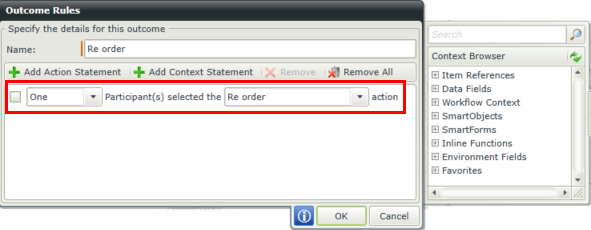
- Select the outcome you want to configure Statements for using the check box provided. Click Edit.
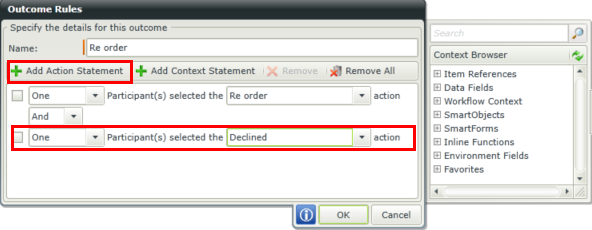
- Note that a default Action Statement exists requiring one participant to select the action in order for the workflow to continue to the next step. You can either remove this statement or edit the statement to your requirements using the drop down options. The first drop down is to select the number of participants that will be required to select an action. The second drop down is to select the actual action that the specified number of participants need to select before the workflow can continue.
- To add another statement, click the Add Action Statement button. Use the drop downs on the added statement to select the number of participants and the action for this statement. Use the drop down between the two statements to determine how these statements should run. The options are:
- And: Using this option will mean that both statements must be true for the workflow to continue.
- Or: Using this option will mean that one of the statements must be true for the workflow to continue.
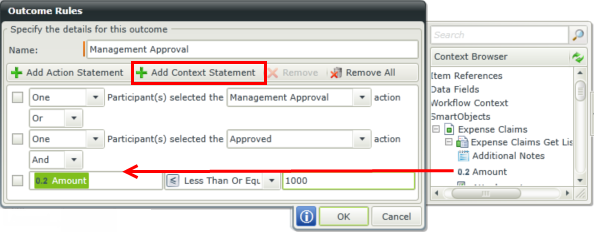
- Click the Add Context Statement button if you want to add more logic to the outcome rule. Fields can be dragged from the Context Browser for the Context Statement values as seen in the image below. These fields can be a pre-configured Data Field or a SmartObject Get List method property.
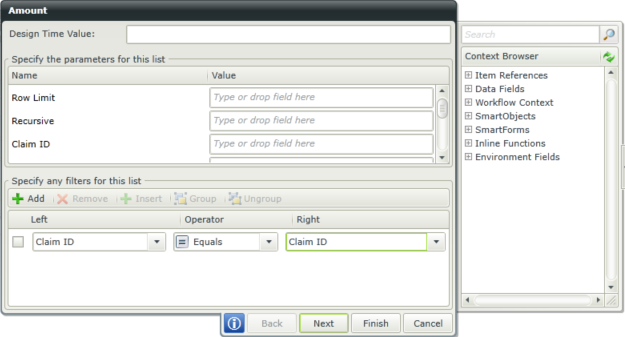
- When using SmartObject method properties, you can specify filters to return specific data.
- Click Next.
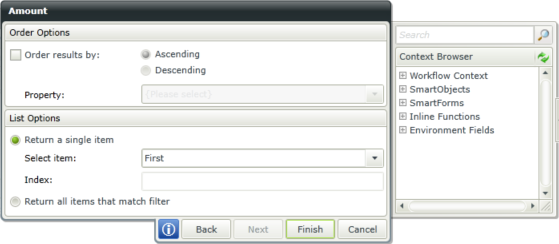
- Specify the return options for the SmartObject property selected.
- Click Finish.
- Click OK.
- Click OK on the Workflow Step Outcomes window to complete the configuration.
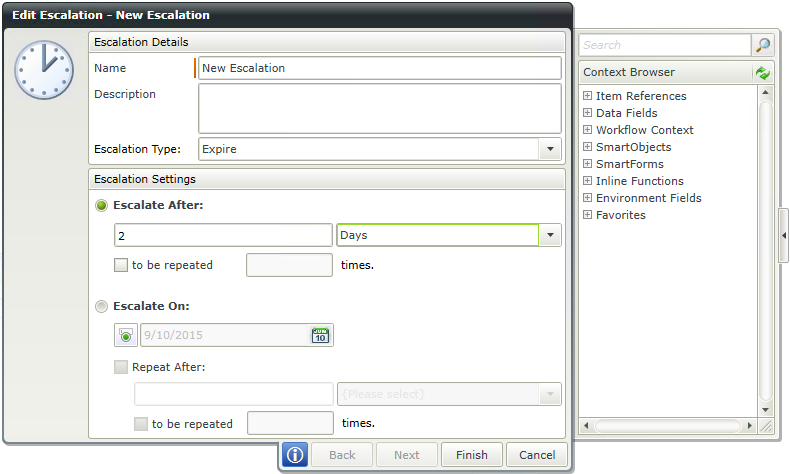
The None Action Statement can be used, for example, in an Outcome rule where an Escalation is created to expire the activity after a certain period. For the escalation the workflow may branch down a different path other than the configured actions (in this example, Approve and Decline) , and that escalation path would only be taken if no one has actioned the item yet. Below is the configuration of this example.
The Escalation expires the activity after 2 days.
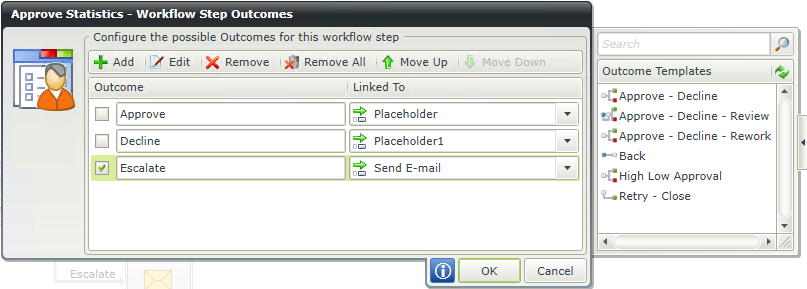
An additional Outcome is created to send an E-mail once the activity expires and the Escalate Outcome rule condition is met.
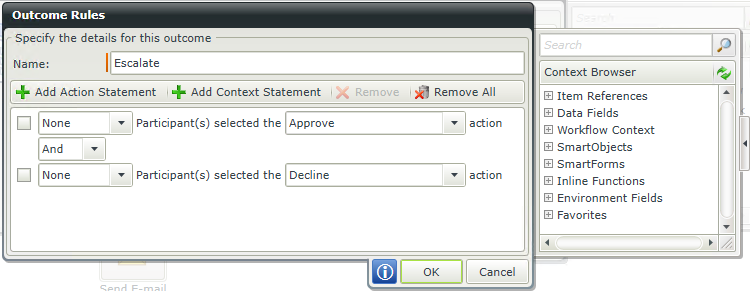
The Escalate Outcome rule contains the Action Statements where no one has Approved and no one has Declined the action.
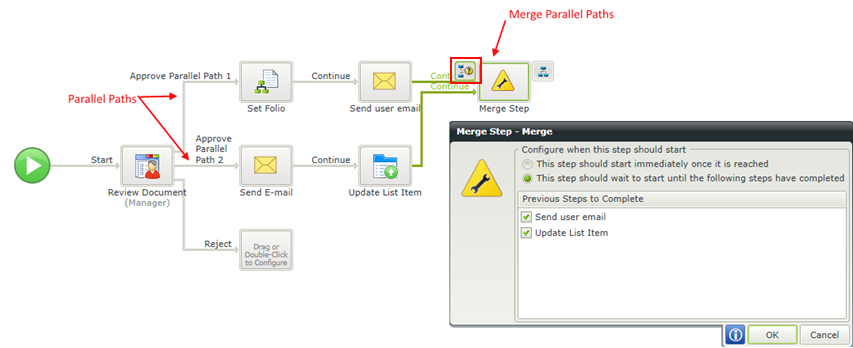
If multiple outcomes for a step all evaluate to true, the workflow will follow each outcome that was true and split into parallel paths. In the workflow shown below, Approve Parallel Path 1 and Approve Parallel Path 2 have the exact same outcome configuration. If the request is approved, the workflow will split into two parallel paths and execute the Set Folio and Send Email steps concurrently.
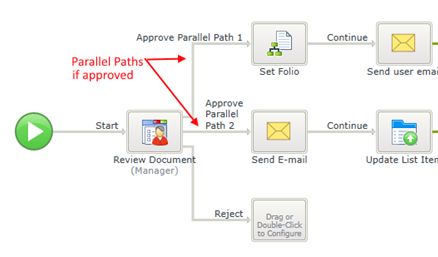
You can split and merge parallel workflow paths by using the merge property for a subsequent step of the workflow and configuring it to wait for the appropriate steps of the workflow to complete, as shown below