How To: Configure cascading drop-down list controls
This topic explains how to configure a Drop-Down List control that uses the value selected in another control to filter the results displayed in the drop-down list. This is often called 'cascading drop-down lists', where the value selected in one drop-down list will filter the values displayed in another drop-down list.
For example, suppose you have three SmartObjects representing cities, counties and states. You can use the cascading drop-down list approach to filter the data in the cities drop-down list based on the chosen county, which in turn is filtered based on the selected state. (For this scenario, you use properties in SmartObjects to configure filtering in the data source, rather than associations between SmartObjects. For examples on using associations between SmartObjects see the topics Create views to capture data for associated SmartObjects and Configure the Picker control to use another control's data to filter the results.)
Cascading Drop-Down List controls

Scenario
Your organization has a form where a user selects a State, County and City. The form will filter the list of Counties based on the selected State, and the list of Cities based on the selected County.
Steps
In this scenario you build the following:
- Three SmartObjects to store information for states, counties and cities.
- An editable list view to enter data for each SmartObject.
- A view with three Drop-Down List controls configured to show cascading data.
You use views to create records for the cities, counties and states in SmartObjects. The State SmartObject is parent to the County SmartObject, which is parent to the City SmartObject. Each child SmartObject has a property that references a unique identifier in its parent SmartObject and you use this field to configure the filter for the data that is displayed in the control.
Setup Steps
The following steps set up the scenario from start to finish. If you want to skip the setup steps and view the topic step, go to Configure the cascading Drop-Down List controls.
- From
K2 Designer, create the
SmartObjects listed below. Use the tables as a guide for adding properties.
State
This is the SmartObject that stores state information.Property Data Type Key Required Unique ID Autonumber Yes No Yes State Text No No
No
County
This is the SmartObject that stores county information.
You use the StateID field to reference the unique ID of the State SmartObject.Property Data Type Key Required Unique ID Autonumber Yes No Yes County Text No No
No
StateID Number No No No
City
This is the SmartObject that stores city information.
You use the CountyID field to reference the unique ID of the County SmartObject.Property Data Type Key Required Unique ID Autonumber Yes No Yes City Text No No
No
CountyID Number No
No
No
If you are not familiar with creating a SmartBox SmartObject, see How To: Create A SmartBox SmartObject. -
In this step, you generate
Edible List Views for the
State,
County and
City SmartObjects. After you generate the views, use them to add records to the SmartObjects.
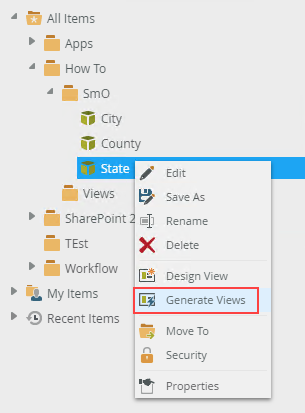
- Right-click the
State SmartObject and select
Generate Views.
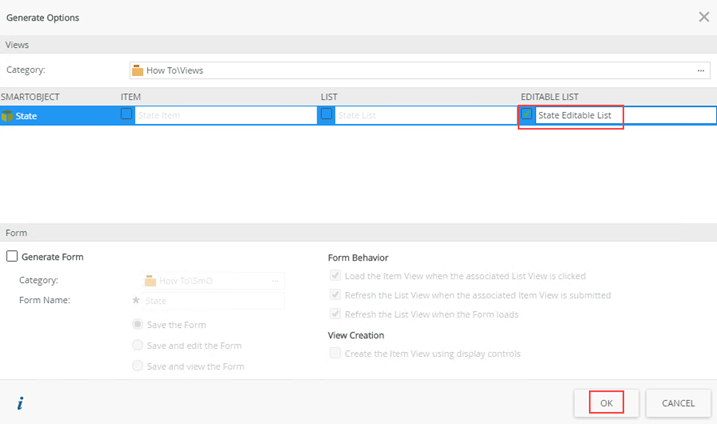
- Check the box below
Editable List to create the
State Editable List view. Click
OK.
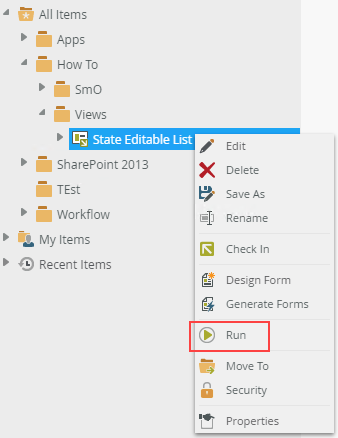
- Run the view by right-clicking it and selecting
Run.
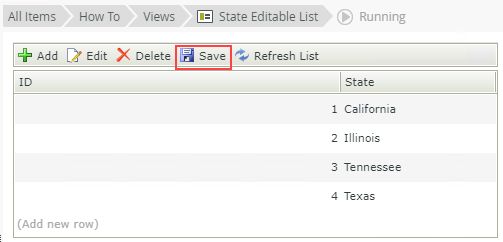
- Enter records using the image below as guidance. Click
Add and type a value in the
State field. The
ID field is automatically populated. Click
Add again to add more items. Click
Save when you are done.
- Enter records for the
County and
City SmartObjects like you did for the
State SmartObject. Use the images below as guidance. Be sure to enter the correct
State ID for each
County, and
County ID for each
City. The city of Burbank is in Cook county in the state of Illinois. Cook county has an automatically generated ID of 5 so you must enter 5 as Burbank's County ID, and because Cook county is in Illinois, you must enter 2 as the State ID for Cook because Illinois' ID is 2.
County editable list view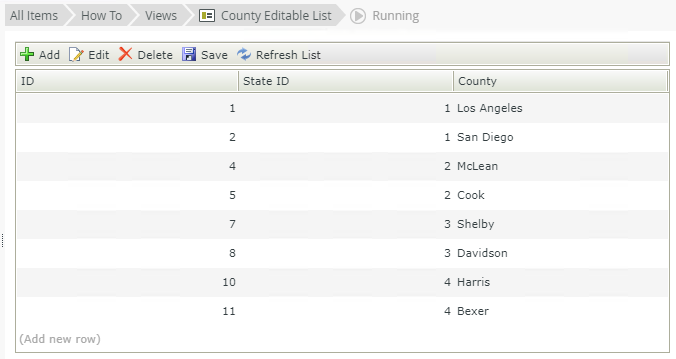
City editable list view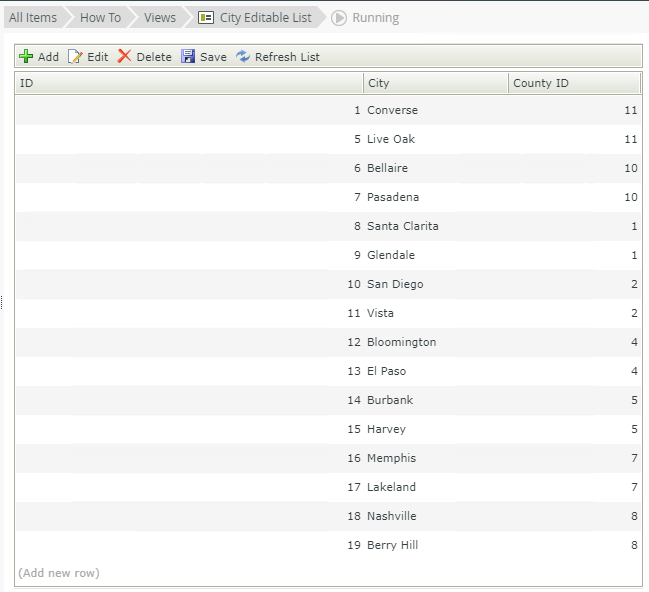
- Right-click the
State SmartObject and select
Generate Views.
Configure the cascading Drop-Down List controls
In this step you design a view with Drop-Down List controls for each of the State, County and City SmartObjects. Then you configure the County and City controls to show data based on the State and County control values, respectively.
- In this step you design an
Item View and add
Drop-Down List controls to it. Then you configure the controls to filter data.
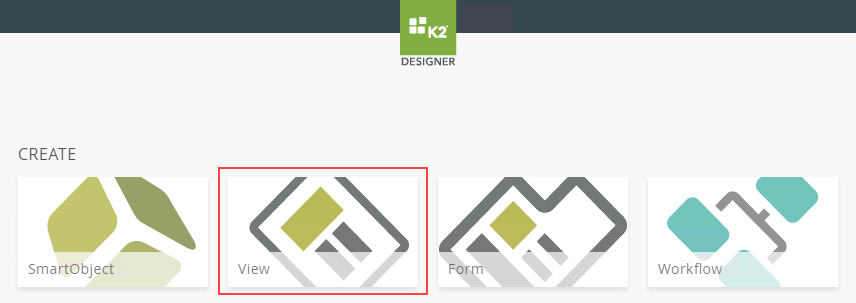
- In the K2 Designer, click on
View on the Create page to create a new view.
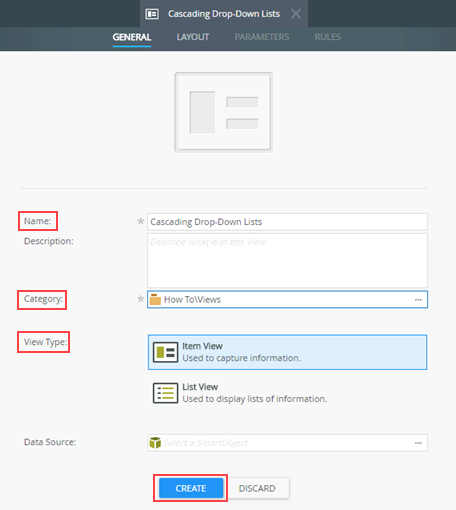
- Enter the name
Cascading Drop-Down Lists and choose a Category to store the view. Then select the
Item View View Type and click
Create
.
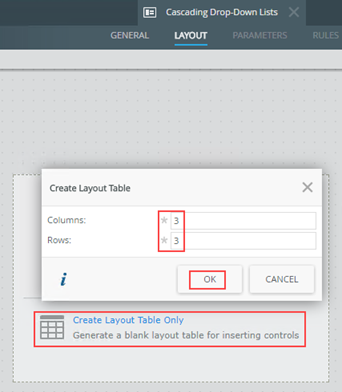
- On the Layout tab, select
Create Layout Table Only and specify
3 columns and rows. Click
OK.
- From the
Toolbox, drag a
Drop-Down List control onto the canvas for each column. In the Detail section of the Properties tab, rename them
Drop-Down State,
Drop-Down County and,
Drop-Down City.
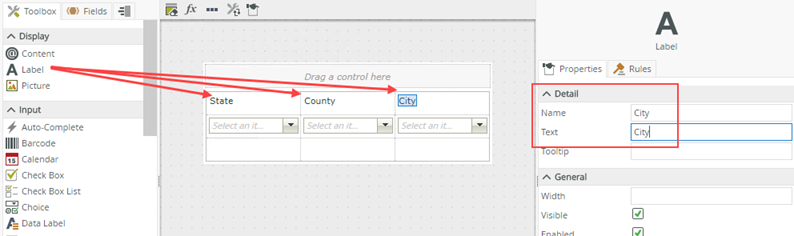
- Add labels for each column. Drag a
Label control from the Toolbox into each column and change the
Name and
Text properties for each appropriately.
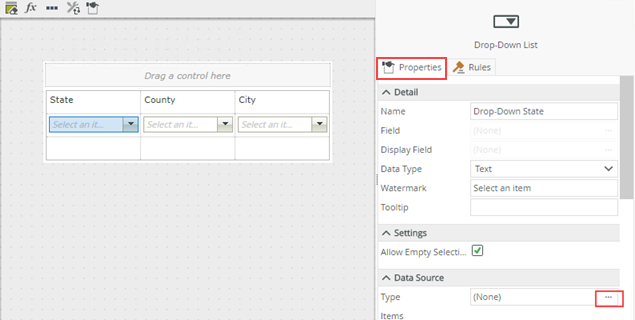
- Add a data source to each control. To do this, select a control and click the
Type ellipsis under the
Data Source section of the
Properties tab.
For information on the Data Source see the topic Drop-Down List control.
For the State Drop-Down List control, configure the data source as follows, then click OK: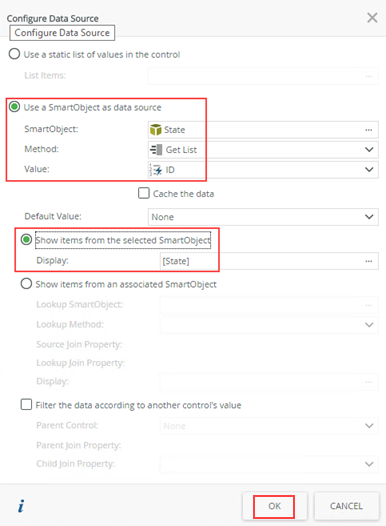
For the County Drop-Down List control, configure the data source, with a filter based on the State Drop-Down List. In the filter configuration, select the control that determines what data the current control should list. For the County Drop-Down List control, the parent is the State Drop-Down List control. The join property determines which records are available, by only showing records in the County SmartObject where the StateID equals the record ID in the State SmartObject. Click OK to continue.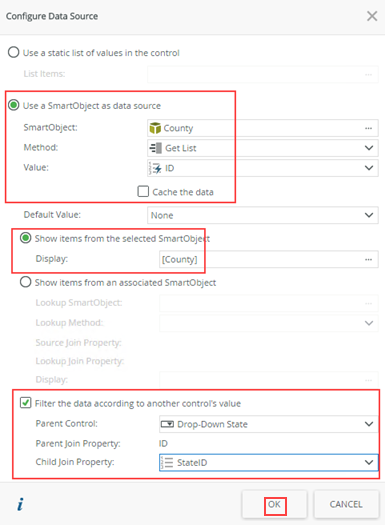
For the City Drop-Down List control, configure the data source with a filter based on the County Drop-Down List as follows, then click OK: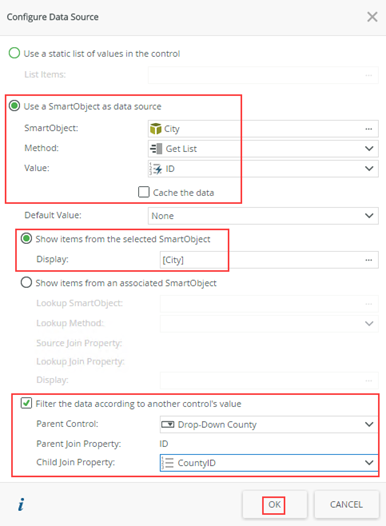
Configuring the Filter in this way means that the City Drop-Down List only shows cities in the county selected in the Counties Drop-Down List, and the counties shown depend on what state you select in the State Drop-Down List.
- In the K2 Designer, click on
View on the Create page to create a new view.
- Test the
Cascading Drop-Down Lists to see the available choices change depending on your selection.
- Right-click the
Cascading Drop-Down Lists view and select
Run.

- Choose a state from the drop-down and see how the selections in the County and City drop-downs change depending on your selections.
- Right-click the
Cascading Drop-Down Lists view and select
Run.
Review
Use the filter option when configuring a data source for a drop-down list control to limit the data shown in the control based on a selection in another control.