Form States
Form states are typically used when different tasks in a workflow use the same form for different events. Each form state has its own rules but all states inherit rules from the base state. Example: A form may have a state called Submit Registration, and for that state some view controls are hidden. The same form may have another state called Register Student where all controls are active and the submit button is hidden. Generally speaking, a new state is created for each workflow task because you potentially have different requirements depending on the tasks that use the same form. The two most common methods for creating states are from the form's rules page and from Task / Form configuration in the workflow designer.
- See How To: Using Form States for an example of using custom form states in a Start step and Tasks of a workflow.
- See How To: Add and View Workflow Attachments for an example of using form states to perform different actions in a workflow.
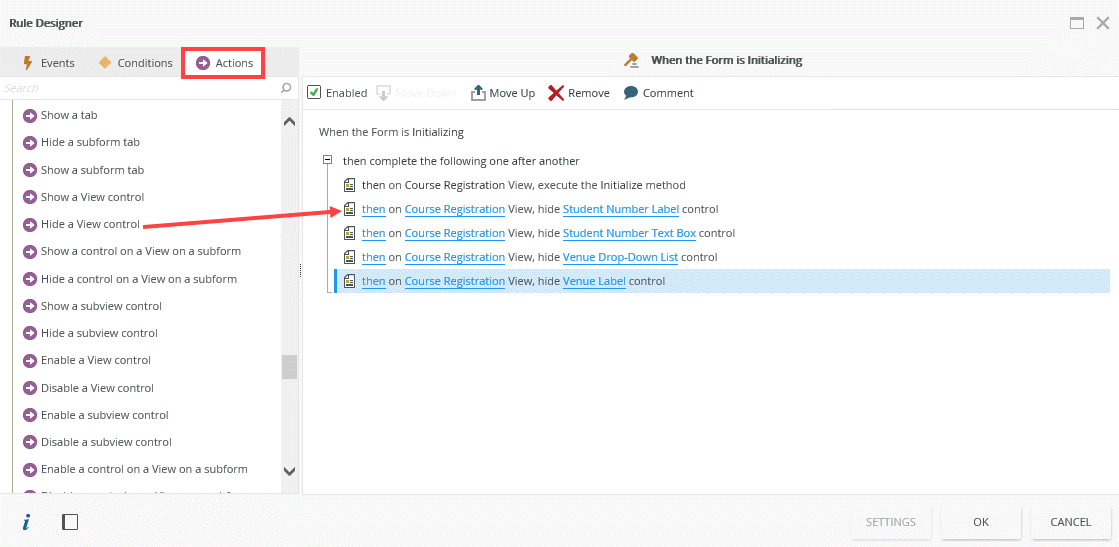
Submit Registration state with When the Form is Initializing rule:

When the Form is Initializing rule containing actions to hide the Student Number and Venue controls:
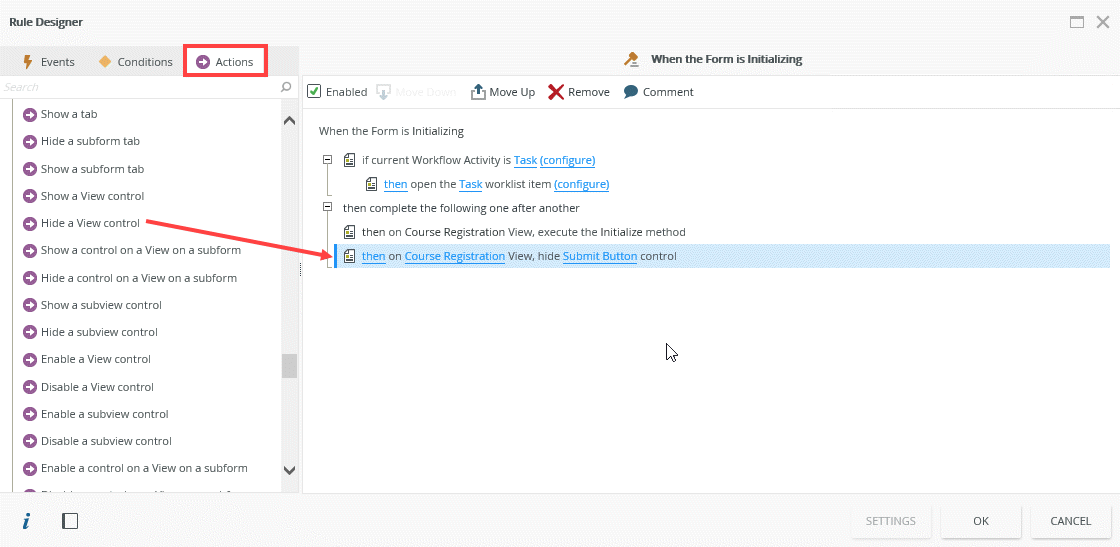
Register Student state with When the Form is Initializing rule:

When the Form is Initializing rule containing an action to hide the Submit Button control:
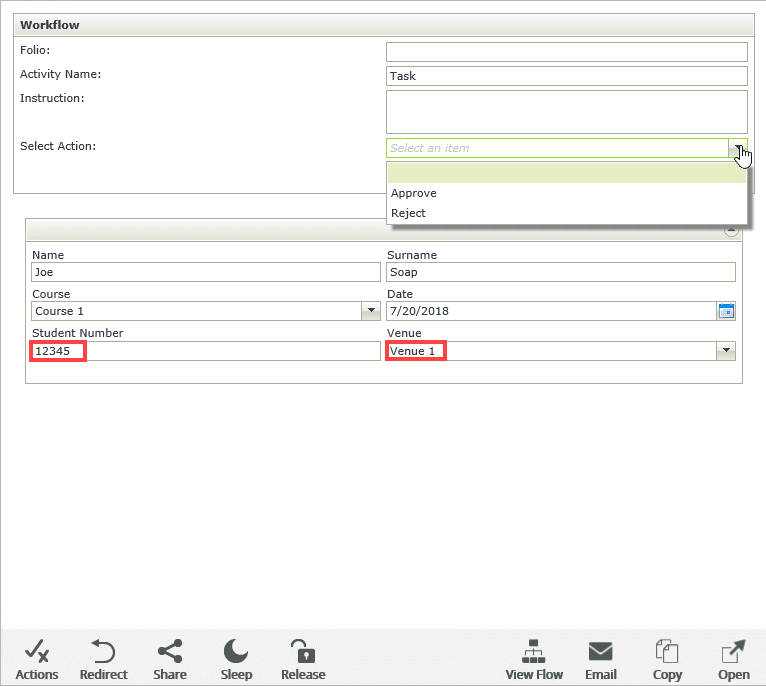
Form shows Submit button and hides Student Number and Venue fields:

Form hides Submit button and shows Student Number and Venue fields:
When you integrate a form with a workflow and select the option Create a new State, the When the Workflow View is being submitted rule is automatically inserted into your form as part of the workflow integration to make sure the worklist item is actioned when certain conditions are met.

When you open the configuration of the then action the worklist item rule action, the activity name, serial number and action are mapped to the work item to make sure the correct workflow task is actioned. You can also use these system values in expressions and conditional formatting.

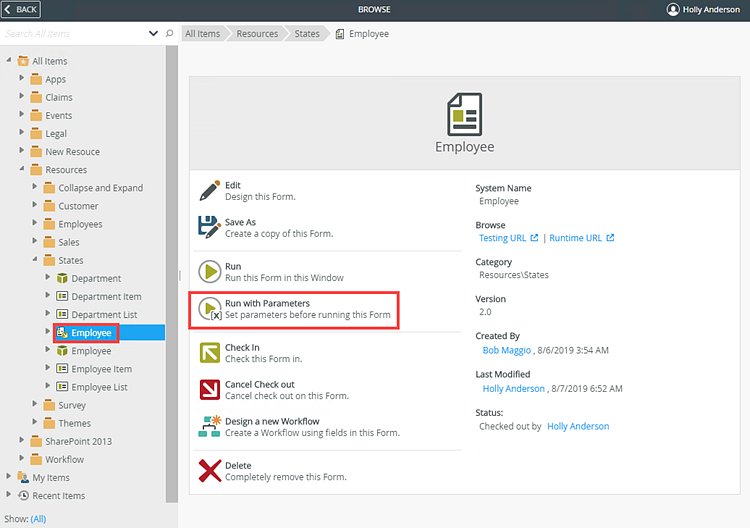
The Run with Parameters option allows you to test your form with different states. You can test the rules you create for each state of your form without running the solution or starting a workflow. Use this feature to see if your form renders correctly for each state (but bear in mind that different states of the form might require additional data, such as values from a workflow, that may not be available when testing that state of the form).
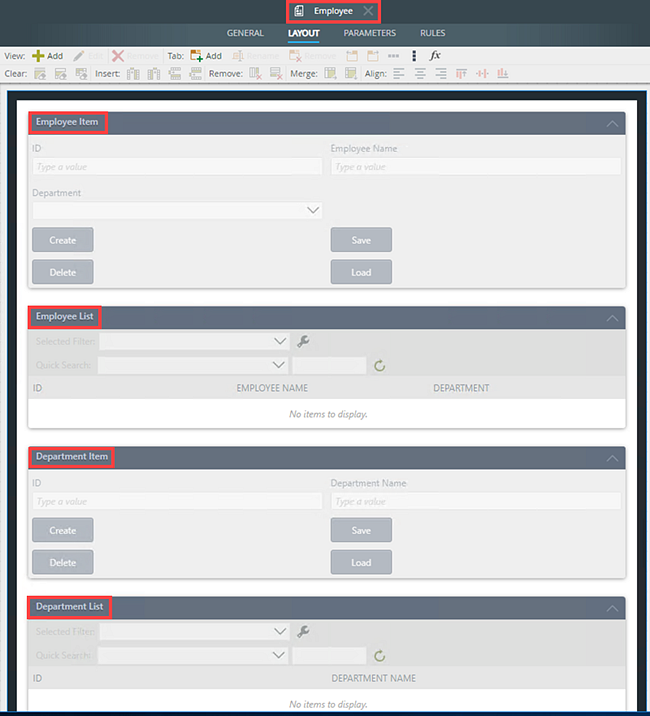
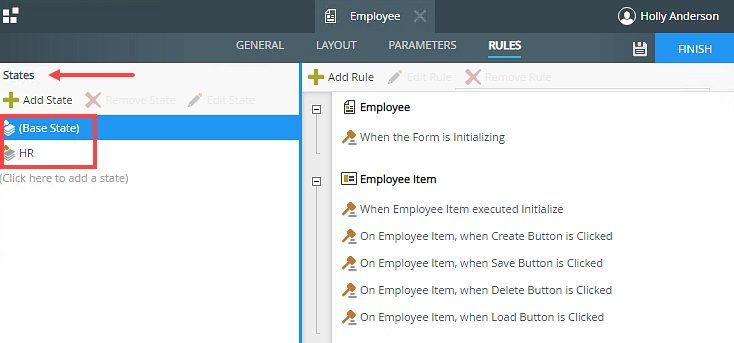
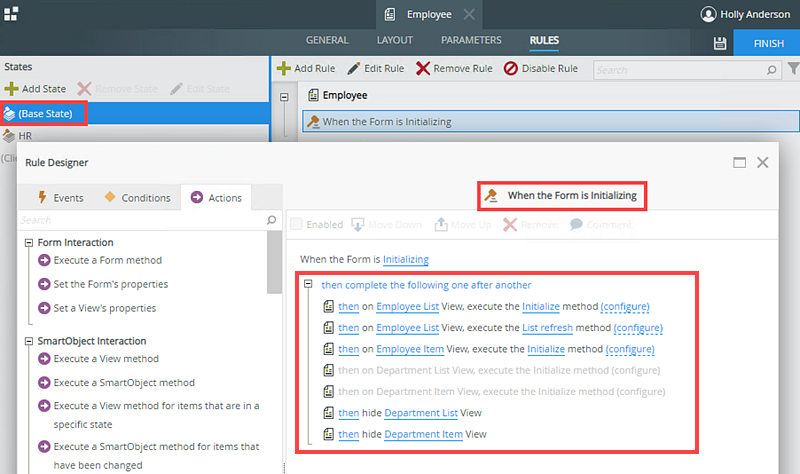
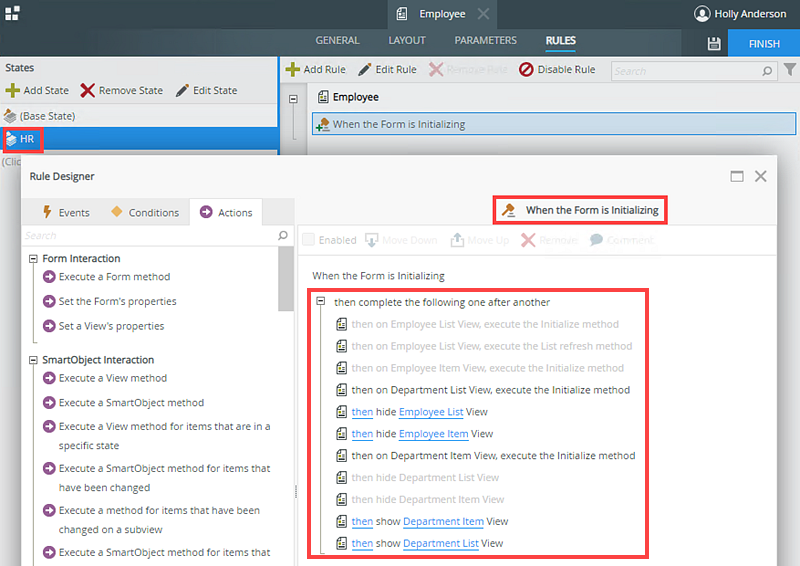
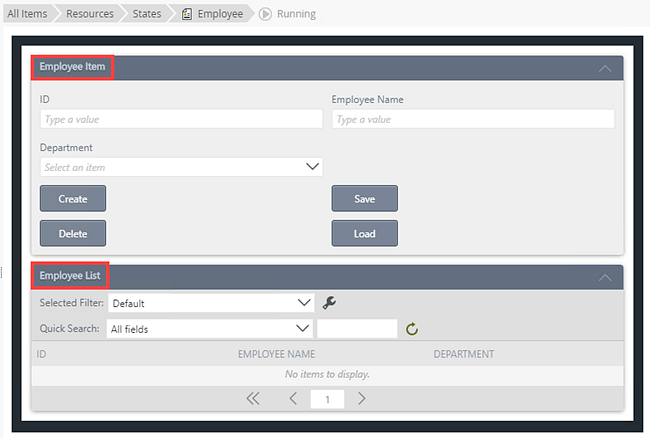
In this example, you use a form called Employee containing four different views; Employee Item, Employee List, Department Item and Department List. You use form states for different tasks in the workflow. Each state shows different views when the form opens (Initializing). The Base State shows the Employee Item and Employee List views and the HR state shows the Department Item and Department List views. Each state has its own rules. The images below show the form and rule configuration for the different states.
Employee form at design time showing four different views:
Employee form at design time showing two form states:
Rule Designer at design time showing Base State rule configuration:
Rule Designer at design time showing HR state rule configuration:
To test or troubleshoot the states, select the Employee form and click Run with Parameters.
The Run with Parameters page opens in K2 Designer.
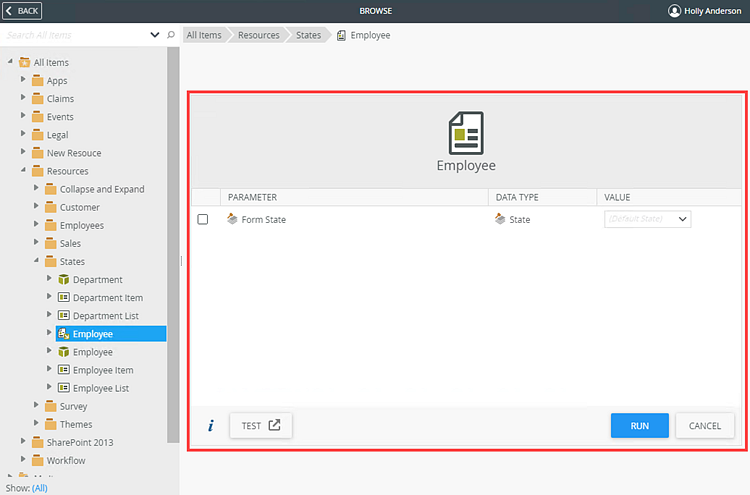
The following table describes the available options:
| Option | Description |
|---|---|
| Parameter |
Lists the available parameters defined for the form. |
| Data Type |
Lists the type of parameter. |
| Value |
Select a state from the menu. |
| Test | Opens form in a new browser tab in the runtime site, using the selected state parameter. |
| Run | Opens the form inside the K2 Designer using the selected state parameter. |
| Cancel | Close the Run with Parameters page. |
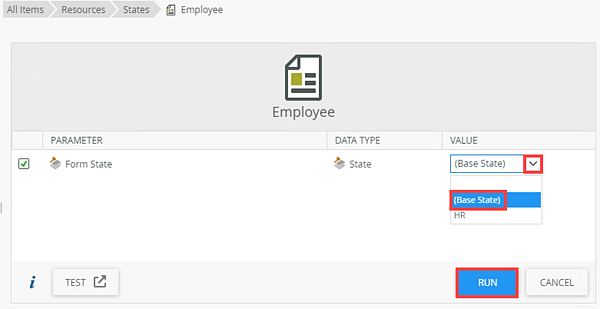
From the Value menu select (Base State) and click Run to test the form inside the K2 Designer.
The Employee form shows the configured views for the Base State (Employee Item and Employee List views).
To see the form in the HR state, select the Employee form > Run with Parameters and HR from the Value menu then click Run.

The Employee form shows the configured views for the HR state (Department Item and Department List views).

Manually adding the State parameter to a URL
You can also add the State query string parameter to the URL of your Employee form in the format : ?_state=[value]where the value is the state's name.
You can use links on the form's properties panel to browse to the form:
- Testing URL - opens the form in designer mode such as https://[domain]/Designer/Runtime/Form/Employee/
- Runtime URL - opens the form in runtime mode such as https://[domain]/Runtime/Runtime/Form/Employee/
From K2 Designer select a form and click the Testing URL link.

The Employee form opens in a new browser window in designer mode. Type ?_state=HR at the end of the URL and press Enter on your keyboard. The Employee form shows the configured views for the HR state (Department Item and Department List views).
